
macOS Catalina is Apple's next-generation desktop operating system that comes with tons of improvements and new features. In reality, Catalina is not a significant update over Mojave, but it has a few cool things that we have been demanding for years. macOS Catalina has been available for testing purposes for months, giving users a glimpse of what's including in the final release.
As a beta form, macOS Catalina is still a little bit buggy, but it is still worth your time. If you are thrilled to test out its new features, then you can make a clean install of macOS Catalina manually, which is more challenging than official upgrade. Following this method, all of your data will be wiped and you can set up your Mac as a new device. So, it's a good idea to have a recent backup of your machine before moving ahead.
Part 1: Download macOS Catalina Public Beta
Official system upgrade is still not available for Mac users currently so you have to download the macOS Catalina DMG and make a bootable USB for installation. For official upgrade, the process is so much easily, which only takes for 3-5 clicks and wait for the upgrade to be completed. However, in this case, it is more harder for manually installation.
Step 1:Go to Apple Beta Software Program and sign in with Apple ID. You have to agree the terms before proceeding.
Step 2: The next step is choose the beta program you want to enroll. Choose macOS this time. After that, you backup the Mac with Time Machine.
Step 3: Download macOS Public Betat Access Utility, which reuqires time machine devcie to be connected. This makes sure all your data is safe place. Install the utility and complete the enrollment.
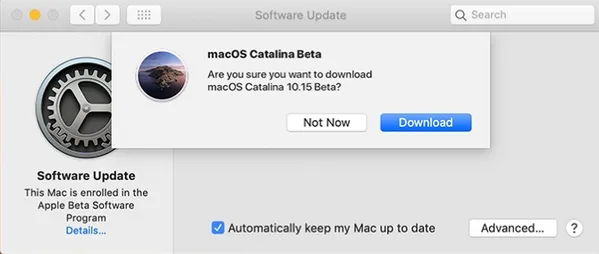
Step 4: Go to System Preferrence -> Software Update and click Download button to download the release.
Part 2: Create a Bootable macOS Catalina USB Install Drive
Before we begin, make sure you now have a USB flash drive by your side. We recommend you get a USB flash drive with a USB-C port. That makes sense, seeing that all Mac models now support Thunderbolt ports (USB-C).
Method 1: Terminal (Mac Only)
Step 1: Once the download is complete, the installer should automatically fire up. From here, just close the installer on your Mac and proceed with the next steps.
Step 2: Launch Finder, then select Applications, and right-click the Install macOS Catalina Beta file you downloaded earlier.
Step 3: From here, select Show Package Contents from the drop-down menu, then open Contents and hit Resources.
Step 4: Open Terminal, then enter sudo and hit the Space key. After that, drag the macOS Catalina installer file and drop it into Terminal.
Step 5: Enter –volume in Terminal and hit the Space key. Now, head over to Finder > Go > Go To Folder. From here, enter /Volumes in the "Go To Folder" section and hit Go to proceed.
Step 6: Connect your USB drive to your machine and it should show up in Finder (in macOS Catalina, Apple removed iTunes in favor of 3 separate apps; Apple Music, Apple Podcasts, and the Apple TV app).
Step 7: Move your USB flash drive into Terminal and hit the Return key. Input a "y" and proceed with pressing the Enter key. This will move macOS Catalina installer files to the USB flash drive (the process may take several minutes).
if you encounter any problems during the process, try formatting the USB drive to APFS.

Method 2: UUByte DMG Editor (For PC and Mac)
It is a much more complicated process when using Terminal app. If you don't like or do not have a Mac at hand, then UUByte DMG Editor is the best solution out there. It works on PC and Mac. Also, it has a GUI and easy to get started for creating bootable macOS Catalina USB installer.


Step 1: Download macOS Catalina DMG file from here.
Step 2: Install UUByte DMG Editor on a Windows PC or Mac and insert a USB drive after that.
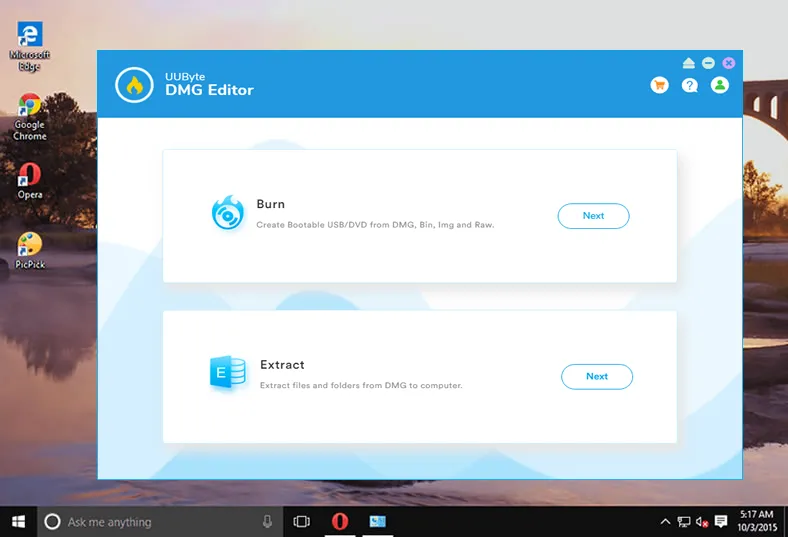
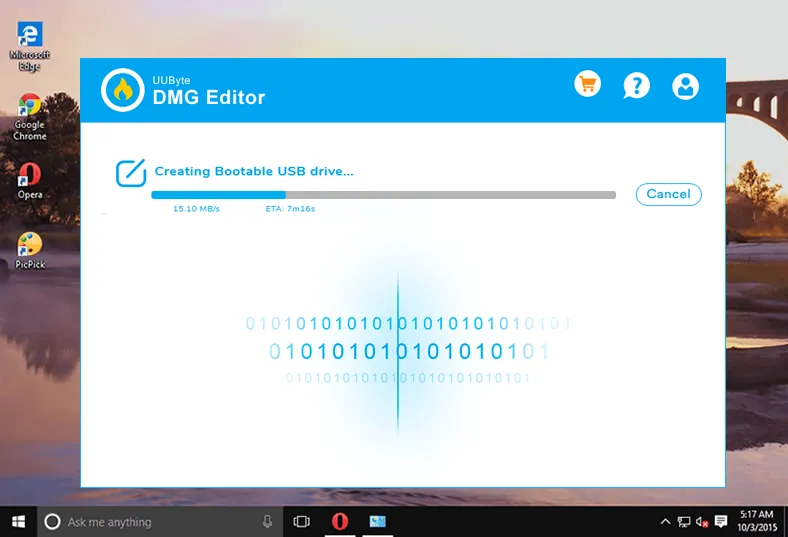
Step 3: Click "Next" button at Burn column and you will be lead to a new window. From there, please import macOS Catalina DMG file into it and select the USB drive.
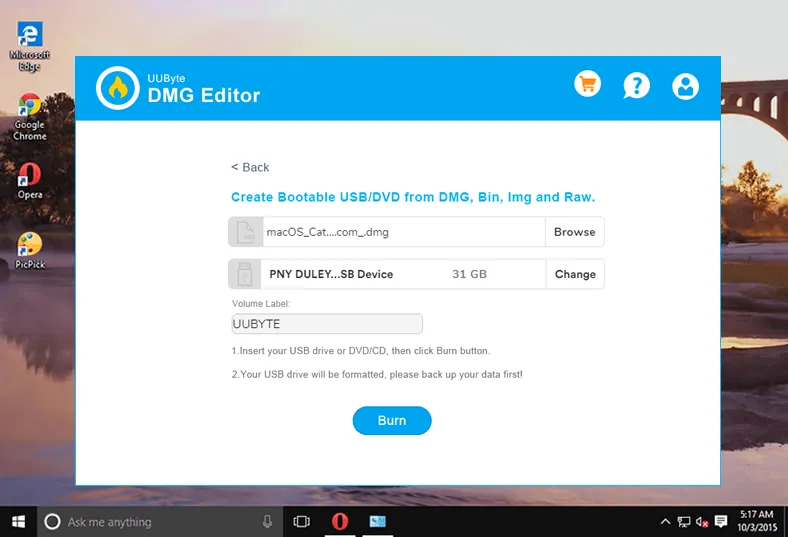
Step 4: Click "Burn" button and wait for about several minutes. Then you will get a bootable macOS Catalina USB drive.
Part 3: Boot Mac from USB and Start Installing macOS Catalina
Once you have a bootable USB install drive for macOS Catalina, you now can boot from it and then start installing macOS on your mac and set up it as new.
Step 1: Connect the macOS Catalina USB install drive to your Mac and then reboot your machine.
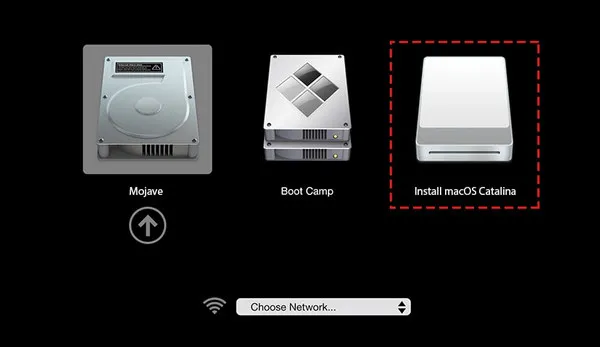
Step 2: Hold down the Option key. Keep the button pressed until you see the boot menu. From here, select the macOS Catalina USB installer drive you created earlier to boot your Mac from.
Step 3: When your Mac finishes booting up, follow the on-screen instructions to complete the setup. Once you are done, you will be able to restore your Mac from a Time Machine backup.
The Bottom Line
Creating macOS Catalina installation USB is a smart move if you want to use your Mac as a new device and keep it running smoothly. Hope that our guide works for you. Keep in mind that macOS Catalina is still in its early stages, so play it carefully with caution.

Petty is editor in chief at UUByte and writes various topics about Windows and Mac to help people make the most of current technology.