
It is a lot of easier when it comes to creating macOS bootable USB installer on a Mac as it has built-in as well as third-party tools to do that. However, you won't be that lucky if you were on a Windows 10 PC. So in here, we will introduce a free way to create bootable macOS USB on PC by creating a macOS virtual machine with the help of free VirtualBox software.
Part 1: Download macOS ISO File or Virtual Disk
VirtualBox only supports ISO and virtual machine image file so the first thing you need is to convert macOS DMG file to ISO. Since this could lead to file corruption and other problems, it's much better to use a third-party source and download it from here, which is more straightforward and will help you avoid a lot of conversion and other issues. Below is a list of samples:
macOS Catalina ISO Image: http://www.mediafire.com/file/Catalina_10.15.5.iso
macOS Mojave ISO Image: https://mega.nz/folder/KGZDgIZQ#Nct0_zq5-LABTtFDo1hTjQ
macOS High Serria ISO Image: https://archive.org/download/MacOSXHighSierra10.13.iso
macOS Catalina Virtual Machine Image: https://drive.google.com/file/d/1oACRx z/view
macOS Mojave Virtual Machine Image: https://drive.google.com/file/d/1OJ SJe/view
macOS High Serria Virtual Machine Image: https://www.mediafire.com/macOS_High_Sierra_Final
Part 2: Create a macOS Virtual Machine in VirtualBox on Windows 10 PC
Step 1:Open VirtualBox on Windows 10 PC
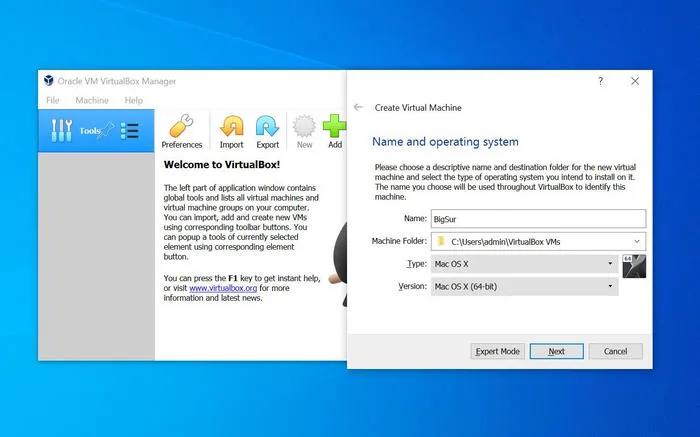
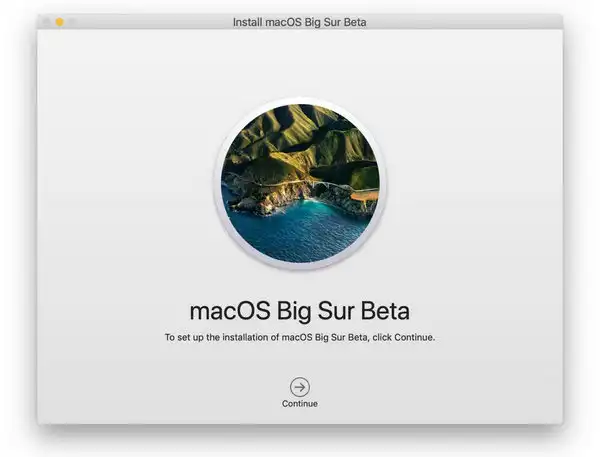
Assuming you've already installed VirtualBox on your Windows 10 computer, launch it and create a new VM called BigSur, with the OS option being set to Mac OS X and the version as Mac OS X (64-bit). Please note that Big Sur won't be available as an option until the next VirtualBox update, if at all.
Step 2:Set RAM Capacity for new Virtual Machine
As you follow the VM creation process, you'll need to set the RAM limit for the virtual machine. The recommended limit is 4096MB or about 4.0GB, but you can allocate more if you have enough RAM on your Windows 10 PC.
Step 3: Set Hard Drive Volume
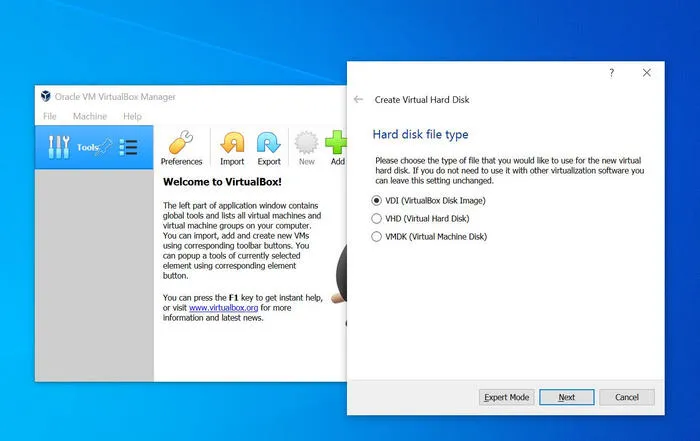
The next step is to set the hard drive for new VM, for which you can pick the Create a Virtual Hard Disk Now option, choose VDI for the drive type, select the option for a fixed drive size, and set the drive size to about 20 to 25GB. You can allocate more if you think you'll be using a lot of apps on the macOS installation.
Step 4: Configure macOS Virtual Machine
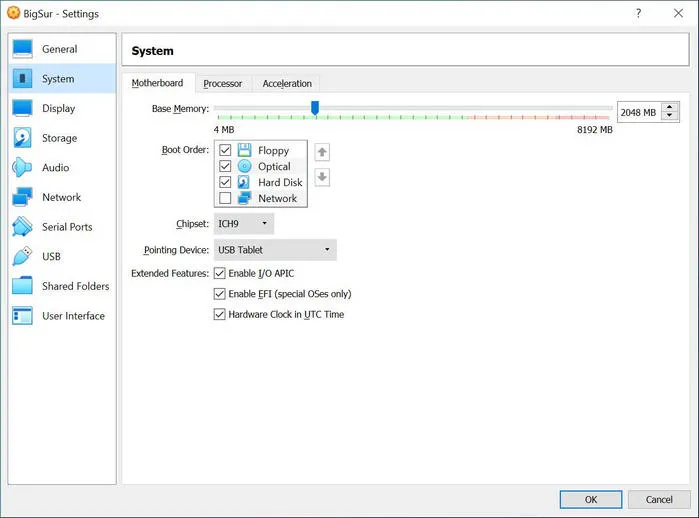
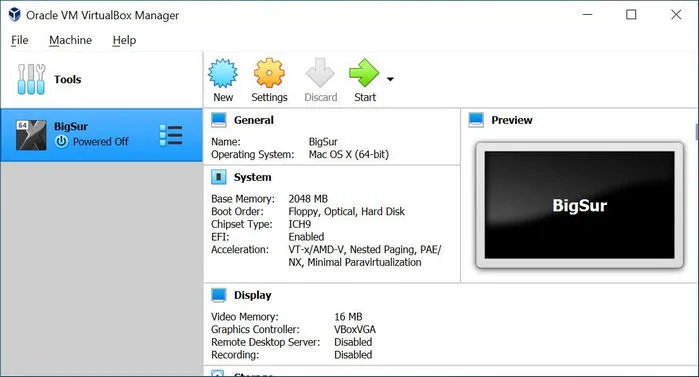
In VirtualBox, you should be able to have a view of the VM you just created, along with the specs you chose. Go to Settings → System → Motherboard and uncheck the Floppy option under Boot Order. Hard Disk and Optical can be checked.
Next to Motherboard is the Processor tab. Go there and set the processor setting to at least 2 CPUs. In the navigation panel on the left, go to Display → Screen → Video Memory and set it to a minimum of 128MB. Next, under Storage → Empty → Attributes, click on the Optical Drive icon on the right and select the ISO image for Big Sur that you created. Click OK and - this is very important - shut down VirtualBox.
Step 4:Final Preparation in Command Line
Although you've successfully created and configured your VM on VirtualBox, some steps still remain that must be completed in Command Prompt as admin. The following commands should be run one at a time, with a wait time in between for each command to run successfully:
cd "C:Program FilesOracleVirtualBox"
VBoxManage.exe modifyvm "Big Sur" --cpuidset 00000001 000306a9 04100800 7fbae3ff bfebfbff
VBoxManage setextradata "Big Sur" "VBoxInternal/Devices/efi/0/Config/DmiSystemProduct" "MacBookPro11,3"
VBoxManage setextradata "Big Sur" "VBoxInternal/Devices/efi/0/Config/DmiSystemVersion" "1.0"
VBoxManage setextradata "Big Sur" "VBoxInternal/Devices/efi/0/Config/DmiBoardProduct" "Mac-2BD1B31983FE1663"
VBoxManage setextradata "Big Sur" "VBoxInternal/Devices/smc/0/Config/DeviceKey" "ourhardworkbythesewordsguardedpleasedontsteal(c)AppleComputerInc"
VBoxManage setextradata "Big Sur" "VBoxInternal/Devices/smc/0/Config/GetKeyFromRealSMC" 1
Part 3: Boot macOS Virtual Machine from PC
Launch VirtualBox again, click the VM called Big Sur, and click the Start button. At this point, you'll see a whole bunch of text running down your screen so you'll have to wait until it's over - about 5 minutes or so. When you see the option to choose a language, do so.
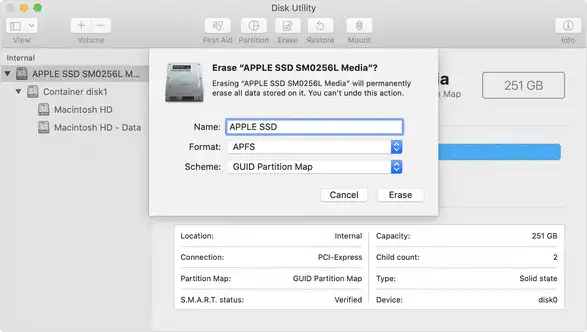
On the macOS Utilities page, click on Disk Utility and hit the Continue button on the bottom right. In Disk Utility, click View and select Show All Devices to see your Big Sur blank image on the left. Now, click on it and give the name Macintosh HD to the drive in the popup window pane; set APFS as your format and GUID Partition Map as the Boot Scheme. If the format is showing you just the Extended version or something else, that's fine. There have been some changes since macOS Catalina. Next, click Erase, which will erase the blank drive and take you back to the macOS Utilities window.
This time, click on Reinstall macOS and the Continue button. Agree to the Terms displayed on your screen and choose Macintosh HD as your hard drive. Click Install. The rest of the installation process will now be executed so this could take a while. However, at the end of the process, you'll be taken back to the installer. Don't worry, this is the expected result. Follow the final two steps below to complete the process. Patience is a virtue, you know!
The reason you were taken back to the installer is that VirtualBox can't boot from the virtual hard drive, for some reason. To counter that, turn the VM off and go to Settings → Storage and once again click the CD icon. In the menu options that pop up, select Remove Disk from Virtual Drive. Now turn the VM on again and you should be able to see the internal EFI shell. If you can see FS1 in yellow, you're on the right track. Type in fs1: and hit Enter after clicking the VM and allowing it to capture your keyboard and mouse. This will take you to the FS1 directory, where you'll need to run the following commands to get to where the installer is:
cd "macOS Install Data"
cd "Locked Files"
cd "Boot Files"
boot.efi
You should eventually be able to see the installer in its GUI avatar. There's just one more step to go. Promise!
The macOS VM should now work on Windows 10 as it's supposed to and take you to the OS set up. Here, specify your country, identify the user and follow the rest of the steps until you see the Big Sur desktop. You have successfully run macOS Big Sur on Windows 10. Hurray!
Part 4: Create macOS Bootable USB Installer in VirtualBox
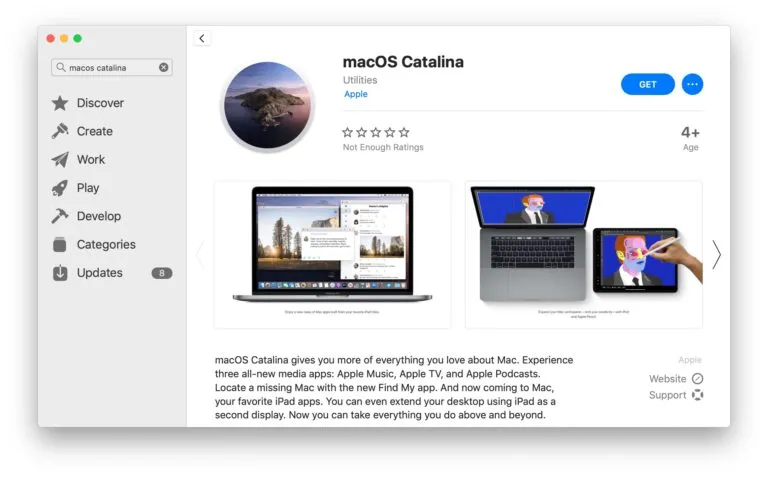
Step 1: Download macOS installation app from Mac App store by searching the name or you can get the dmg file from other websites.
Step 2: Install USB drive for macOS virtual machine and you should see the drive name in left sidebar in Finder App.
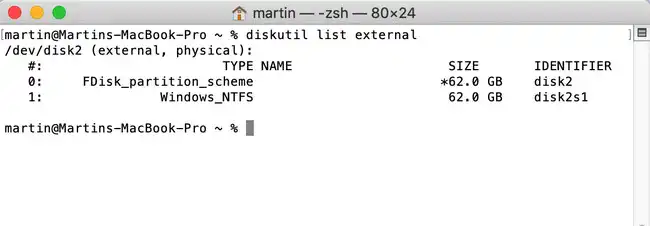
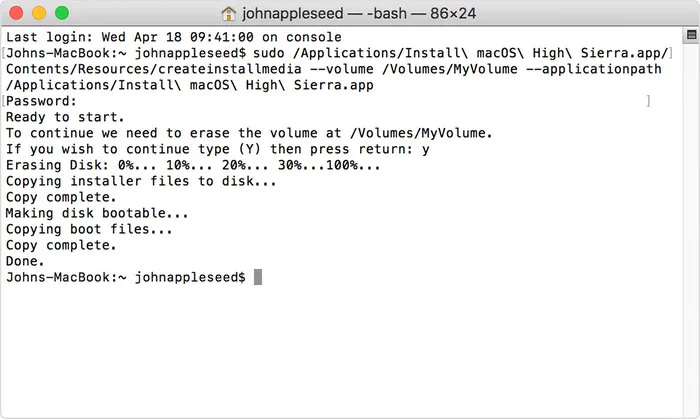
Step 3: Find the USB drive name using this command: diskutil list external
Step 4: Use the createinstallmedia command to create a bootable macOS USB installer:
sudo /Applications/Install\ macOS\ Catalina.app/Contents/Resources/createinstallmedia --volume /Volumes/MyVolume (Catalina)
sudo /Applications/Install\ macOS\ Mojave.app/Contents/Resources/createinstallmedia --volume /Volumes/MyVolume (Mojave)
sudo /Applications/Install\ macOS\ High\ Sierra.app/Contents/Resources/createinstallmedia --volume /Volumes/MyVolume (Hihg Serria)
sudo /Applications/Install\ OS\ X\ El\ Capitan.app/Contents/Resources/createinstallmedia --volume /Volumes/MyVolume --applicationpath /Applications/Install\ OS\ X\ El\ Capitan.app (El Capitan)
Step 5: Wait for a few minutes and a bootable macOS USB installer is ready!
Final Note
It is a long and complicated work to create a bootable macOS USB installer with VirtualBox. Though it does work as promised, it is time consuming! Actually, there is alternative premium solution for this. That's UUByte DMG Editor, a GUI-based app to burn dmg file to USB on both PC and Mac.After burning, you will get a bootable USB installer for macOS. And you only need to wait for 5-10 minutes.

Petty is editor in chief at UUByte and writes various topics about Windows and Mac to help people make the most of current technology.