Table of Contents
There are times when we need to run two separate macOS instances. One effective solution is to install macOS on an external drive. The other day I was trying to install macOS Ventura to an external SSD but came across this error at the beginning.
This disk doesn’t use the GUID partition table scheme
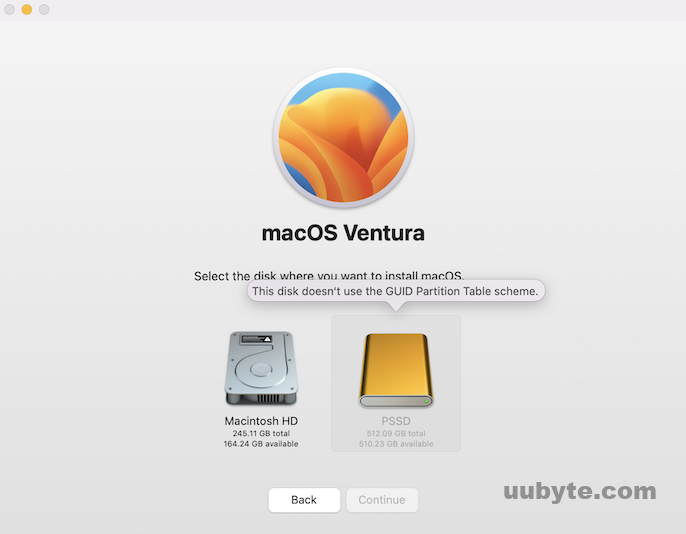
The external drive is grayed out. This means it is not available for installing macOS at this time because of wrong partition table.
Why this happened and how to fix this error so you can install another macOS version to external drive? The quick solution is to format the drive with GUID Partition Table under APFS file system. Before getting into the details, we need to have a little background about macOS file system and GUID partition scheme.
History of Mac’s File System
The history of the macOS file system is a long and complicated one. The first version of the file system, HFS, was introduced in 1985 with the release of the original Macintosh. HFS was designed to be a simple and efficient file system for the limited storage capacity of early Macs. It quickly became the standard file system for the Macintosh platform.
In 1998, Apple released the first version of its new file system, HFS+. HFS+ was designed to be a more robust and powerful file system than HFS. It supported features such as file compression and journaling. HFS+ quickly became the standard file system for the Macintosh platform.
In 2016, Apple released the first version of its new file system, APFS. APFS was designed to be a more robust and powerful file system than HFS+. It supported features such as file compression and encryption. APFS quickly became the standard file system for the Macintosh platform.
Why Choosing APFS as the Default File System for Modern macOS
First and foremost, APFS is designed specifically for flash and solid-state drives, which are becoming increasingly popular. This means that it is much better optimized for these types of drives than older file systems like HFS+.
Another big advantage of APFS is that it is much more efficient in terms of space usage. This is because it uses a technique called "copy-on-write" which allows it to avoid duplicating data unnecessarily. This can save a lot of space, especially on larger drives.
Finally, APFS is also much faster and more reliable than older file systems. This is because it uses a modern journaling system which helps to prevent data loss in the event of a power failure or other unexpected shutdown.
Overall, APFS is a much better file system for modern macOS than older file systems like HFS+. It is more efficient, faster, and more reliable. If you are using a newer Mac with a flash or solid-state drive, you should definitely consider using APFS.
What is GUID Partition Table Scheme on Mac?
GUID partition table (GPT) is a popular standard for disk partition on a physical storage device, such as a hard disk drive or solid-state drive, using globally unique identifiers (GUIDs). It is part of the Extensible Firmware Interface (EFI) standard and is used by Apple computers. The GPT scheme allows for disks larger than 2 TB and can be used with any type of file system.
The main advantage of the GPT scheme is that it allows for disks larger than 2 TB. It is also more flexible than the MBR partitioning scheme and can be used with any type of file system.
GPT is designed as an improvement to the older Master Boot Record (MBR) partitioning scheme, which is constrained in both the number and size of partitions. GPT overcomes these limitations by using a logical block address (LBA) scheme that allows for more than 2.2 billion partitions on a disk with a maximum partition size of 9.4 ZB (9.4×1021 bytes).
How to Format External Drive on Mac (GUID with APFS)
Formatting a disk on Mac is a simple task by using the Disk Utility app. However, this operation will delete all content from the drive. You should back up the drive first.
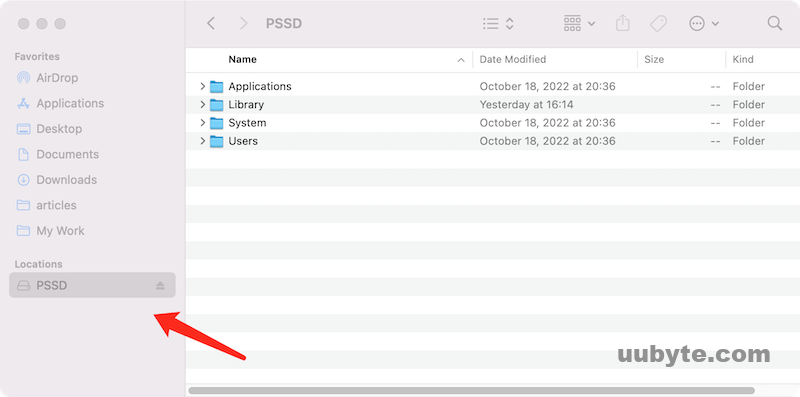
Step 1: Plug in the external drive into Mac and make sure you can see the drive name in Finder’s sidebar.
Step 2: Open Launchpad app at the bottom and search ‘disk’ to find the Disk Utility app.

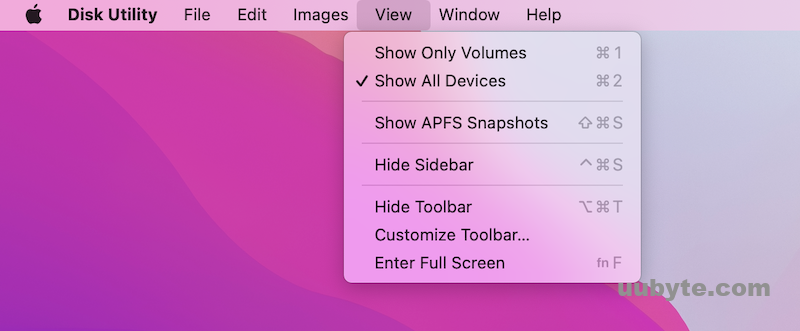
Step 3: Under Disk Utility window, navigate to View menu and choose Show All Devices submenu from the list.
Step 4: Right click on the drive name at the left and choose the Erase option.

Step 5: At this time, set a new name for this drive. After that, pick up GUID Partition Map from the list besides Scheme.

Step 6: Move to Format section and select APFS as the target file system.
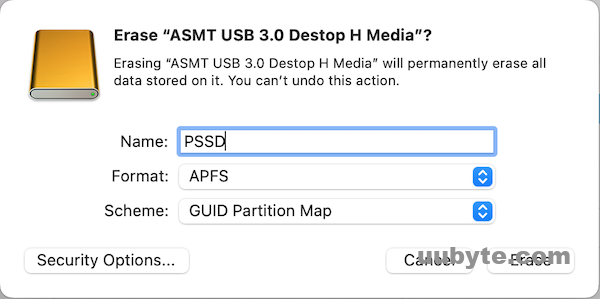
Step 7: Once the settings is done, click Erase button to format the drive with GUID partition scheme and Apple file system (APFS). This will be done within seconds.
Step 8: Go to Application folder and run Install macOS app again. At this time, the external drive is able to be choose as destination disk to install macOS.
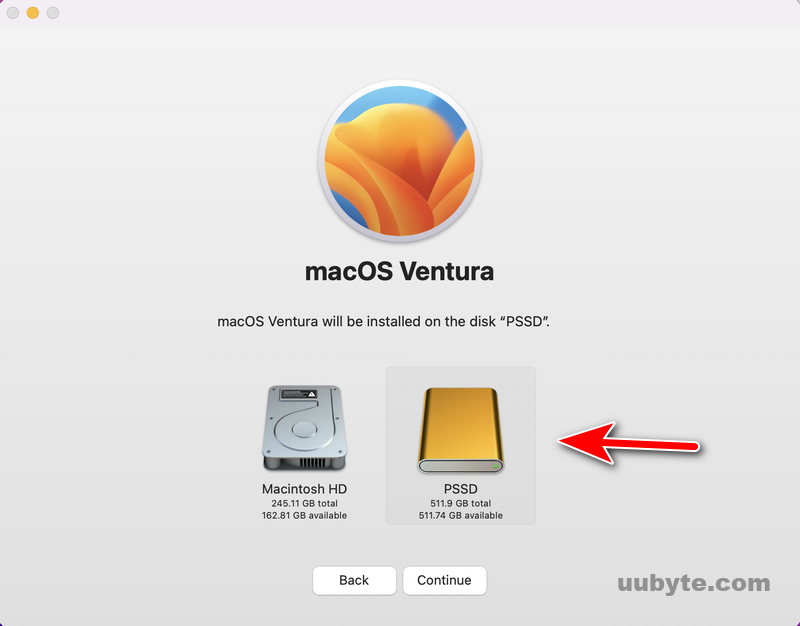
When you see "This disk doesn’t use the GUID Partition Table scheme" during macOS installation, it simply means the drive needs to be changed from default MBR to Apple’s GUID partition map. You can get this done quickly with the help of built-in Disk Utility.