Table of Contents
There are cases for which you need to run two different instances of Windows 11. You can achieve this by using more than one computers but it is costly. Another popular solution is to dual boot Windows 11 on a single computer with two separate hard drives (SSD is more recommended than HDD nowadays).
We assume the current PC is already running Windows 11 and a new SSD will be added to the motherboard so a different version of Windows 11 will be installed on the new SSD.
Step 1: Choose a Proper SSD for Your PC
When looking for the best SSD for PC, there are several factors to consider. Performance, interface, storage and pricing are all important considerations when selecting an SSD.
Performance
Performance is one of the most important factors when choosing an SSD for your PC. An SSD should provide fast read and write speeds, as well as low latency, to ensure that your computer runs smoothly and quickly. Look for an SSD that has a high IOPS (Input/Output Operations Per Second) rating, as this indicates how fast the drive can perform tasks. Additionally, look for an SSD with a good Random Read/Write speed, which measures the speed of random access to data.
Interface
The interface of an SSD is the type of connection it uses to connect to your computer. The most common interface is SATA, which is compatible with most PCs. However, there are other types of interfaces available, such as m.2 and NVMe, which offer faster speeds than SATA. It’s important to make sure the interface of the SSD you choose is compatible with your computer’s motherboard.
Storage
Storage capacity is another important factor to consider when choosing an SSD. The size of your SSD will depend on the type of applications you plan to run on your PC. For example, if you are running a lot of applications that require large amounts of storage, such as video editing software, you will need an SSD with a larger capacity. On the other hand, if you are only running basic applications, such as web browsers and word processing software, a smaller capacity SSD may be sufficient.
Pricing
The cost of an SSD is an important factor to consider when making your selection. SSDs can range in price from a few hundred dollars to several thousand dollars, depending on the type of drive and the capacity. Generally, larger capacity drives tend to be more expensive, so it’s important to find the right balance between performance, storage, and price.
Our suggestion is the Samsung 860 EVO. This 2.5-inch SATA III internal solid state drive offers up to 550 MB/s read and 520 MB/s write speeds, making it one of the fastest drives on the market. It also comes with a wide range of storage options, ranging from 250GB to 4TB, so you can find the perfect size for your needs. Additionally, the 860 EVO is very affordable, making it a great option for budget-conscious buyers.
Other recommendations are including Western Digital SN570, Crucial P3 and Kingston A400.
Step 2: Connect the New SSD to Motherboard
1. Shut down the computer and unplug it from the power source.
2. Open the computer case and locate the unused slot for SSD interface.
3. Insert the SSD into the drive bay, making sure that the connectors on the drive line up with the connectors on the motherboard.
4. Secure the SSD to the drive bay using the mounting screws provided with the drive.
5. Connect the data and power cables to the SSD. That’s!
6. Reboot the computer and you will be able to see the drive letter in Disk Management apps.
Step 3: Create a Windows 11 Bootable USB for Installation
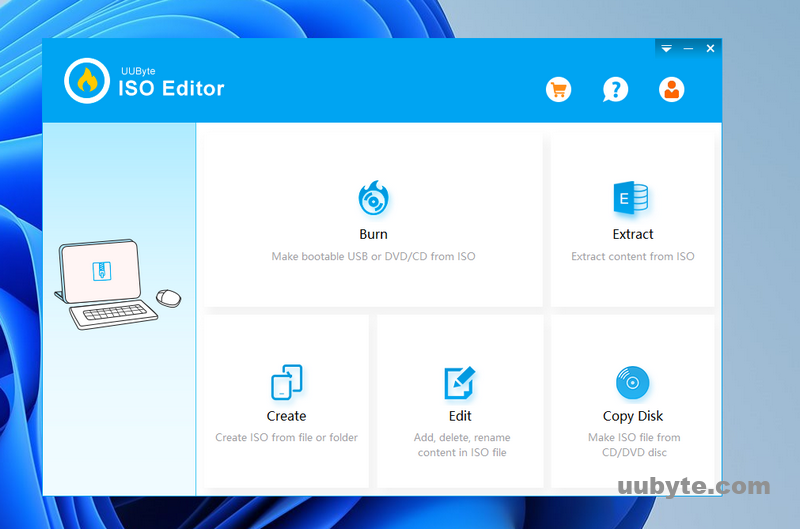
To install Windows 11 on the new SSD, you have to prepare for a bootable USB first. In fact, there are dozens of tools to do that, but UUByte ISO Editor is the best one according to user review. The most important factor is the user-friendly interface. And it is error free. Anyone even novice can complete the task in a couple of mouse clicks.
1. Download and install UUByte ISO Editor from the following download links:
2. Plug in a USB flash drive into the computer and make sure it is recognized by the computer.
2. Run ISO Editor and click the Burn menu at the top.
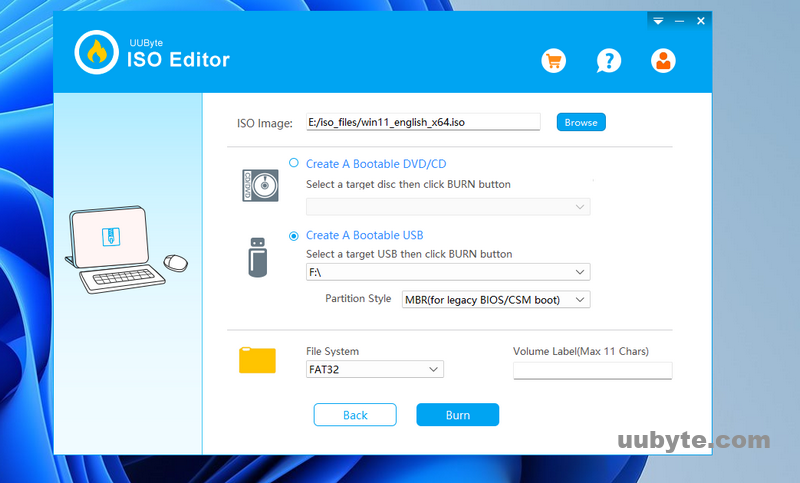
3. Import Windows 11 ISO and choose the USB drive from drop-down menu. We suggest ejecting other USB storage devices during this process.
4. Click the Burn button at the bottom screen to start creating a Windows 11 bootable USB.
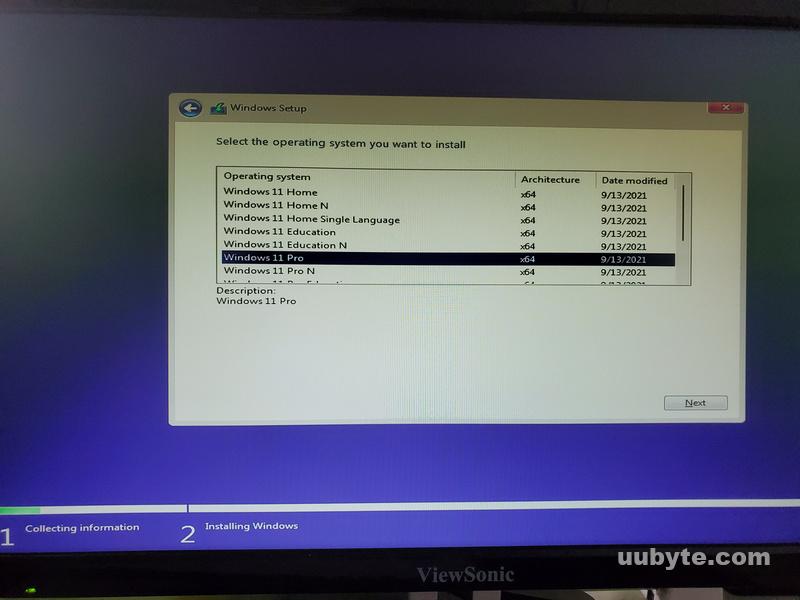
Step 4: Install Windows 11 on the New SSD
Installing Windows 11 on a new SSD is a great way to get the most out of your computer. With a solid-state drive, you’ll enjoy faster boot times, improved performance, and increased storage capacity. Here’s a step-by-step guide to help you get started.
Before you begin, make sure the new SSD is well connected to the motherboard and a Windows 11 bootable USB is ready.
Now, connect the bootable USB into the PC and power on the computer. Press the key (screen prompt) to get into the boot menu where you can choose a boot device at this time.
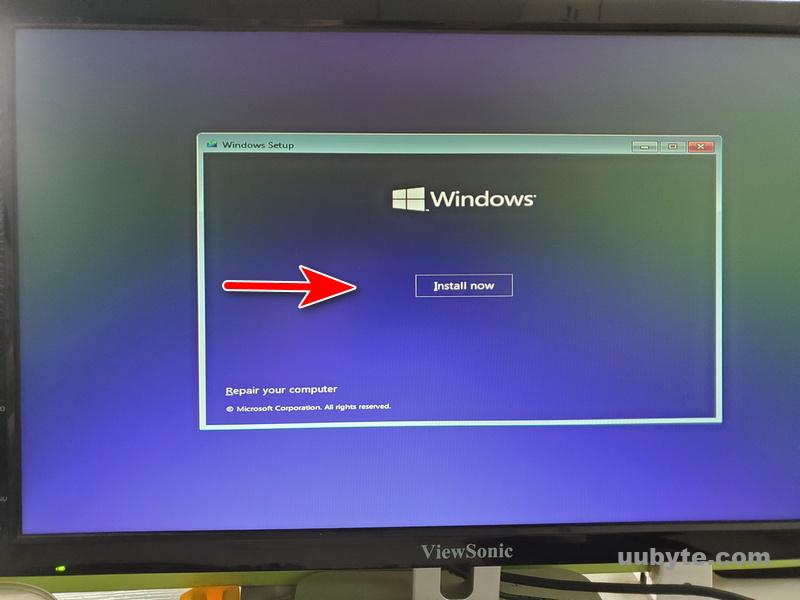
Select the new SSD and begin the Windows 11 installation process according to the setup Wizard. Please follow the instructions on the screen to complete the installation.
Step 5: Configure Dual Boot with EasyBCD
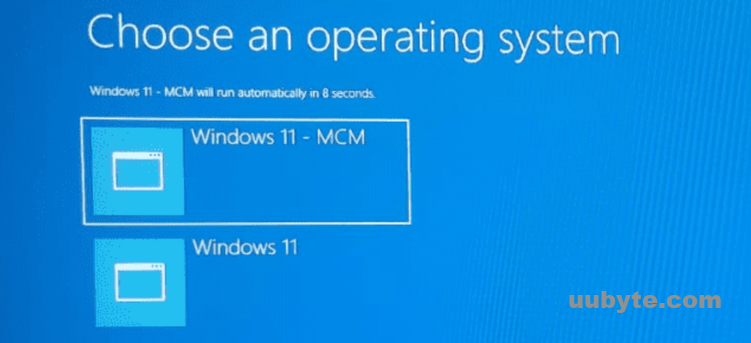
By default, you will see two Windows 11 versions to choose from when the PC boots up. This is called dual boot menu. If you could not see the option, you have to configure the boot menu manually with EasyBCD.
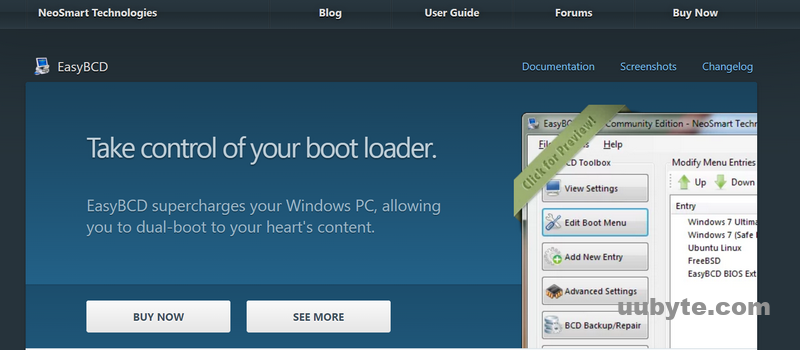
EasyBCD is a free software utility for Windows users that makes it easy to configure and tweak the Windows bootloader. It is designed to give users the ability to control how their computer starts up, allowing them to choose which operating system to boot into, set up dual-boot configurations, and more. EasyBCD can also be used to manage bootable USB drives and other bootable media. It is a powerful tool for managing the Windows bootloader, and can be used to create a custom boot environment for any operating system.
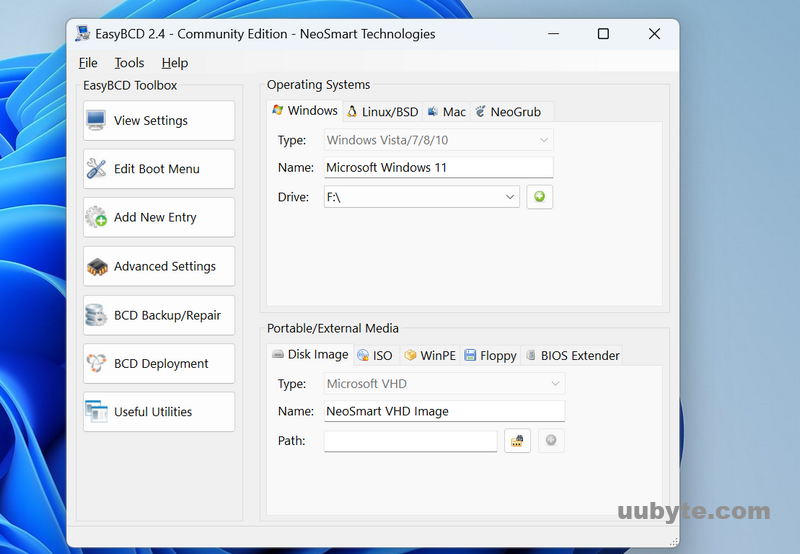
How to configure dual boot menu with EasyBCD:
1. Download and install EasyBCD from its official website. You need to fill out some personal information to get the download link.
2. Launch EasyBCD and select the “Add New Entry” tab.
3. Select “Windows” from the list of Operating Systems.
4. Select the version of Windows you want to dual boot with.
5. Enter a name for the entry and click “Add Entry”.
6. Select the “Edit Boot Menu” tab and change the settings as desired.
7. Click “Save Settings” when you are done.
8. Reboot your computer and you should now see the dual boot menu.
Video Tutorial: Clean install of Windows 11 on a new SSD without product key
Troubleshoot Guide If Dual-Boot Failed
Dual booting Windows 11 is a complicated process and there are many cases contributing to the failure. You can follow the suggestions listed in blew to fix it.
#1 Use Media Creation Tool to Create Windows 11 Bootable USB
Media Creation Tool is the official tool developed by Microsoft for making bootable Windows USB. However, UUByte ISO Editor and Rufus are more popular than it. If there are errors during Windows 11 installation, we suggest re-creating the Windows 11 installation disk with Media Creation Tool.
#2 Change Disk Mode in BIOS
Another common case to cause the failure is the wrong disk mode settings in BIOS.
IDE (Integrated Drive Electronics) is an interface standard for connecting storage devices such as hard drives, optical drives, and solid-state drives to a computer’s motherboard. It was developed in the 1980s as a replacement for the earlier Parallel ATA (PATA) standard. IDE is an older technology, but it is still widely used in many computers.
AHCI (Advanced Host Controller Interface) is a newer interface standard for connecting storage devices. It was developed in 2004 as a replacement for the older IDE standard. AHCI provides faster data transfer speeds and improved power management, making it the preferred interface for modern computers. It also supports features such as Native Command Queuing (NCQ) and Hot Plugging.
To change the disk mode in BIOS, you should restart the computer and press the key that opens the BIOS menu. This is typically the F2 or Delete key.
Next, use the arrow keys to navigate to the “Advanced” tab and select the “Storage Configuration” option.
Click on the the Disk Mode menu and choose the desired disk mode from the list.
Finally, save the changes and exit the BIOS menu.
#3 Fix Corrupted Drive Letters
After Windows 11 is installed on the new SSD, the new instance may corrupt the existing drive letters. If this happens, the motherboard is unable to detect two Windows 11 versions at the same time. We suggest giving a different letters name to the system drive of new SSD.
To chance a corrupted drive letters, open the Run dialog box by pressing the Windows key + R. Next, type “diskmgmt.msc” and press Enter. Right-click on the drive with the corrupted letter and select Change Drive Letter and Paths. Now, select the drive letter you want to use and click Change. Finally, restart the PC to apply the changes.
Summary
It would be a time-consuming process to dual boot Windows 11 on a single PC. You have to pick up the right SSD for the motherboard and attach to it correctly. Actually, installing Windows 11 is a relatively simple task but it is much more challenge to bring up the two Windows 11 boot menu at login. Fortunately, you can follow the tips we share at the last section.