Table of Contents
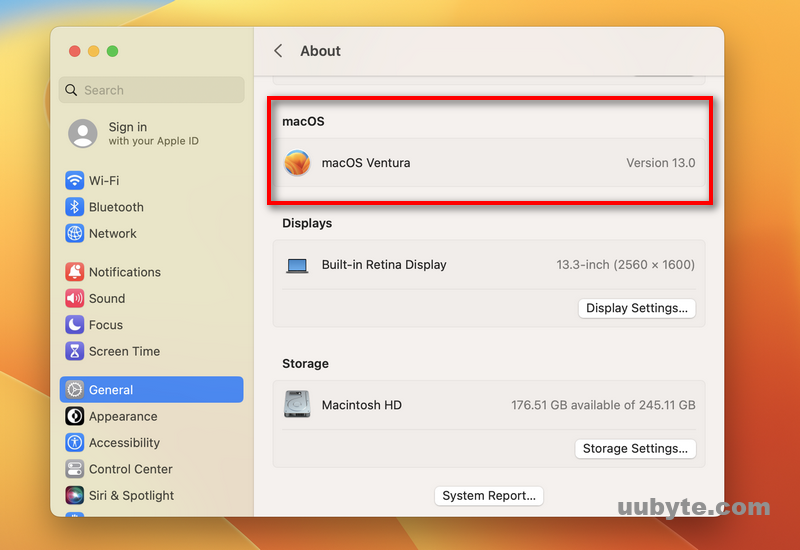
I recently upgraded my Mac from macOS Monterey to Ventura 13.0 (stable) and found out my NTFS app failed to write the NTFS drive since them. This is a bug you could come across regularly after macOS upgrade. If you are the one like me who want to read or write a NTFS drive on Mac Ventura 13, please follow the guidelines in this post.
Introduction macOS Ventura
macOS Ventura is a new operating system from Apple that is based on the UNIX platform. It is designed to be more stable and reliable than its predecessors and comes with a variety of new features and improvements. One of the most notable new features is the addition of a new file system that is designed to be more resistant to data corruption. Other new features include a redesigned Dock, a new Mission Control interface, and support for AirPlay 2.
What is NTFS?
NTFS (New Technology File System) is a file system that was introduced by Microsoft in the early 1990s. NTFS is an improvement over the older FAT (File Allocation Table) file system and is designed to provide better support for larger hard drives and more efficient file management. NTFS is the default file system for Windows NT, 2000, XP, and Vista.
One of the key features of NTFS is that it supports file compression, which can help save disk space. NTFS also supports file encryption, which can help protect sensitive data from being accessed by unauthorized users.
NTFS has a number of advantages over FAT, including better support for large hard drives, more efficient file management, and file compression. However, NTFS also has a few disadvantages, such as the fact that it is not compatible with all operating systems (e.g., Linux) and that it can be more difficult to recover data from an NTFS drive if it becomes corrupted.
Does NTFS Work on Mac?
As we know, NTFS is a preferred file system for Windows, it is not fully compatible with macOS. Apple provides a utility called macFUSE, which improves the native file system handling capabilities along with the third-party file system, such as NTFS. Unfortunately, macFUSE can’t read or write a NTFS drive by default. When you connect an external NTFS drive on macOS Ventura, you will see the drive name is grayed out.
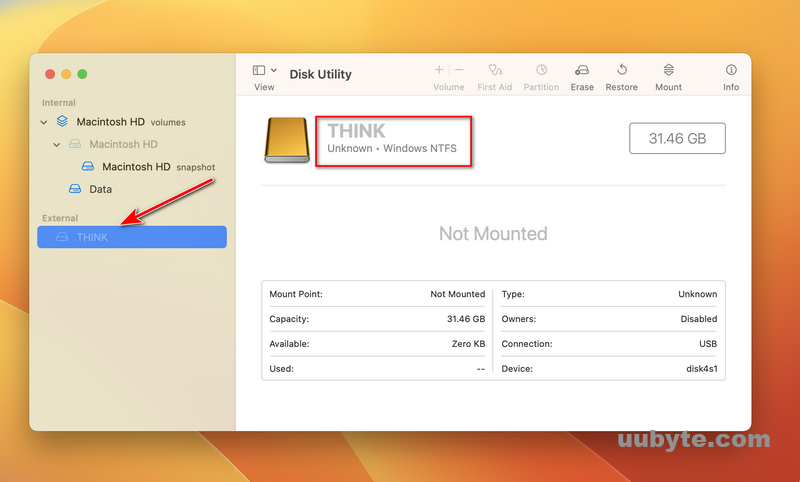
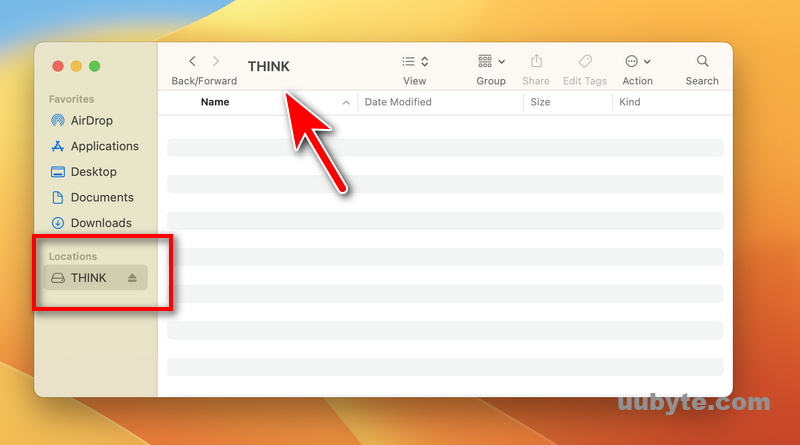
When you click the drive name in Finder, no content will be shown. In fact, there are files and data in this drive. This means you are unable to read or write this drive without additional steps.
If you need to read or write to an NTFS volume on a Mac, you can use the free third-party utility NTFS-3G (command line) or other premium NTFS for Mac software with more user-friendly interface.
Method 1: How to Read or Write NTFS Drive on Mac Ventura (NTFS Geeker)
NTFS Geeker added support for macOS Ventura and Apple Silicon M2 Mac last week. Though it is not the first app that enables NTFS writing on macOS Ventura, NTFS Geeker is now our favorite because of user-friendly design and pricing. After testing our a couple of NTFS software in the past, NTFSGeeker is the easiest solution in regards of reading or writing NTFS drive on Mac.
How to read and write NTFS drive Using UUByte NTFS Geeker software:
1. Download NTFS Geeker app and follow the prompts to install it on your Mac.

2. At the end of installation, you will be asked to enable a new System Extension, which is the core module to read and write NTFS drive.
3. Allow the request in System Preferences and restart the Mac to let the changes take into effect.
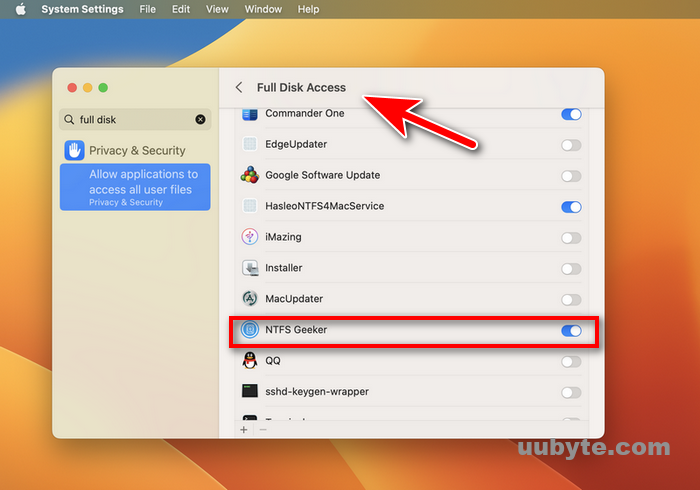
4. Open NTFS Geeker app and grant the permission of Full Disk Access to NTFS Geeker.
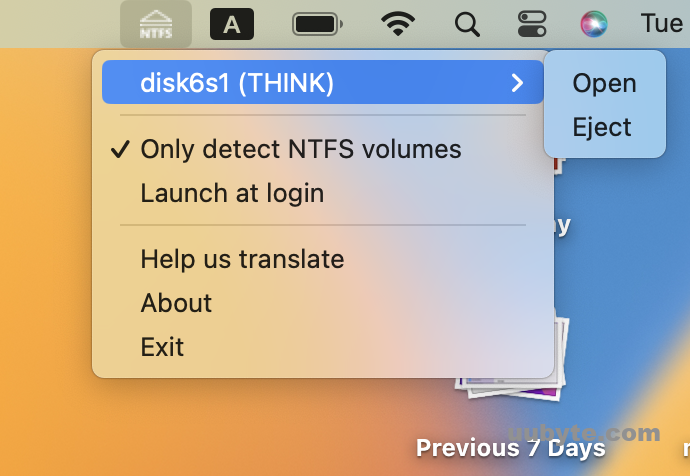
5. Connect NTFS Geeker drive to Mac and right click the drive name in NTFS Geeker. Choose Mount as Writable from the pop-up menu.
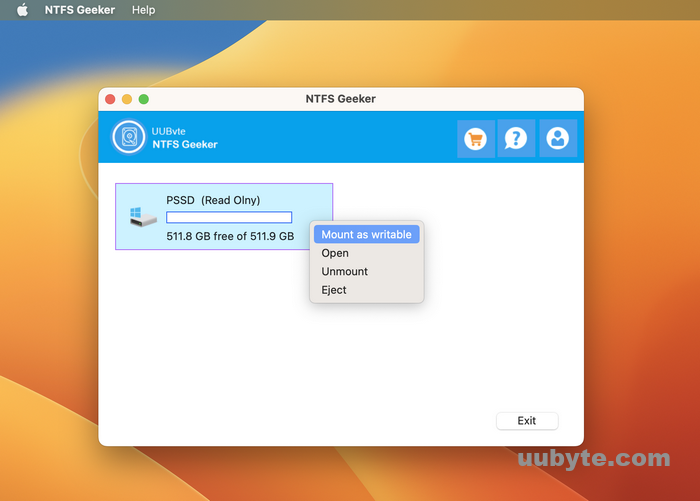
6. Wait a few seconds to let the drive being mounted. Upon success, you are able to read or write this NTFS drive on macOS Ventura.

By default, Move to Trash is not available when NTFS is conneted by Mac because it is a write action.
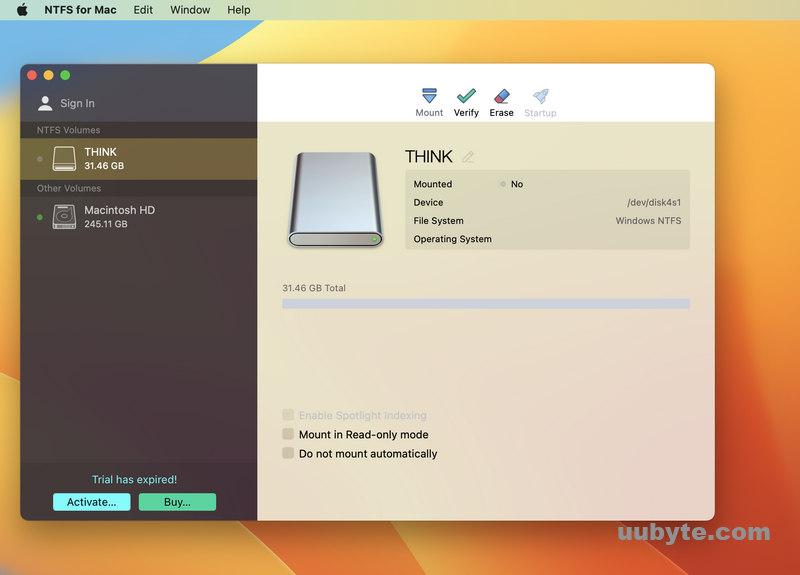
Method 2: How to Read or Write NTFS Drive on Mac Ventura (Paragon NTFS for Mac)
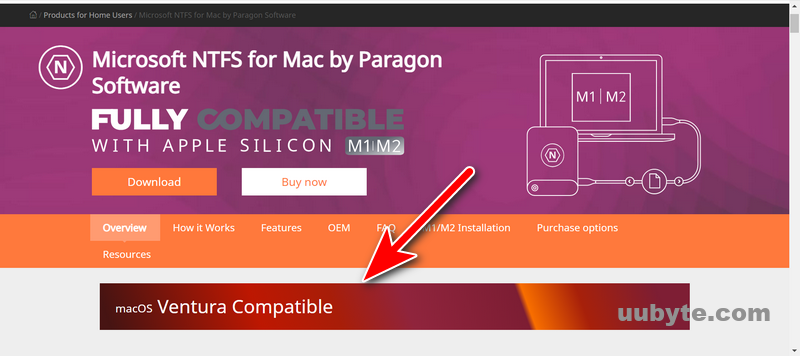
Paragon NTFS for Mac is the first software as far as we know to add NTFS support on macOS Ventura. It is a dedicated NTFS for Mac software dated back to the early 1990’s. It offers 10-day free trial with all features for users who are interested in this amazing program. After the trial is expired, you need to purchase a license to activate the copy at a fairly reasonable price (189.95 USD).
How to read and write NTFS drive Using Paragon Software:
1. Go to Paragon software official website and download the latest version of NTFS for Mac (link).
2. Double click the dmg file to launch the installation wizard. At this step, you need to select a location to install this app.
3. At the end of installation, it asks you approve the system extension made by Paragon Software GmbH in Privacy & Security.

4. Open System Settings on Mac Ventura and tap Allow to grant the permission to Paragon NTFS for Mac software.
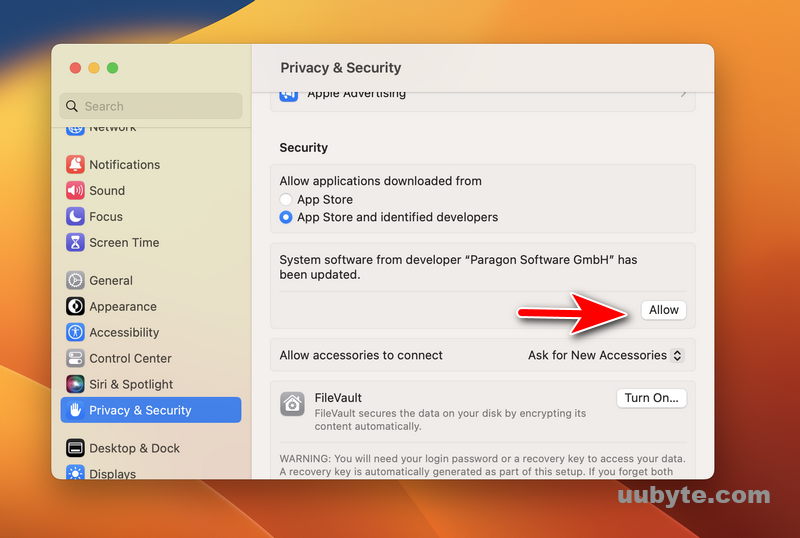
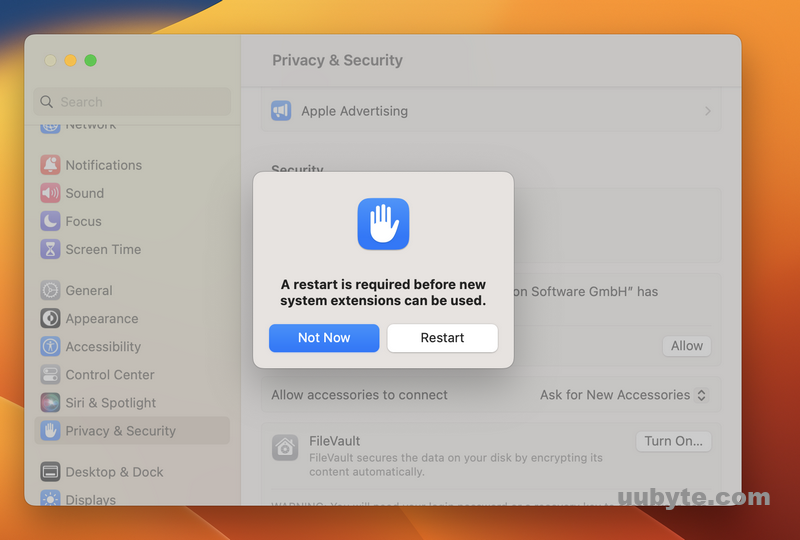
5. Enter the login password to finish this operation. After that, your Mac will update system cache. Wait a few seconds and restart your Mac as requested (mandatory).
6. After reboot, you can use Paragon NTFS for Mac Software to read or write NTFS as you like.
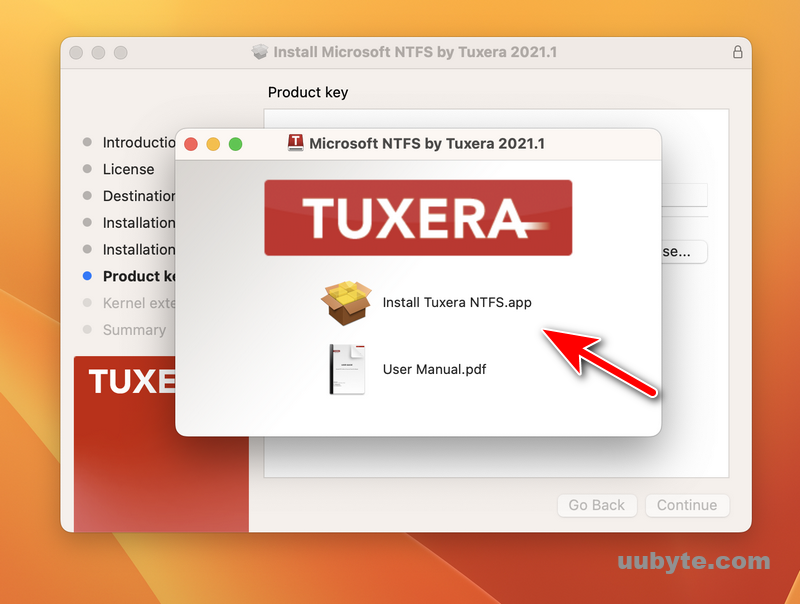
Method 3: How to Write a NTFS Drive on Mac Ventura (Tuxera NTFS)
In the past, macOS could read NTFS-formatted drives natively but it is not the case for Ventura). You can’t read or write to NTFS drive out of the box. This can be a pain if you need to exchange files with a Windows-using friend or colleague. Unfortunately, most of the popular NTFS for Mac software don’t support Ventura from the time we are writing the post, such as Mounty, EaseUS, Hasleo. Another working solution is Microsoft NTFS for Mac by Tuxera (short for Tuxera NTFS).
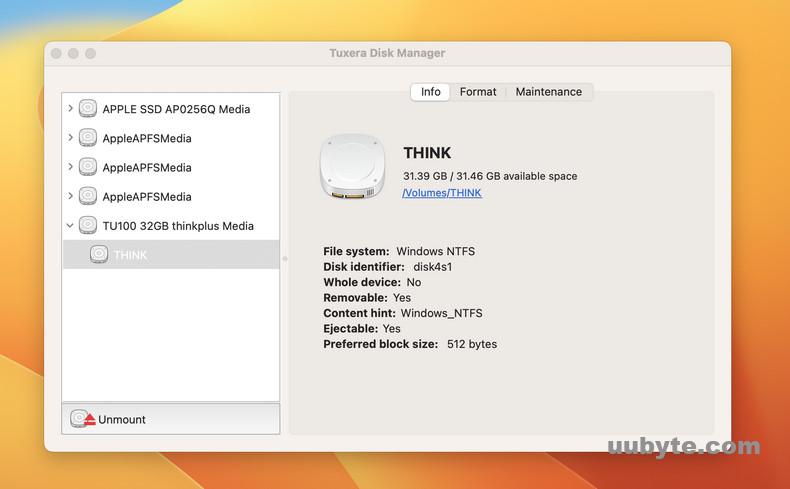
Tuxera NTFS is a commercial NTFS driver developed from the popular open-source NTFS-3G driver, and it offers support for modern macOS, including Ventura , Monterey, Big Sur. However, it’s not free, but it’s one of the most reliable NTFS drivers for Mac, and it’s very easy to use.
Here’s how to write to NTFS drives on macOS Ventura with Tuxera NTFS.
1. Download and install Tuxera NTFS for Mac. You can get a free trial from the Tuxera website.
2. Once Tuxera NTFS is installed, open the "Tuxera NTFS for Mac" preferences panel from System Preferences.
3. In the preferences pane, select the NTFS drive you want to enable writing on, then click the "Enable NTFS Writing" button.
4. You’ll be prompted to enter your password to enable writing on the drive. Enter your password and click the "Enable NTFS Writing" button.
5. That’s it! You can now write to NTFS drive on your Mac Ventura.
Tuxera NTFS is a reliable and easy-to-use option for writing to NTFS drives on your Mac. It’s not free, but it’s worth the price for its ease of use and reliability.
Other Possible Methods to Read or Write NTFS on macOS Ventura
Using 3rd-party NTFS for Mac app is the most popular way to read or write NTFS drive on Mac. It is not an exception for the latest macOS Ventura. However, we have other options out.
First, you can build a Windows 10 virtual machine with Parallels Desktop or UTM. Windows 10 has native support for reading or writing NTFS drive. However, this process will take sometime to create a Windows virtual machine. If your Mac supports Bootcamp, then you can make a Windows dual boot easily on Mac.
Secondly, you can also format the NTFS drive to exFAT or FAT on Mac with the help of Disk Utility. Both FAT and exFAT are readable and writable on Mac by default. The only drawback is that it will format the drive and delete all content from the disk.
Well-Known NTFS Software that Currently Not Working on Ventura
macOS Ventura is still in developer beta and some of the popular NTFS software are not prepared for Ventura yet. So don’t waste time on trying them out. According to the user feedback from MacRumors, the following NTFS Reader for Mac software don’t support macOS Ventura till the day we wrote this post:
- Mounty (Free)
- NTFS-3G (Free)
- Hasleo NTFS for Mac (Free)
- EaseUS NTFS for Mac (Premium)
Notice: We will keep updating the list if some of them start to support NTFS write access on macOS Ventura.
Mounty
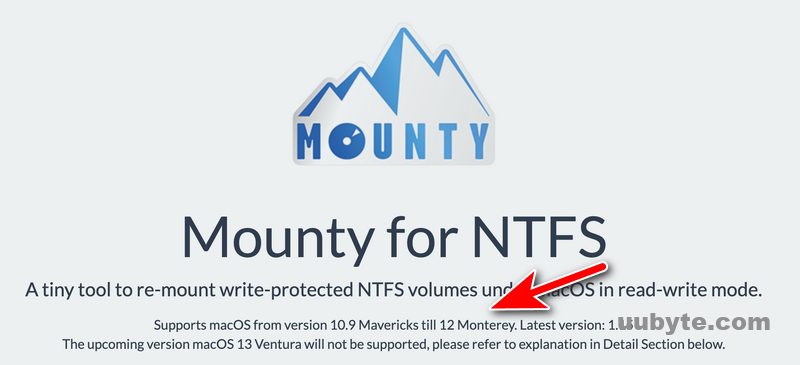
Mounty NTFS is a software that allows you to mount NTFS drives on your Mac. It is a simple and easy to use software that comes with a user-friendly interface. With Mounty NTFS, you can easily mount NTFS drives on your Mac and access them just like any other drive.
Mounty NTFS is a great choice for those who need to access NTFS drives on their Mac. It is easy to use and comes with a user-friendly interface. With Mounty NTFS, you can easily mount NTFS drives on your Mac and access them just like any other drive.
NTFS-3G
NTFS-3G is an open source, cross-platform implementation of the Microsoft Windows NTFS file system. It is released under the terms of the GNU Lesser General Public License, version 2.1 (or later).
NTFS-3G is a safe and stable file system driver that supports both read and write access to NTFS-formatted drives. It is designed to be a drop-in replacement for the standard NTFS driver that comes with the Windows operating system.
NTFS-3G is an excellent choice for those who need to access NTFS-formatted drives on a cross-platform basis. It is also a good choice for those who need a more robust and stable file system driver than the standard NTFS driver that comes with Windows.
Update: NTFS-3G is able to read and write NTFS disk on macOS Ventura after recent update. However, the whole process is too complicated (more than 16 steps). Even our senior editor took about 2 hours to set up the app, not to mention how much more time for ordinary users. Hence, it is only recommended for advanced users who are familiar with commands.
EaseUS NTFS for Mac

EaseUS NTFS for Mac is a file system driver that allows you to read, write, and edit files on NTFS-formatted drives on your Mac. It’s a great solution for working with files on Windows-formatted drives, and it’s a necessary tool if you want to dual-boot your Mac with Windows.
It is a reliable and easy-to-use file system driver that makes it possible to read, write, and edit files on NTFS-formatted drives on your Mac. It’s a great solution for working with files on Windows-formatted drives, and it’s a necessary tool if you want to dual-boot your Mac with Windows.
Paragon NTFS is a file system driver that allows you to read, write, and edit files on NTFS-formatted drives on your Mac. It’s a great solution for working with files on Windows-formatted drives, and it’s a necessary tool if you want to dual-boot your Mac with Windows. Paragon NTFS is a reliable and easy-to-use file system driver that makes it possible to read, write, and edit files on NTFS-formatted drives on your Mac.
Hasleo NTFS for Mac (Only Read NTFS)
Hasleo NTFS for Mac is a software that allows you to read and write to NTFS drives on a Mac. It is a simple and easy to use software that is compatible with most of macOS versions, including macOS Ventura. However, Hasleo NTFS for Mac is only a great choice for those who need to read NTFS drives on a Mac. It does not write to NTFS on macOS Ventura.
Video Tutorial: How to Write NTFS Drive on Mac Ventura
Some of the functions are changed dramatically in macOS Ventura, causing apps not to working properly on your Mac. Honestly, this is a quite common scenario we can see after OS update. When we wrote the post at the first time, only Paragon NTFS for Mac was able to read and write NTFS drive on Mac Ventura. But now, there are more software vendor adding support to their NTFS software. We will constantly update the list when new change is made to the above mentioned software.