Table of Contents
macOS is the stock operating system for Apple’s desktop and laptop computers, such as MacBook, Mac Mini and iMac. Conventionally, Apple introduces a new version of macOS each year according to this wikipedia page, dating back to mac OS X 10.10 (Cheetah) in 2001.
Usually, a dozen of unique features will be introduced for a new release. For those macOS tech fans, app developers and software tester, it is quite fascinating to run multiple macOS instances on a single Mac. So they can experience the new features and test out the app for new OS.
This was a chenllenging task in the past. But now, Apple makes it easy to install two or more copies of macOS on one Mac thanks to the introduction of APFS, a more secure and flexible file system than the old HFS.
First, Make Sure Your Mac Has Enough Free Space
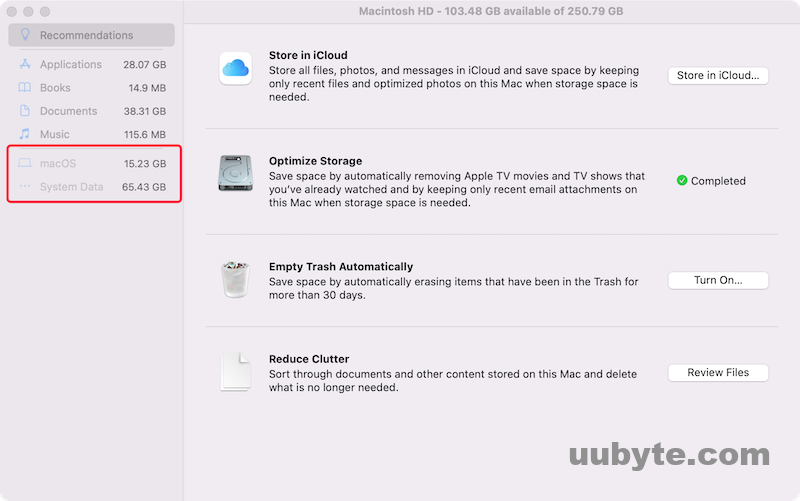
The budget Mac computer usually comes with a small hard drive, starting from 128GB or 256 GB. They are not the ideal device to run more than one copies of macOS on one Mac. macOS and system data could eat up more than 80 GB of free space. Here is my example of MacBook Pro with 256 GB storage.
If you plan to install two copies of macOS on one Mac, the volume of internal drive is 256 GB at least. Ideally, it should be 512 GB or 1 TB. This guarantees both of them will run smoothly on this Mac even for resource extensive apps such as xCode, iMovie, Adobe Premiere Pro.
For Macs with 128 GB internal storage, it is more practical to install the additional macOS to an external SSD.
Backup Your Mac for Data Safety
Installing a new copy of macOS is not a simple task as you could think. Even you follow the instructions correctly, it might end up with unexpected errors because of hardware or software issues. To void the data loss during the installation, it is highly recommended to take a full back up of personal data, apps and system settings.
For simple backup, you can copy and move important files to a USB drive or external hard drive.
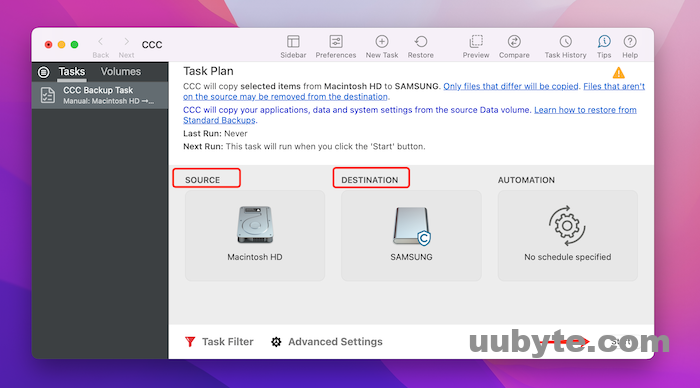
To make a full backup of internal drive, please give a try on Time Machine (free) and Carbon Copy Cloner (Free Trial) , which are the two most popular apps for data backup on Mac. Personally, I prefer Carbon Copy Cloner as it is much faster than Time Machine. And the backup and restore options are better. Besides, all the features are available even in free trial period (30 days).
Create a New APFS Volume from Internal Disk
Now, we have done all the preparation work and we can start to the actual step of installing a new copy of macOS. The first step is to add a new APFS volume from the internal drive. For reference, APFS is the preferred file system to run an instance of modern macOS. This can be done using the built-in Disk Utility app, which lets you manipulate the disk for volume creation, editing and deleting.
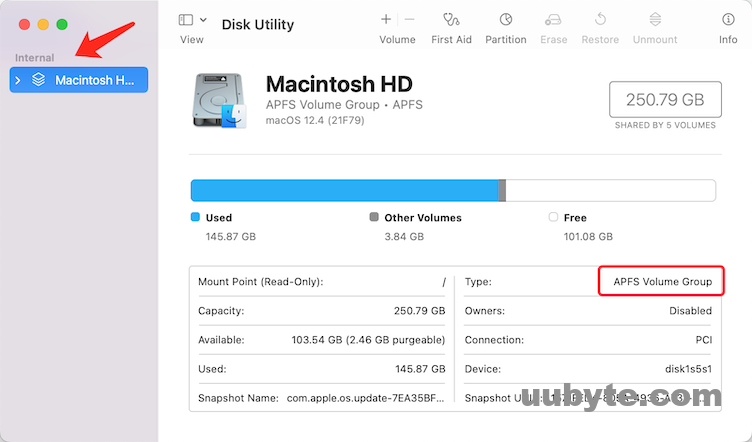
Open Disk Utility app and you can see all the internal and external disks being connected to this Mac. The following is an example of the internal disk information gathered by Disk Utility app. Usually, the internal SSD drive is called Macintosh HD by default. We will add a new APFS to the internal drive so a new macOS can be installed in it.
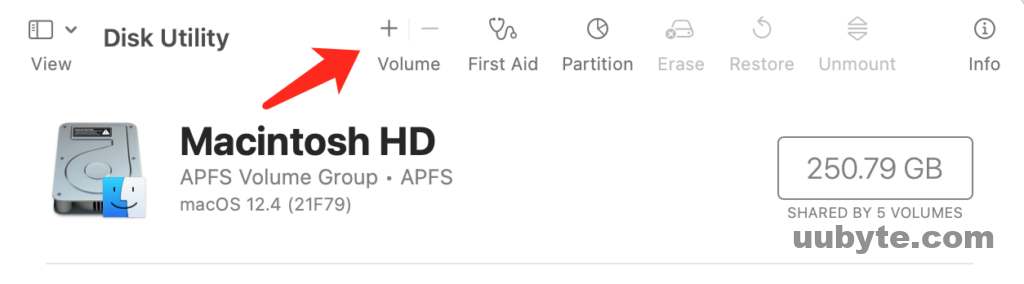
Step 1: Click the ‘+’ above the Volume text at the top to add a volume to the selected drive.
Step 2: A new pop-up window appears on the screen, where you can set a name and format for the new volume. In here, we should choose APFS under Format section.
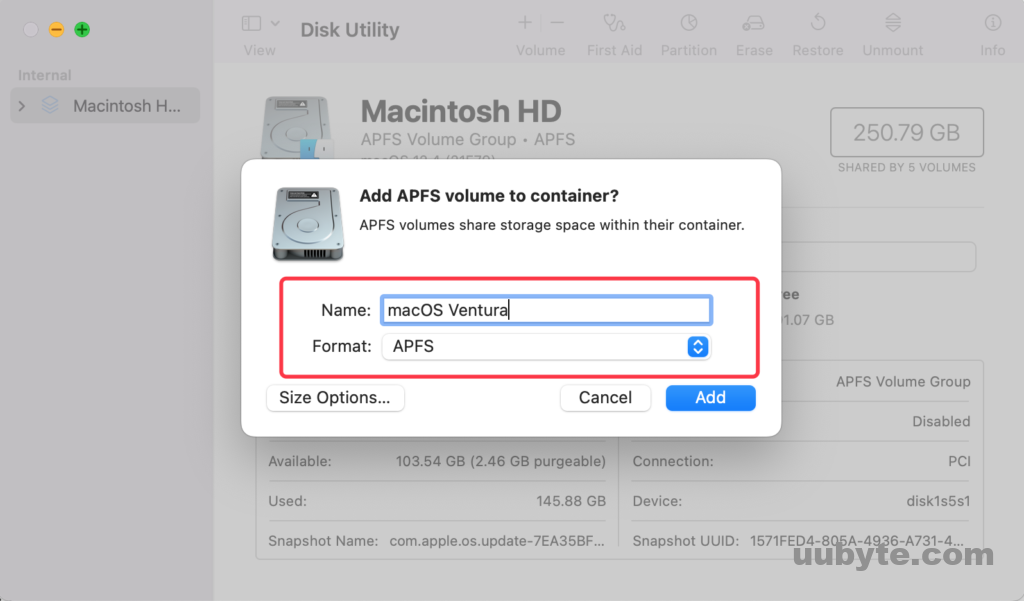
Step 3: Click the blue Add button to create a new volume on this disk.
Install another macOS to the New Volume on a Mac
The new added APFS volume is the destination we are going to keep the new macOS. Now, we comes to the final part of then entire tutorial. Please follow the steps listed in below to install another macOS version to the new volume on Mac.
Step 1: Decide which macOS you want to install
There are two many macOS versions you can pick up, such as the latest Ventura, Monterey, Big Sur and Catalina. Please check the system requirements of each macOS and make sure the newly added macOS is fully compatible with current Mac.
For example, my MacBook Pro comes with Catalina when it was shipped. Now, it is running macOS Monterey. Basically, I can install a new copy of Catalina, Big Sur, Monterey and Ventura without any problem.
Step 2: Download macOS installer app
macOS installer app as its name indicates is a specific type of app for macOS installer. You can download the installer app from Mac App Store when it is available or download from third-party websites if you could not find it in Mac App Store. This is quite common as Apple only provides a limited number of macOS for download, which is based on the Mac model and region.

Step 3: Install macOS to New Volume
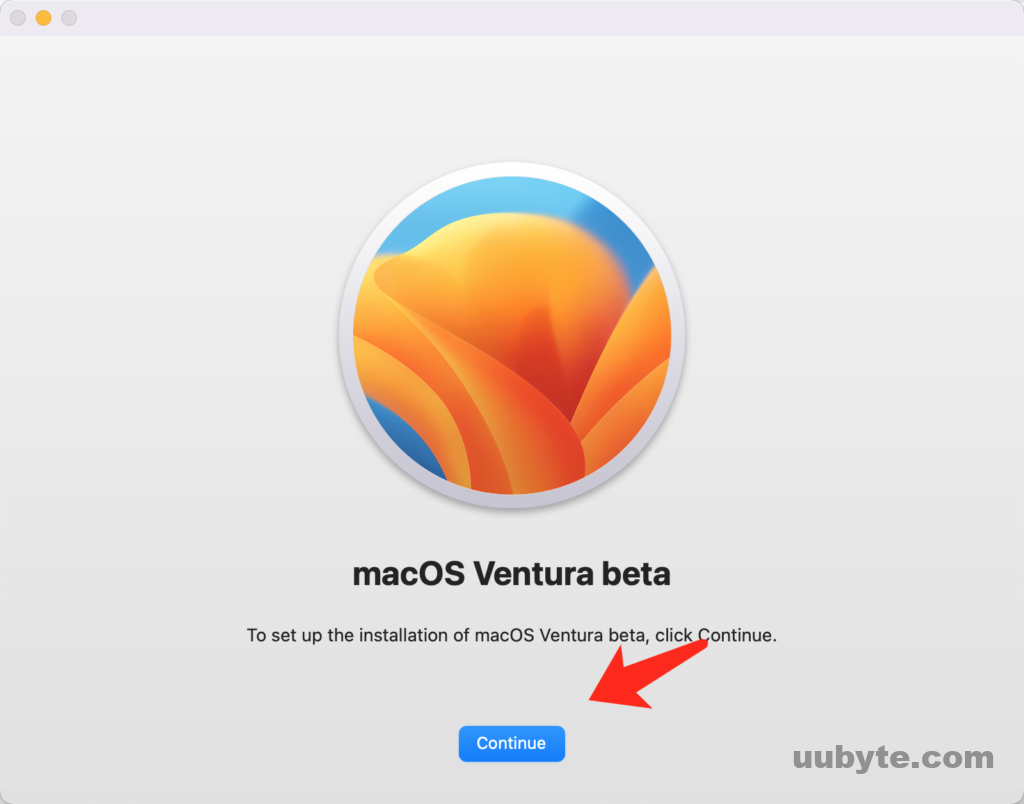
Run the macOS installer app and click the Continue button to launch the installation wizard. It will gather the information from the current hardware and decide if this Mac is eligible to install this version of macOS.
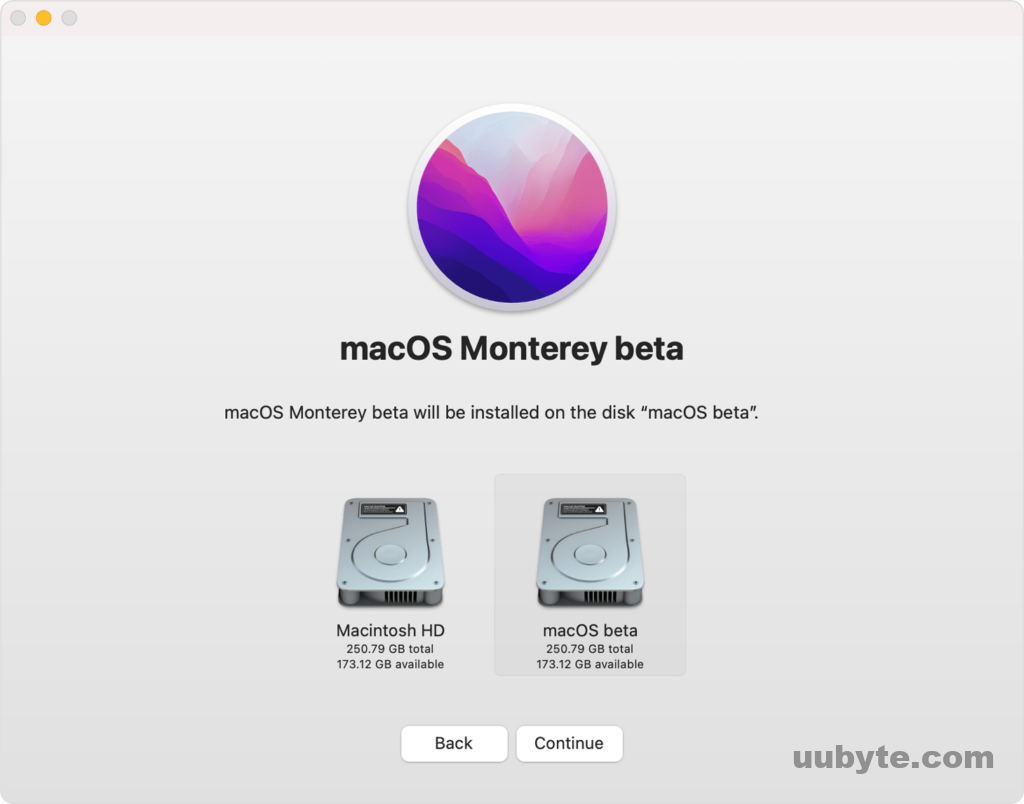
After the verification process, it will ask you which volume you want to install the macOS. Please select the new volume to proceed.
Step 4: Boot Mac from new Installed macOS
Your Mac will still boot from the default macOS even a new one has been installed. To boot from the newly installed macOS, a few additional steps are required and there are different for Intel and Apple Silicon Mac.
For Intel Mac, please reboot or power on the Mac. Now, keep pressing the option button for about 10 seconds. After that, Startup Manager pops up and you can select and boot any available volume for this time.
For Apple Silicon Mac, shutdown the Mac first. Wait one minute and hold the Power key until you see Loading startup options. A few seconds later, all bootable volumes are shown on the screen. You can choose one to proceed.
Video Tutorial: Run macOS Big Sur and Catalina on A Mac (Dual Boot Mac)
Troubleshooting: Installation of macOS Could Not Continue
I managed to install another copy of macOS Big Sur on my M1 MacBook (running Monterey). However, I came across this error on my wife’s Intel MacBook Pro. It says "Installation of macOS could not continue" because of some important content failed to download at this time.
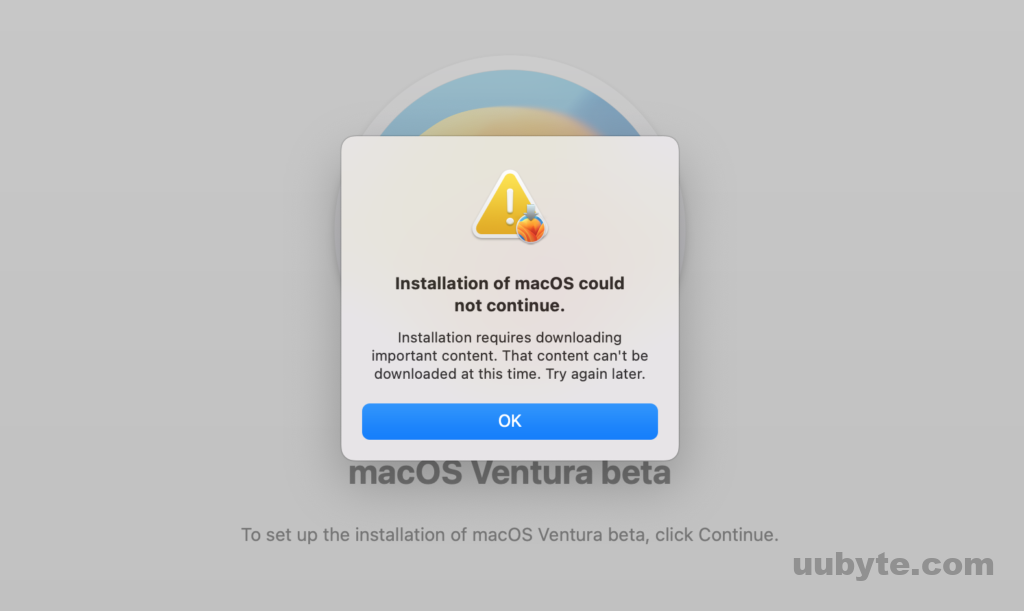
How to fix this error? First, check macOS version you are going to install is fully compatible with this Mac. If not, the installation could not continue for sure. Second, make sure this Mac is connected to Internet with good condition. The installer app needs to fetch and download content from Apple Server. It is recommended to close proxy and VPN during this time.
If the error continues, then create a bootable macOS USB using createinstallmedia command. After that, boot your Mac from USB and starts to install macOS from the USB.
Conclusion
Nowadays, it is quite safe and easy to install two versions of macOS on one Mac thanks to the adoption of APFS. The most important part is to check if the added macOS is compatible with current hardware. Also you need to make sure there is enough free space for the new OS.