UUByte NTFS Geeker is a dedicated app to read and write NTFS drive on a Mac. Currently, it fully supports Apple Silicon Mac and the latest macOS Sonoma. Please check out the online tutorial listed in below to write NTFS drive on Mac.

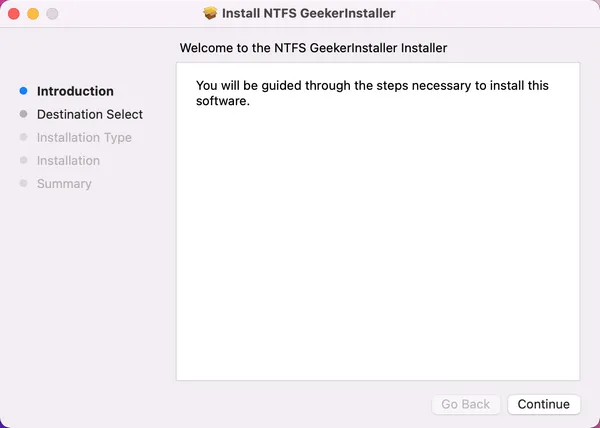
Step 1: Download and Install NTFS Geeker on Mac
The download link is located at the upper right corner of this page. Please click on the red download button to save .pkg file on your Mac. After that, double click the file to install UUByte NTFS Geeker.
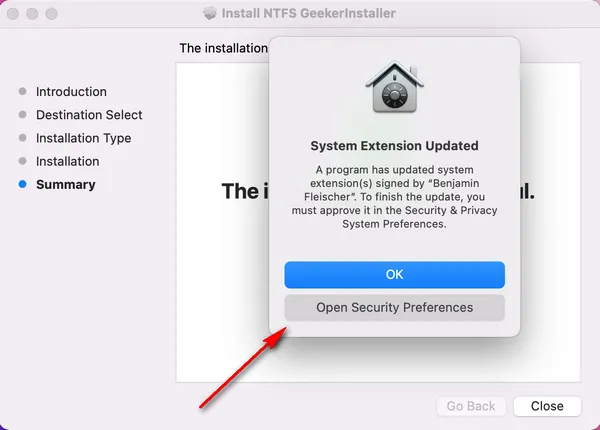
Step 2: Enable or Update System Extension
The NTFS drive is based on Benjamin's implementation. You have to enable or update this system extension to proceed. Please open Security Preferences to complete the task.
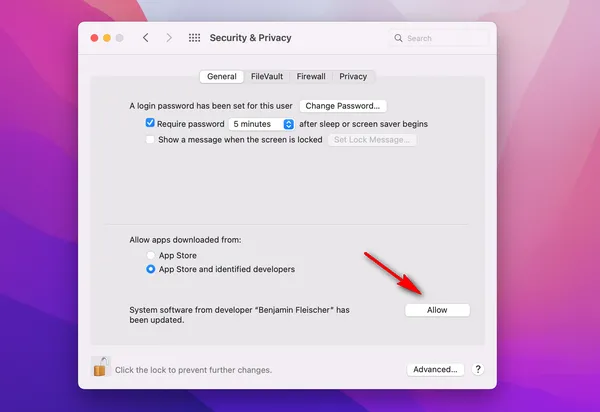
In Security & Privacy window, double click the lock icon at the bottom to make changes. After that, click the Allow button to enable the system extension..
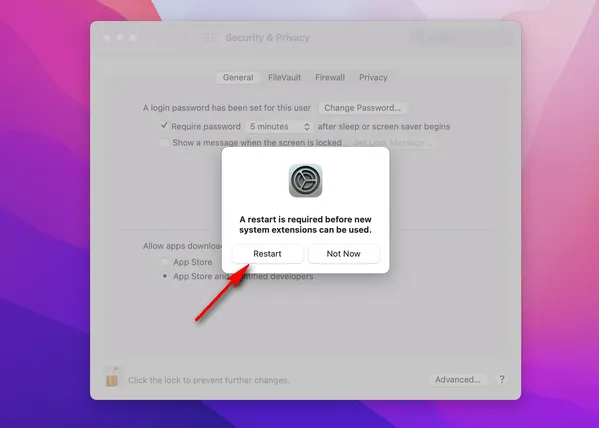
To make it into effect, your Mac has to be restarted.
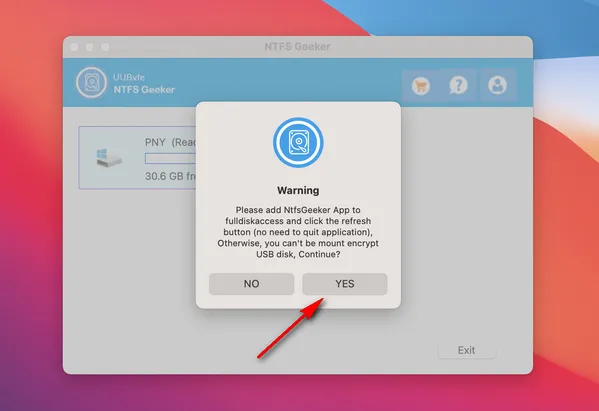
Step 3: Open NTFS Geeker App and Allow Full Disk Access
Open NTFS Geeker app from Launchpad and you will be asked to grant the full disk access permission to this app so it can read and write external drives. Click 'Yes' to continue.
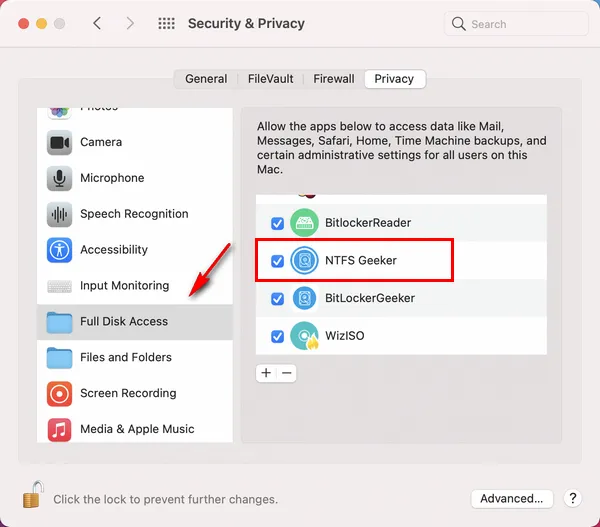
At this time, Mac opens Security & Privacy panel again. Please find Full Disk Access menu fro left sidebar and mark NTFS Geeker app at the right side.
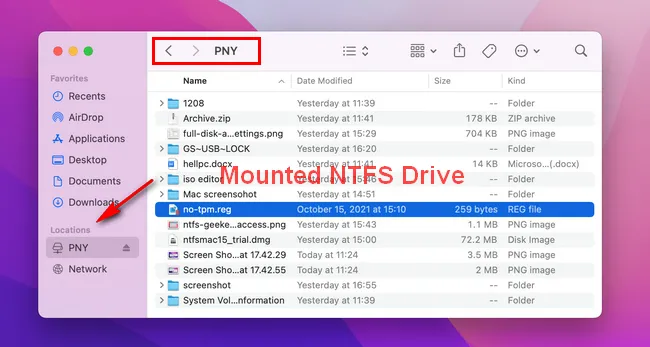
Step 4: Mount NTFS Drive as Writable
Connect NTFS drive to the Mac and you will see the drive name in UUByte NTFS Geeker app. Right click on it and select 'Mount as writable'. This will grant NTFS read and write access on a Mac.

Step 5: Read or Write NTFS Drive on Mac
A new window pops up when the NTFS drive is mounted successfully. You will see all files and folders in that drive. From now on, you can copy files from NTFS drive to Mac or move files from Mac to NTFS drive.
Summary:
This is a complete tutorial for using NTFS Geeker on your Mac. There are a couple of settings you have to make at first. After that, you can read or write NTFS drive on Mac freely. If you still have question in this app, please contact our support team for assistance.
💬 Reviews