Table of Contents
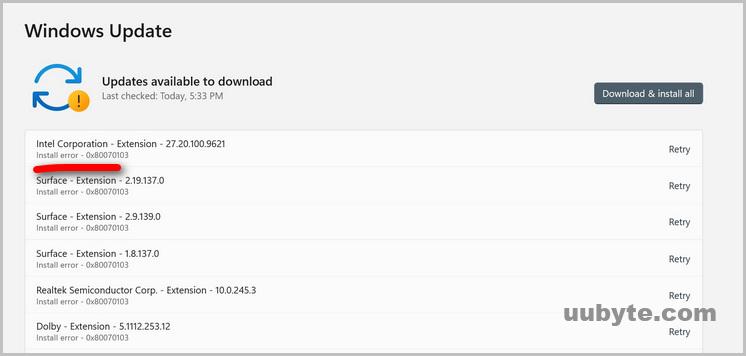
Windows Update Error 0x80070103 was a widespread Windows 11 issue recently. A lot of users reported this error when they were trying to install this update on their Windows 11 devices. Microsoft is working hard to fix the problem but it is still in progress and no official solution available currently.
Fortunately, this issue does not affect the normal use and they are several unofficial tricks to fix Windows update error 0x80070103. We will cover them in below sections.
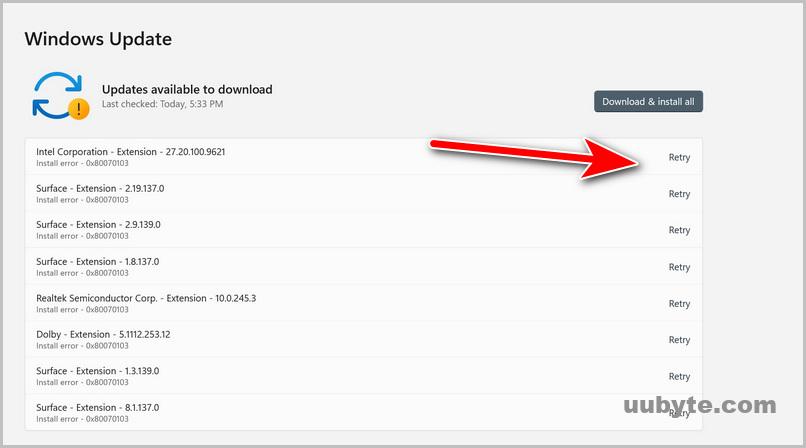
Method 1: Click the Retry Button A Couple of More Times
This is the easiest trick you can try out to fix Windows Update Error 0x80070103 on Windows 11. According to user feedback, this problem can be solved by clicking the Retry button several times. You can find the button at the right side of each filed.
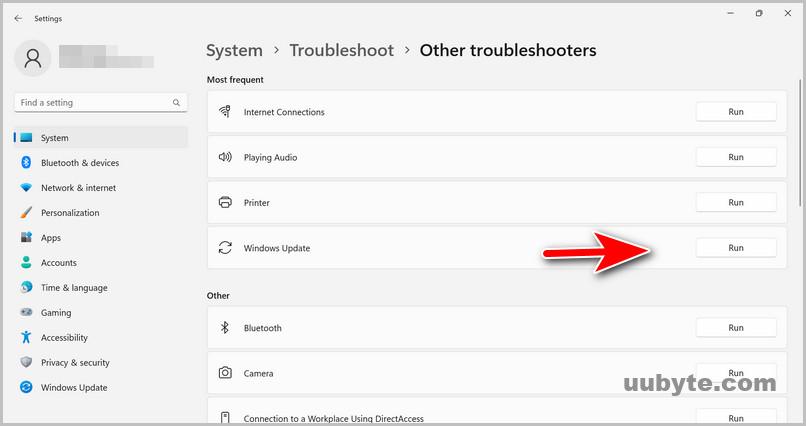
Method 2: Run Windows Update Troubleshooter
Windows Update Troubleshooter is a built-in tool in Windows 11 that can help diagnose and resolve problems with Windows Updates. It can detect and fix a variety of common issues, such as corrupted files, incorrect settings, and network problems. The tool can also be used to reset Windows Update components, which can help resolve update errors.
You can run the Windows Update Troubleshooter in Windows 11 using the following steps:
Step 1: Open the Windows Settings app by clicking on the Start menu and selecting the gear icon or by pressing the Windows key + I on your keyboard.
Step 2: In the Windows Settings app, click on "System" and then select "Troubleshoot" from the left-hand side menu.
Step 3: Scroll down to the "Get up and running" section and click on "Windows Update" and then click on "Run the troubleshooter."
Step 4: The Windows Update Troubleshooter will now start scanning for any issues with Windows Update.
Step 5: Follow the prompts provided by the troubleshooter to fix any issues that are detected.
Once the troubleshooter has finished running, restart your computer and try running Windows Update again.
Alternatively, you can also access the Windows Update Troubleshooter by typing "troubleshoot" in the search bar on the taskbar and selecting "Troubleshoot settings." From there, follow steps 3-6 above to run the Windows Update Troubleshooter.
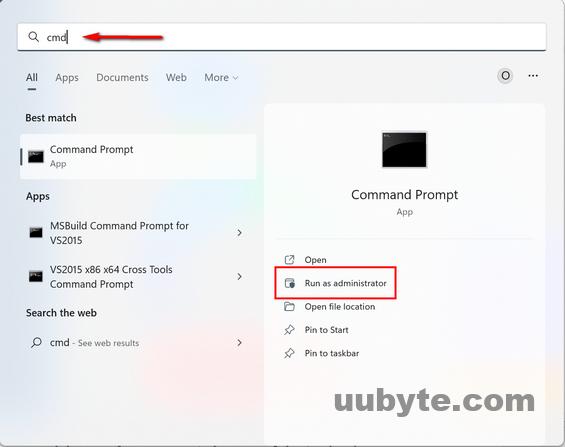
Method 3: Try Command Prompt
Command Prompt is a command line interpreter application available in the Windows 11 operating systems. It’s used to execute entered commands. Most of those commands automate tasks via scripts and batch files, perform advanced administrative functions, and troubleshoot or solve certain kinds of Windows issues.
You can run the following commands to fix Windows Update Error 0x80070103.
Go to Windows 11 desktop and search ‘cmd’. From the result list, click Run as administrator.
Next, copy and paste the following commands one by one and hit the Enter to execute each command:
net stop wuauserv
net stop cryptSvc
net stop bits
ren C:\Windows\SoftwareDistribution SoftwareDistribution.old
ren C:\Windows\System32\catroot2 Catroot2.old
net start wuauserv
net start cryptSvc
net start bits
netsh winsock reset
Method 4: Pause the Update and Reboot Windows 11
In Windows 11, you can pause updates and restarts for a certain period of time using the built-in settings. Here are the steps:
Step 1: Click on the Start menu and select the Settings icon (gear icon) in the left-hand side panel.
Step 2: In the Settings window, select "Windows Update" from the left-hand side menu.
Step 3: Under the "Windows Update" section, click on "Advanced options."
Step 4: Under "Advanced options," you will see a section called "Pause updates." Toggle the switch to "On" to pause updates. You can also select a specific date to resume updates by clicking on the drop-down menu and selecting a date.
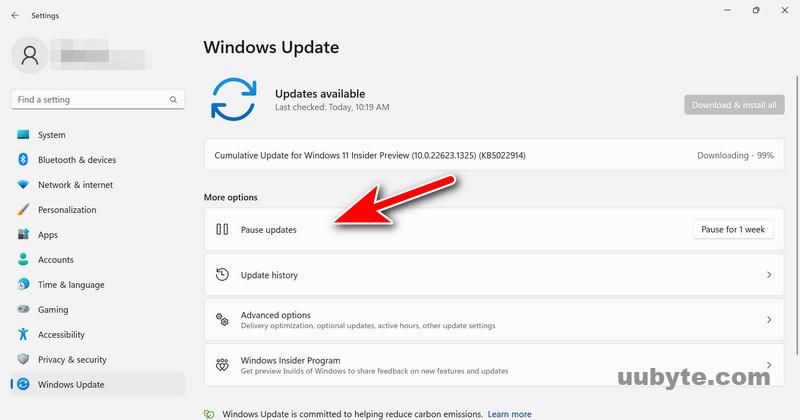
Step 5: Back to Windows 11 desktop and click on the Windows menu. Find Power option at the lower right corner and choose to restart the device.
Method 5: Delete Previous Windows 11 Update and Try again
It is proven to be an effective solution to fix the Windows Update Error 0x80070103 by deleting the previous update files. To delete previous Windows 11 updates, you can use the built-in Disk Cleanup utility. Here are the steps:
Step 1: Press the Windows key + R on your keyboard to open the Run dialog box.
Step 2: Type "cleanmgr" and press Enter to open the Disk Cleanup utility. It will ask you which drive you want to clean up. Select the drive where Windows 11 is installed (usually the C: drive) and click "OK".
Step 3: From the new pop-up, go to Clean up system files option. After a few moments, Disk Cleanup will scan your system and display a list of files to delete.
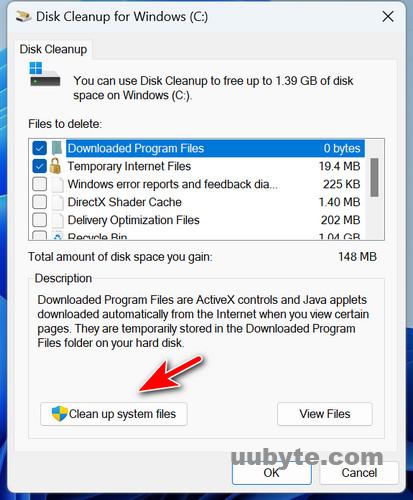
Step 4: Scroll down the list until you see "Previous Windows installation(s)" option. Check the box next to it.
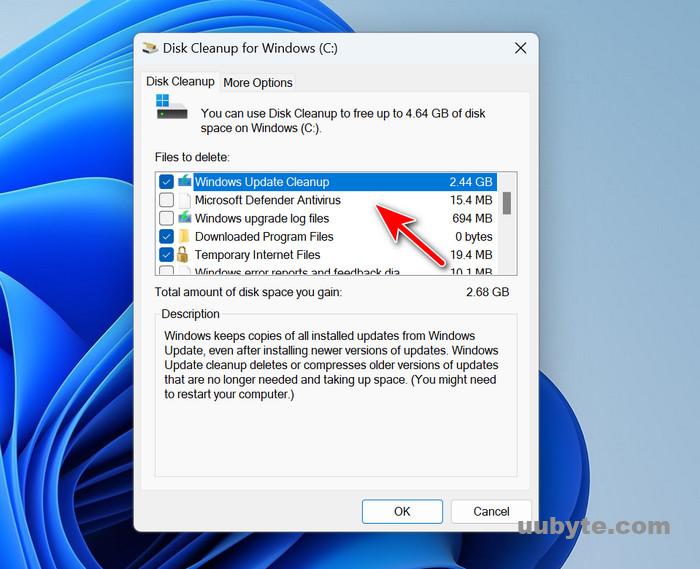
Step 5: You can also select other items you want to delete, such as Temporary files, Recycle Bin, etc. Once you’ve selected the files you want to delete, click "OK" and then click "Delete Files" to confirm.
Step 6: Disk Cleanup will now start deleting the selected files, including the previous Windows 11 updates. This may take some time depending on the amount of data to delete.
After the process is complete, your system will have more free disk space, but note that you won’t be able to roll back to the previous version of Windows after deleting the previous installation files.
Method 6: Disable Driver Updates in Windows 11
In Windows 11, you can disable automatic driver updates to prevent your system from installing the wrong or incompatible drivers. Here are the steps:
Step 1: Press the Windows key + R on your keyboard to open the Run dialog box.
Step 2: Type "sysdm.cpl" and press Enter to open the System Properties window.
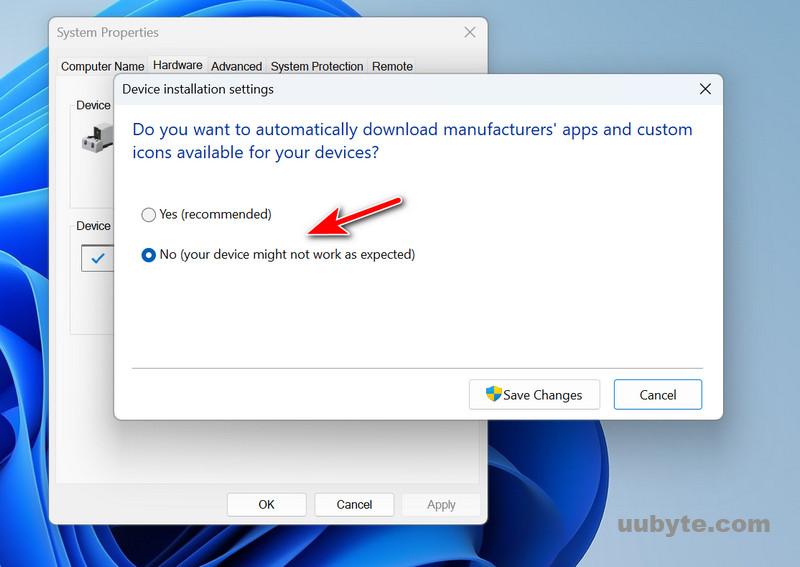
Step 3: In the System Properties window, click on the "Hardware" tab.
Step 4: Click on the "Device Installation Settings" button.
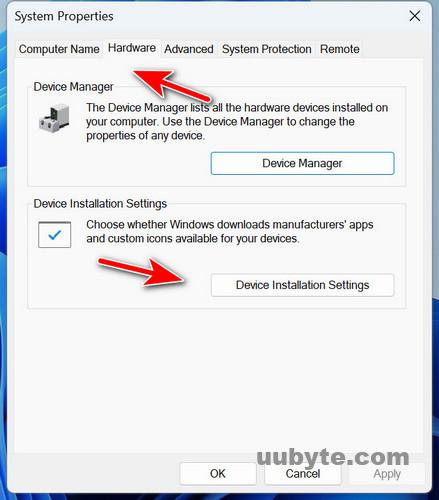
Step 5: In the Device Installation Settings window, select the option "No (your device might not work as expected)".
Step 6: Click on "Save Changes" to apply the changes.
After you complete these steps, your device will no longer download or install driver updates automatically. However, you may still receive important security updates that include driver updates as part of the update process.
If you need to install a specific driver, you can download and install it manually from the manufacturer’s website or using Device Manager in Windows 11. Keep in mind that installing the wrong or incompatible driver can cause issues with your device, so it’s important to make sure you are installing the correct driver for your system.
Summary
Don’t be panic if you saw Windows Update Error 0x80070103 on a Windows 11 computer. This is a minor error and won’t break the system. You can use Windows as normal even this update failed to install. Plus, we are quite sure the problem could be fixed by one of our suggestions.