Today, I was trying to connect a USB device to my Windows 11 laptop so I can edit the images taken from my Mac.
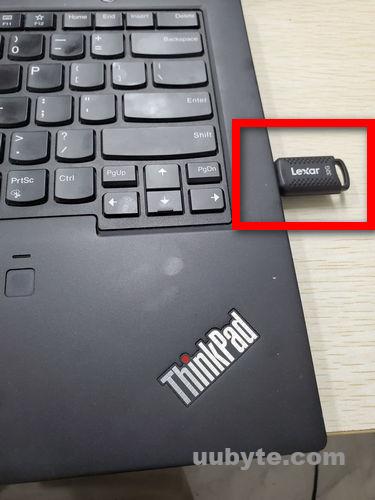
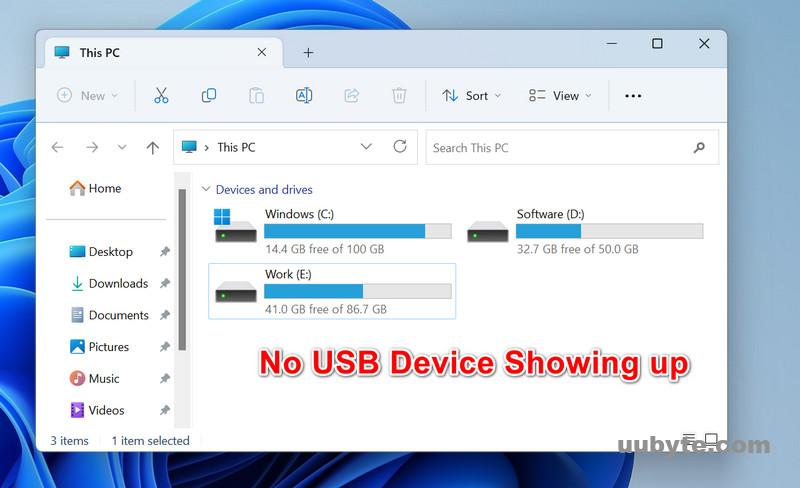
Unfortunately, the USB flash drive was not recognized by Windows 11 laptop. Simply put, the USB drive name is not showing up in Windows 11 file explorer.
This problem happened twice after I formatted my USB drive on a Mac. In this post, I will show you how to fix this problem so you will grant read and write permission to this USB drive.
[Fixed] USB Device Not Recognized or Showing up in Windows 11
There are many reasons to cause the USB drive not being recognized by Windows 11 PC. Generally, it comes into two cases. Firstly, the newly formatted USB device is not assigned a drive letter. Hence, the drive name is not showing up in file explorer. However, you can see the drive name in Disk Management.
Secondly, the file system of USB drive is not supported by Windows 11, such as Apple HFS+/APFS or Linux ex3/ex4. As consequence, your USB name is not listed in Disk Management. You have to use third-party apps to partition the USB drive with FAT32/NTFS so it can be recognized by Windows 11.
Scenario 1: USB Device Showing up in Disk Management
We can’t live without USB device at work and home. Now, USB flash storage is matured and those devices are more durable than before. This means the chance is low when the USB device is broken or damaged. If this was the case, it is more a software bug and it is easy to fix this when you can see the device name from Disk Management.
Step 1: Move to the search filed of Windows 11 task bar.

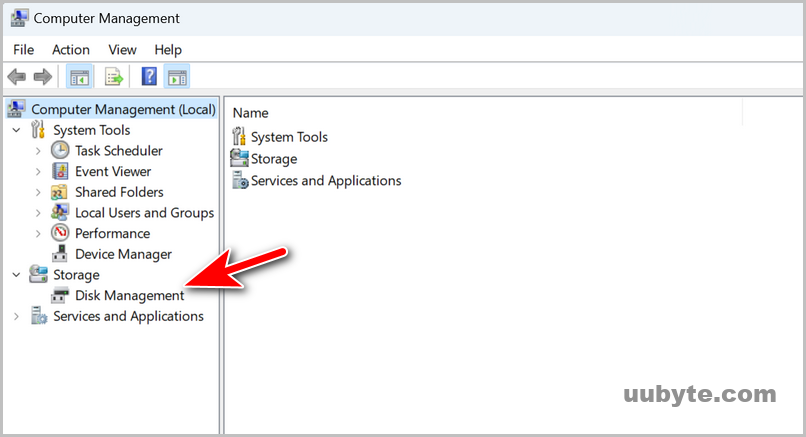
Step 2: Type ‘computer management to open this built-in system utility.

Step 3: Go to Storage -> Disk Management.
Step 4: It will list all internal and external storage devices being connected to this computer. As you can see, my USB drive LEXAR is displayed as Disk 1 and marked as removable device.

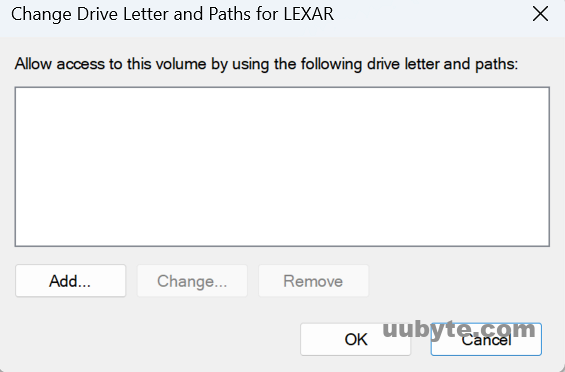
Step 5: Right click on the USB device and choose ‘Change Drive Letters and Path...’.
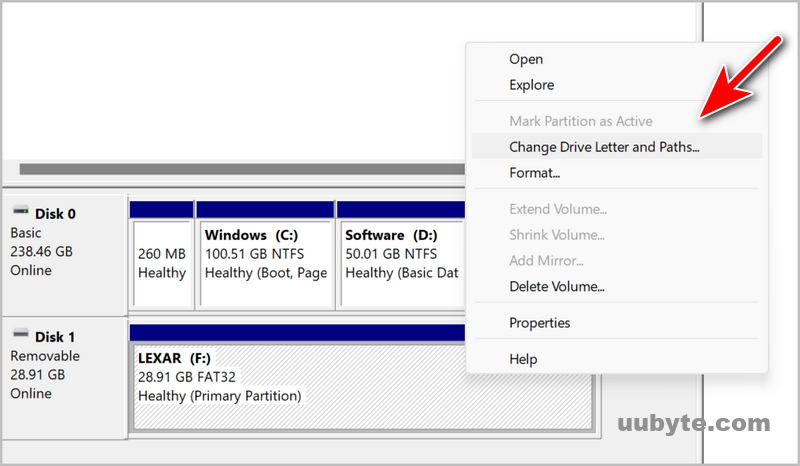
Step 6: Currently, there is no drive letter assigned to this USB. Please click the ‘Add‘ button to continue.
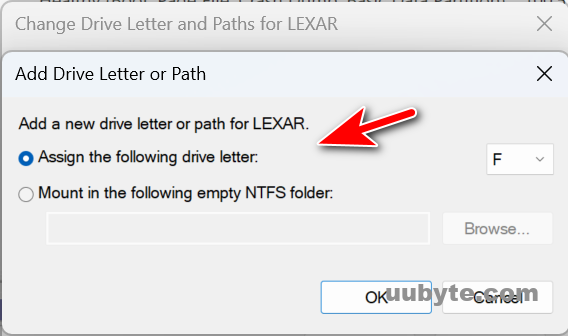
Step 7: Assign a new drive letter to the USB drive from the new pop-up Window.
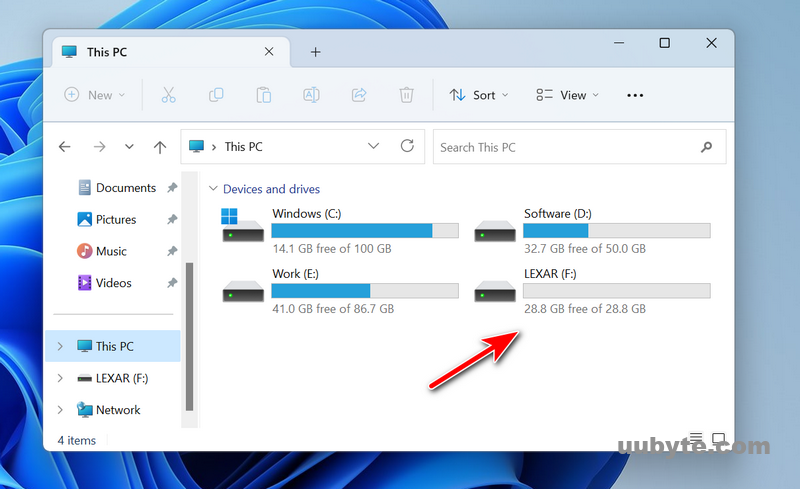
Step 8: Now, the USB is recognized by the computer and the USB drive name is also showing up in Windows 11 file explorer.
Scenario 2: USB Device Not Showing up in Computer Management
This is also a common case when the USB drive is formatted by a Mac or Linux computer as the default file system is not FAT32 or NTFS when you are trying to erase a USB drive on a non-Windows devices. Taking Mac for example, the default file system is APFS, which is not supported by Mac. Apparently, your USB device will not showing up in Windows 11 when it is plugged in.
How to fix the issue if the USB device is not showing up in the Disk Management and you are unable to apply further actions to the drive? The answer is using a professional disk partition tool that supports more file systems than Windows 11 OS.
In this section, we will take DiskGenius as example. It is the best free disk partition management software for Windows PC.
Step 1: Download DiskGenius Free Edition from this link.

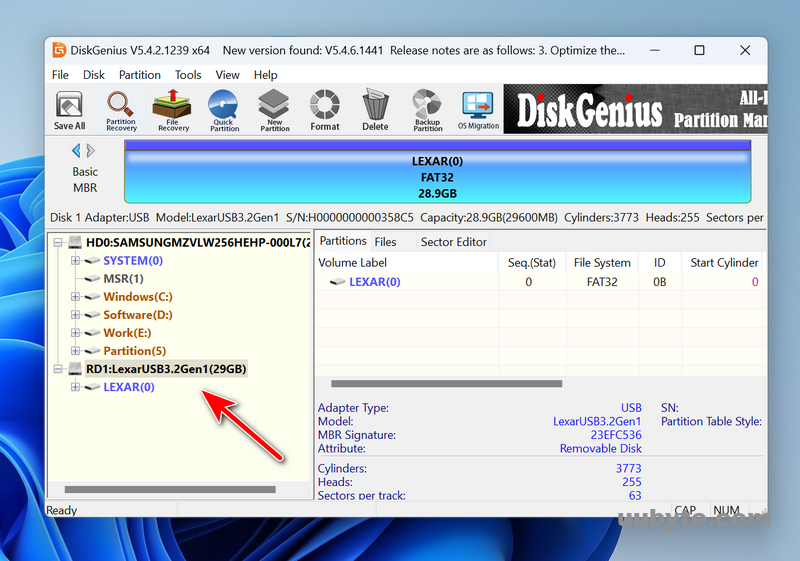
Step 2: Run the app on your Windows 11 PC. All the disks will be displayed on the left sidebar.
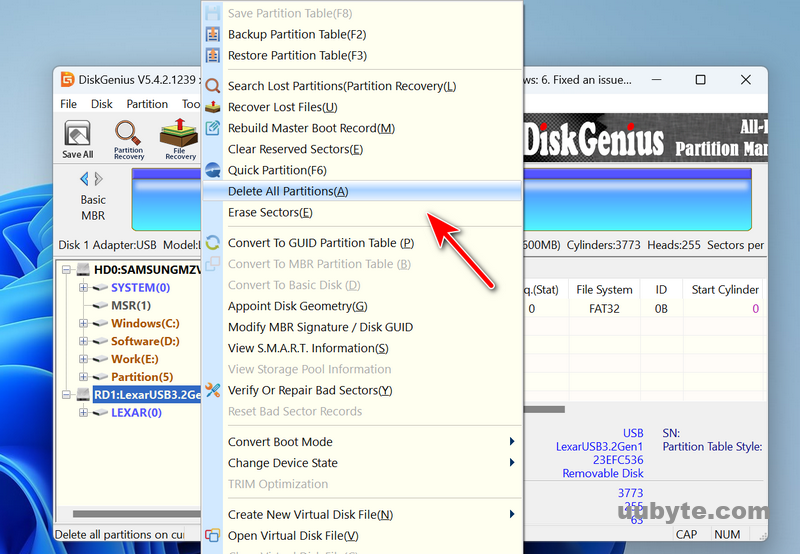
Step 3: Right click on the USB drive and choose Delete All Partitions(A).
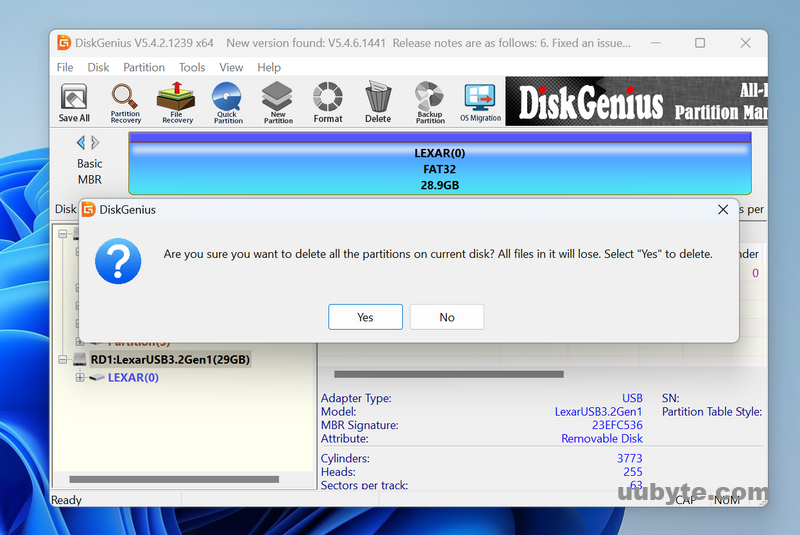
Step 4: This will format the USB drive completely. Before doing this, please take a backup of the files. Click Yes to proceed.
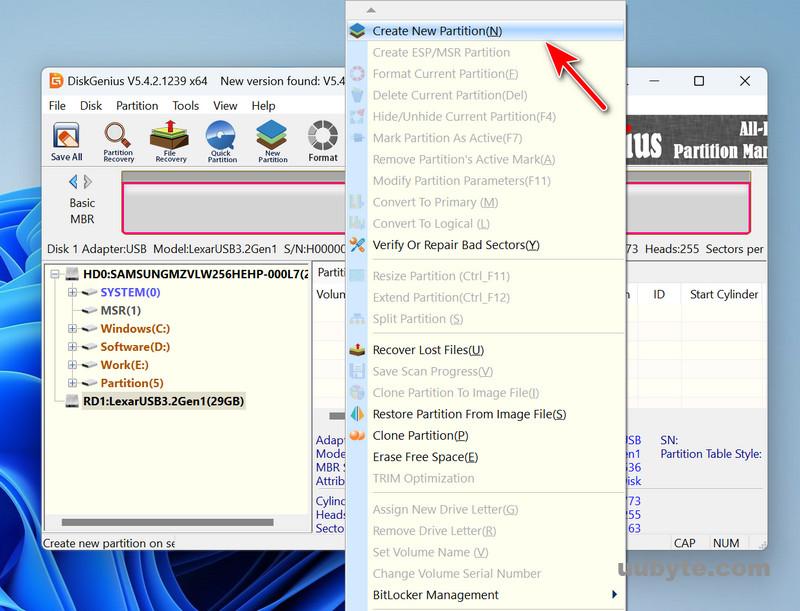
Step 5: You will get a blank USB with no file system after formatted. To make it recognized by Windows 11, you should create a new partition (FAT32/NTFS/exFAT). Right click on the USB name and choose Create New Partition from pop-up menu.
Step 6: Now, you should choose the the USB drive from the pop-up Window by clicking the Select Partition button. Then, click the Start button to add a new partition to the target USB device.

Step 7: Once a new partition is created, you will find some brief information about the USB drive. In our example, the USB is formatted with FAT32 and the volume name is LEXAR.
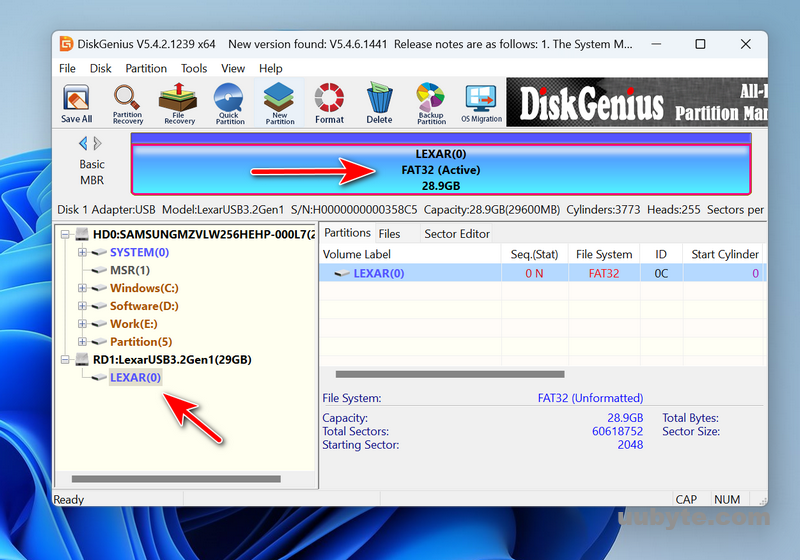
Step 8: You should see the USB drive name in Windows 11 file explorer if all the steps go smoothly.
Note: You should assign a drive letter to the USB in Disk Management utility if the drive is not showing up. The steps are available in Scenario 1.
Tried Two Suggestions but Still Not Fixed Yet?
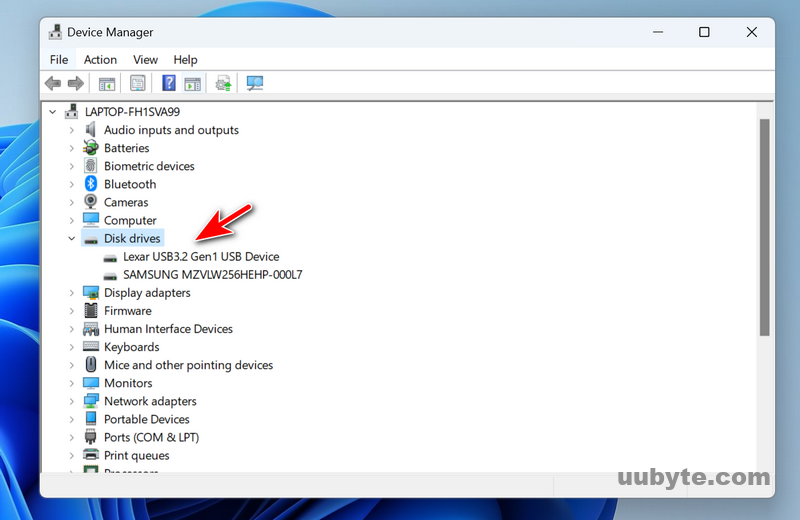
Besides the two common cases listed above, another possible reason is that the USB drive is not installed properly. If this was the case, there is a yellow mark on the USB device in Device Management. This means you have to download and install the correct USB drive to fix this.
Just go to the USB vendor website and move to the download section. Input the USB model and you will be able to download the driver from there.
However, this chance is quite rare as Windows 11 already have packed the universal USB device driver by default.
Video Guide: How to Fix a Plugged in USB Drive Not Showing Up in Windows 11
Final Words
USB detection has been improved dramatically since Windows 10. Usually, you don’t have to do additional setup to make it working on a Windows 11 or Windows 11 computer. However, the chance is high for the USB device not being recognized by the computer after it is formatted on another device running macOS or Linux.
In addition, there may be hardware failure if none of the above solutions worked. In this way, you should go to the repair shop or just buy a new USB drive instead.