Table of Contents
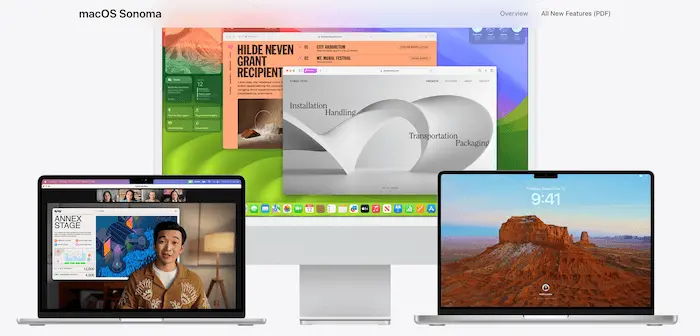
After months of beta review, the stable version of macOS Sonoma (14.0) is finally public available in September 2023. macOS Sonoma is now the latest desktop operating system for MacBook, MacBook Pro, Mac Mini and iMac.
When a new OS comes out, software developers and tech enthusiast are eager to try it out. No matter what the reason is, the first step is to create a macOS Sonoma bootable USB and install it on a target machine. In this tutorial, we will show you the detailed steps on how to make Sonoma bootable USB on a Windows 10 PC. The steps are the same for Windows 11.
Why You Should Install or Upgrade to macOS Sonoma
With macOS Sonoma, your Mac experience will reach new heights. Enhance your video call appearances. Engage with data like never before. Amplify your gaming prowess. Plus, unveil numerous methods to tailor your Mac to your preferences. Here are some compelling reasons to consider upgrading to the macOS Sonoma:
New Features: Each major macOS release introduces new features and enhancements. Upgrading allows you to take advantage of these new tools and functionalities, improving your overall experience and productivity.
Performance Improvements: New versions often come with optimizations that can make your Mac run smoother and faster.
Refined User Experience: Apple often tweaks the user interface and experience in new releases, making it more intuitive and aesthetically pleasing.
Integration with Apple Ecosystem: If you have other Apple devices (like an iPhone, iPad, Apple Watch, or Apple TV), the latest macOS often brings better integration and continuity features between devices.
macOS Sonoma Compatible Devices
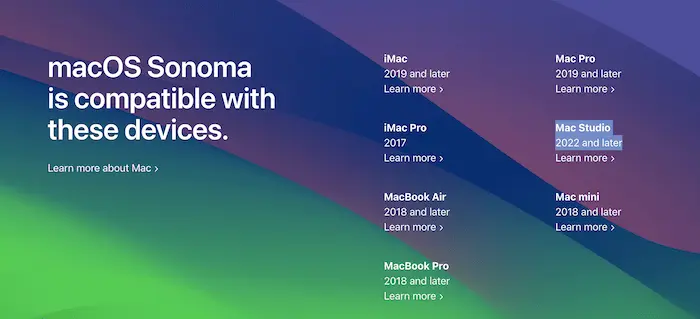
Unfortunately, not all Macs are supported by macOS Sonoma, especially the old models before 2018. The following are the Mac devices with official Sonoma support:
- MacBook Air 2018 and later
- MacBook Pro 2018 and later
- Mac mini 2018 and later
- iMac 2019 and later
- Mac Studio 2022 and later
For incompatible devices, you can follow this guide to install macOS Sonoma on unsupported devices.
Requirements
- macOS Sonoma DMG File
- A fast USB flash drive with more than 16 GB Storage
- UUByte DMG Editor
- Windows 10 or Windows 11 PC
How to Create macOS Sonoma Bootable Using Windows 10/11
Navigating between different operating systems can often seem like crossing bridges between two worlds. For users who primarily operate within the Windows ecosystem but occasionally need to delve into the macOS universe, having a macOS bootable USB can be invaluable. Whether you’re troubleshooting, setting up a dual-boot system, or just experimenting, creating a macOS bootable drive using Windows 10/11 can be a handy skill.
In this part, we’ll explore the steps and tools required to craft this bridge, allowing you seamless transitions between both OS realms. Buckle up and get ready to dive deep into the cross-platform journey!
Step 1: Check Hardware Compatibility
Before you embark on the process of creating a macOS bootable drive on a Windows 10 or Windows 11, it’s crucial to ensure that the hardware you intend to use is compatible with macOS. Not every computer or component is built to work with Apple’s operating system, and attempting to install macOS on incompatible hardware can lead to a myriad of issues.
Mac Model: If you’re planning to create a bootable drive for an actual Mac, make sure the macOS version you’re aiming for supports your Mac model. Apple provides lists of compatible Mac models for each macOS release on its website.
PC Hardware: For those trying to run macOS on a non-Apple computer (often referred to as a Hackintosh), it’s a bit more complicated. You’ll need to research and ensure that your PC’s CPU, GPU, motherboard, and other critical components are compatible with macOS. Websites and forums dedicated to the Hackintosh community can be valuable resources for this.
Remember, compatibility is key. Taking the time to verify that your hardware is compatible can save you hours of potential troubleshooting later on.
Step 2: Download macOS Sonoma DMG File
Once you’re confident in your hardware’s compatibility, the next essential step is to obtain the macOS DMG file. This file contains the macOS installation package, which will be transferred to your USB drive to make it bootable. Here is the download link for macOS Sonoma (stable 14.0) from Google Drive:
https://drive.google.com/file/d/1NaPVaoh_OfZK0FBy43PzA-cxQ4JuoV8w/view
After DMG file is downloaded, it’s a good practice to verify its integrity. You can do this by comparing its checksum value (often provided by trusted download sources) to ensure the file hasn’t been altered or corrupted during download.
Step 3: Burn macOS DMG File to USB
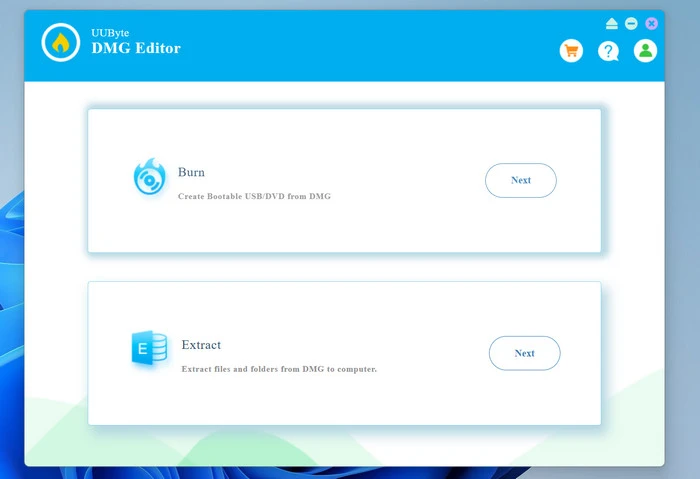
Having procured the macOS DMG file, the next phase involves burning this file to a USB drive to make it bootable. One of the efficient tools to accomplish this on Windows 10 or Windows 11 is the UUByte DMG Editor, a pioneering tool designed to simplify the complexities of managing macOS files on a Windows platform. This software stands out not just as a DMG file handler, but as a bridge that connects the macOS and Windows ecosystems. Whether you’re aiming to burn, extract, or edit DMG files, the UUByte DMG Editor emerges as an indispensable ally for tech enthusiasts and professionals alike.
First, download the UUByte DMG Editor software from its official website or a trusted source. Once downloaded, launch the installer and follow the on-screen instructions to install the program.

Now, plug in your USB drive to an available USB port on your computer. Ensure that it has enough space (typically at least 16GB) and is free of important data, as this process will erase its contents.
Start the UUByte DMG Editor software and click on the "Burn" option within the software.
Browse your computer to select and load the macOS Sonoma DMG file you downloaded in the previous step. In addition, the software should list available USB drives. Choose the one you wish to make bootable.
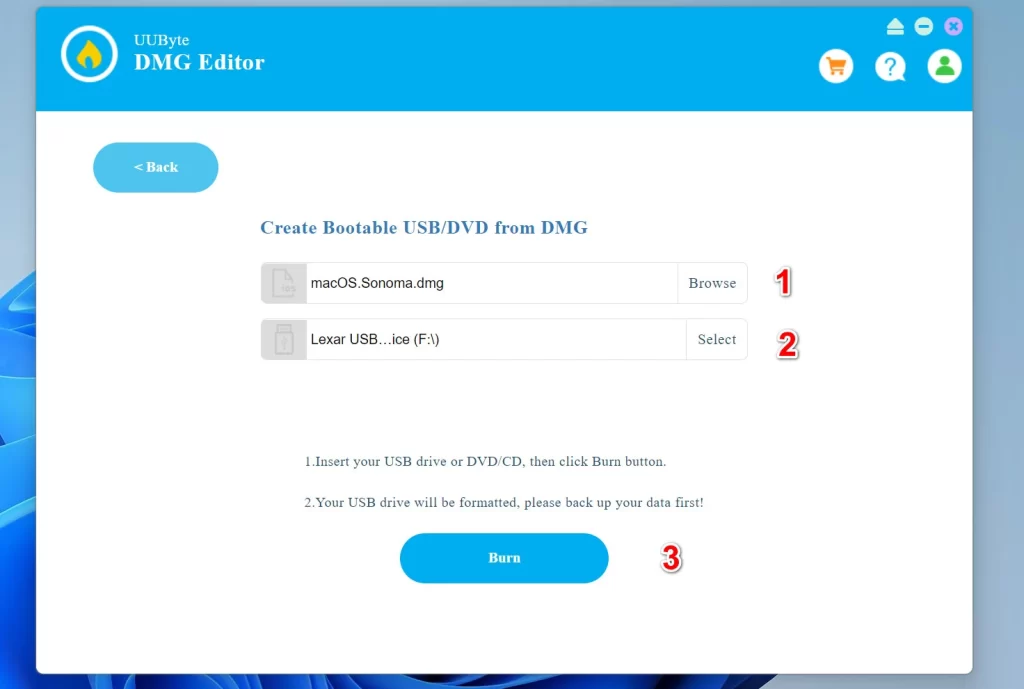
Finally, click on the "Burn" button within the software. The program will then start the process of writing the macOS Sonoma installation files onto the USB drive, effectively making it a bootable macOS Sonoma installer. Once the process is complete, the software will notify you. Safely eject the USB drive from your Windows computer.
Your USB drive is now a bootable macOS installer, thanks to the UUByte DMG Editor. Ensure you keep it safe and avoid adding or removing files from it, so it remains effective when needed for macOS installations or other related tasks.
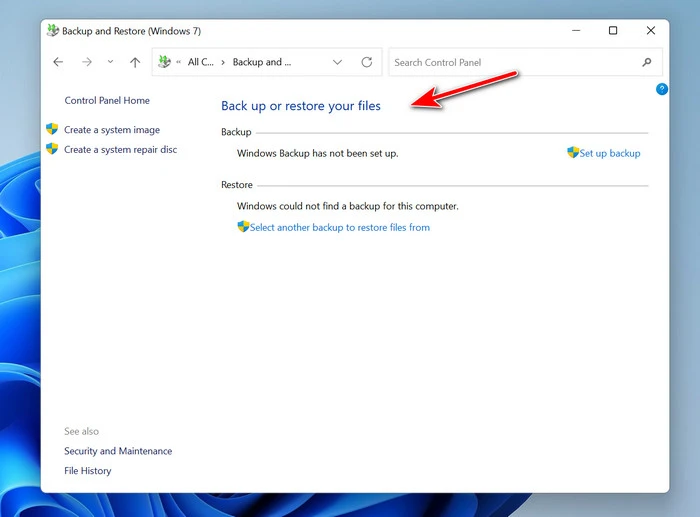
Bonus: Back Your Device before macOS Sonoma Installation
Backing up your computer—whether it’s a PC or Mac—is a crucial step before installing a new operating system like macOS Sonoma. This ensures that your data is safe, and you can restore your system to its previous state if something goes wrong during the installation process. You can use the built-in tool to make a full backup of the whole device or only copy the important data to an external drive.
By taking the time to back up your computer, you’re safeguarding your valuable data. This step provides peace of mind and a safety net, allowing you to proceed with macOS installation or any other major system changes with confidence.
Troubleshooting Guide for Creating macOS Bootable USB on Windows
Making a macOS Sonoma bootable USB on Windows PC can sometimes run into obstacles. Here’s a troubleshooting guide to help address the most common issues:
1. Error Downloading macOS DMG File:
- Check Internet Connection: Ensure you have a stable internet connection. Interruptions can corrupt the download.
- Reputable Source: Always download from a reputable source. Avoid unofficial sites that may host tampered or corrupted files.
2. USB Drive Not Recognized:
- Different USB Port: Sometimes, specific USB ports might be faulty. Try a different port on your computer.
- Reformat the USB Drive: Ensure the USB drive is formatted correctly, typically FAT32 or exFAT. Remember, reformatting will erase all data on the drive.
- Check Drive Health: The USB drive might be failing. Use tools like Windows’ built-in Disk Management to check its health.
3. Error During the Burning Process:
- Drive Space: Ensure your USB drive has sufficient space (generally at least 16GB).
- Close Other Programs: Running other software might interfere with the burning process. Ensure you close unnecessary applications.
- Try Different Software: If one program doesn’t work, consider using another reputable tool for the task.
4. Bootable USB Not Working:
- BIOS/UEFI Settings: Before your computer boots into Windows, it checks for guidance from the BIOS/UEFI. Ensure you’ve set your computer to boot from the USB drive. You might need to disable ‘Secure Boot’ and enable ‘Legacy Boot’ in the BIOS/UEFI settings.
- Test on Another Computer: This helps determine if the issue is with the USB drive or the computer.
5. MacOS Installer Error on Boot:
- Corrupted DMG File: If the DMG file used was corrupted or tampered with, the macOS installer might not work. Redownload from a trusted source.
- Hardware Compatibility: Ensure the computer you’re trying to install macOS on is compatible. Not all hardware configurations will work, especially if attempting a Hackintosh setup.
Our Final Words
In the intricate dance of technology, melding macOS and Windows can sometimes seem akin to blending oil and water. Yet, with the right tools and guidance, it’s entirely feasible to create a harmonious synergy between the two. While challenges can arise when creating macOS Sonoma bootable USB on a Windows device, they’re not insurmountable. By understanding potential pitfalls, employing systematic troubleshooting, and leaning on the collective wisdom of the tech community, users can effectively bridge the macOS-Windows chasm. The journey might have its complexities, but with perseverance and the right resources, success is well within reach.