Table of Contents
I can see a lot of Mac users had upgraded their Mac to the latest macOS Sonoma. As a branded new version in early stage, there are plenty of bugs and this is normal. One of the biggest issues with Sonoma is the inability to mount external drives, especially those ones encrypted by FileVault. Some of the external drives, including:
- Normal hard drive or SSD
- Time Machine Backup Drive
- NAS Network Drive
- Fusion Drive
You might also receive this error message:
The disk "the name of the external drive" can’t be unlocked. A problem was detected with the disk, which prevents it from being unlocked."
We will share a couple of effective suggestions to help you fix this issue if external drive is not mounting properly on Mac Sonoma.
[Update]: This has been a known issue in Sonoma 14.0 and Apple will fix this on the next release. So please upgrade macOS Sonoma to the latest version. If this does not work, then try the following suggestions to fix the issue.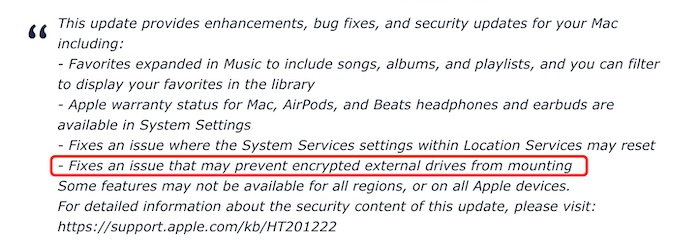
1. Reboot Your Mac
This is the simplest solution you can try out and for some times, it is the best way to fix some weird issues.
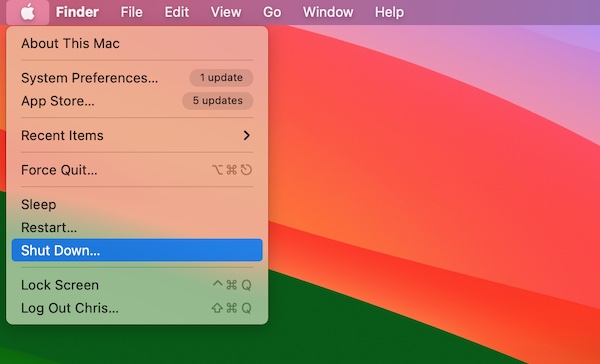
To do this, please unplug all external drives and shutdown your Mac. Wait a few minutes and power on the Mac. You will be prompted to enter a password to access the content.
After successful login, connect the external drives and you will see all the drives are mounted in the Finder app.
2. Boot in macOS Recovery and Mount the Drive in Disk Utility
If a reboot did not help, then another reliable solution is boot into macOS Recovery.
On an Intel Mac: Power on the Mac and press and hold Command + R keys.
On Apple Silicon Mac: Press and hold the power button on your Mac until the system volume and the Options button appear.
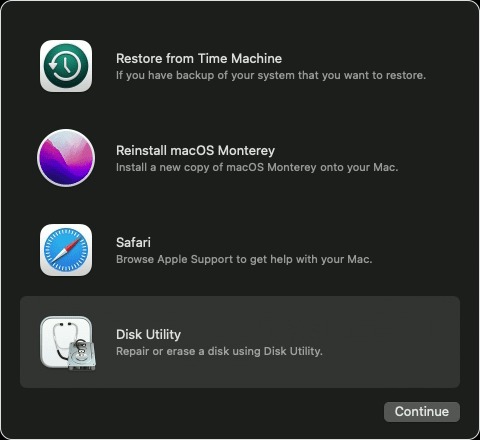
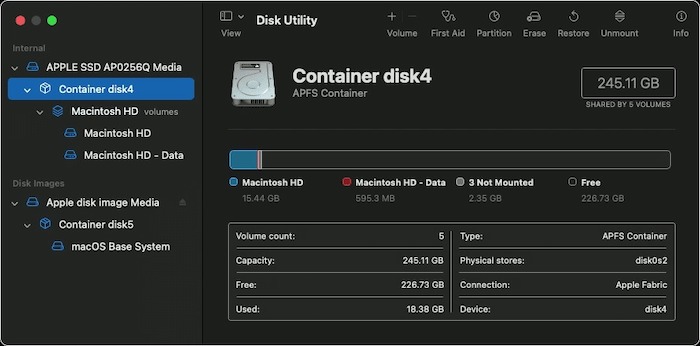
After that, select the Disk Utility app and click the external drive name.
You will be asked to enter the password to access the content if this drive is encrypted by FileVault.
Once it is done, reboot your Mac and the external drive will mounted successfully on Mac Sonoma.
3. Mount the Drive with Commands in Terminal App
This fix is applicable depending on your disk’s format – be it the modern APFS Container layout or the traditional Core Storage. Unsure of your format? No stress. Start with the first method; if it doesn’t pan out, diskutil will guide you to the alternative approach. Here’s how to begin:
First, ensure your external disks are connected. Launch the terminal and enter:
diskutil list
This command displays all volumes accessible to your Mac. Locate your external disk and note its identifier (for instance, it might be "disk3s2"). Replace "disk3s2" in the following command with your disk’s actual identifier:
sudo diskutil apfs unlockVolume disk3s2
During this process, you’ll encounter up to two password prompts. The first, labeled "Password:", asks for your Mac’s admin password (because of "sudo"). The second, "Passphrase:", requires your disk’s password.
If the procedure succeeds, your disk will mount correctly. If not, and you encounter an error, follow these steps:
diskutil coreStorage list
This displays all CoreStorage volumes. Your target is usually the "Logical Volume Family" in the hierarchy, not the "Logical Volume". Identify the UUID next to the desired volume (it looks like a long string, e.g., 2DFBD430-5FD7-11EE-A8B4-5F1EC8397ED9). Using this UUID as an example, run:
sudo diskutil coreStorage unlockVolume [Your UUID]
Remember, the Password prompts will appear again. Successfully completing these steps should mount your disk.
4. Create a New Local Account for Login on Your Mac
Creating a new local account on your Mac is a straightforward process that allows you to have multiple users on a single device, each with their own settings, files, and applications. This is particularly useful if you share your Mac with others or want to keep your work and personal profiles separate. The process is user-friendly and can be done in just a few minutes. Below are the steps to create a new local account for login on your Mac:
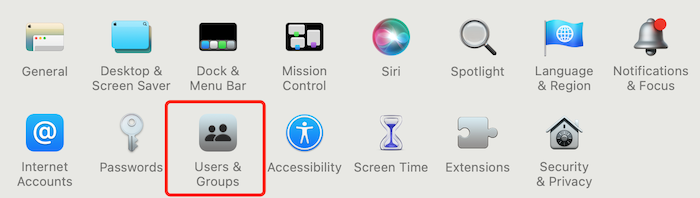
Step 1: Access Users & Groups
In the System Preferences window, look for "Users & Groups" (this may be represented by an icon of two silhouettes). Click on it to open the Users & Groups settings.
Step 2: Unlock the Settings
If the settings are locked, click on the lock icon at the bottom left corner of the window. You will be prompted to enter the administrator username and password. This is necessary to make changes to user accounts.
Step 3: Add a New User
Once the settings are unlocked, click the "+" button below the list of user accounts. This button is usually found at the bottom left of the Users & Groups section.
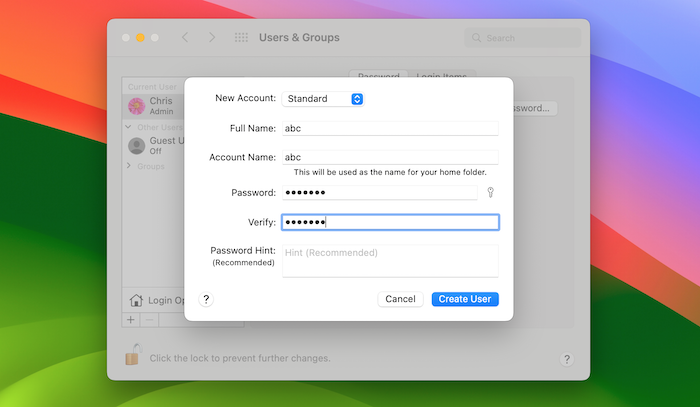
Step 4: Choose the Account Type
A new window will pop up where you can select the type of account you wish to create. You can choose from options such as Administrator, Standard, Managed with Parental Controls, etc. Select the one that best suits your needs.
Step 5: Fill in the User Details
In the same window, fill in the required fields such as full name, account name, password, and password hint. Ensure that the password is secure and the hint is something that can help you remember the password without being too obvious.
Step 7: Create the Account
After filling in the details, click on the "Create User" button to finalize the creation of the new account.
5. Remove FileVault Encryption from the Drive
FileVault is an encryption feature built into macOS that offers an additional layer of security to your data. However, there might be situations where you need to remove this encryption. Removing FileVault encryption is a straightforward process, but it’s crucial to proceed with caution to ensure your data’s safety.
Go to the "System Preferences" on your Mac. Here, click on "Security & Privacy" and navigate to the "FileVault" tab. You’ll see a lock icon at the bottom left; click it and enter your administrator password to make changes. If FileVault is on, you’ll find a button that says "Turn Off FileVault." Click this button to initiate the decryption process. The decryption time depends on the amount of data and your Mac’s performance capabilities, so it might take a while.
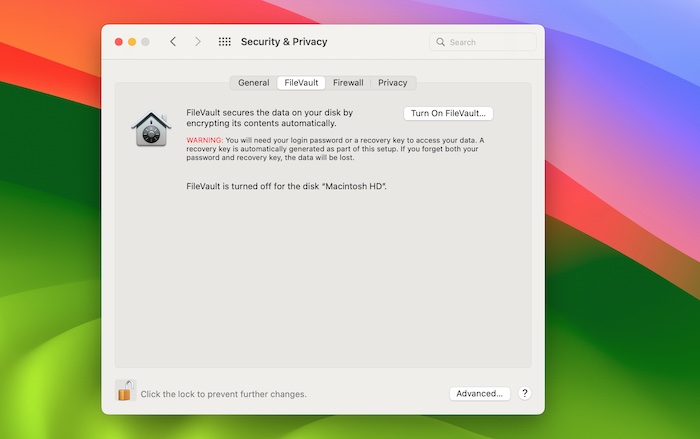
After initiating the decryption, you can continue using your Mac as usual; the decryption runs in the background. To check the progress, you can return to the "Security & Privacy" panel in "System Preferences." The FileVault section will display the decryption status. Once the decryption is complete, FileVault will be turned off, and your drive will no longer be encrypted.
6. Format the Drive to APFS
Apple File System (APFS) is Apple’s advanced file system introduced in macOS High Sierra and later, designed to maximize speed, efficiency, and reliability. Whether you’re preparing a new drive for use or upgrading an existing one, formatting a drive to APFS is a straightforward process that can significantly enhance your system’s performance.
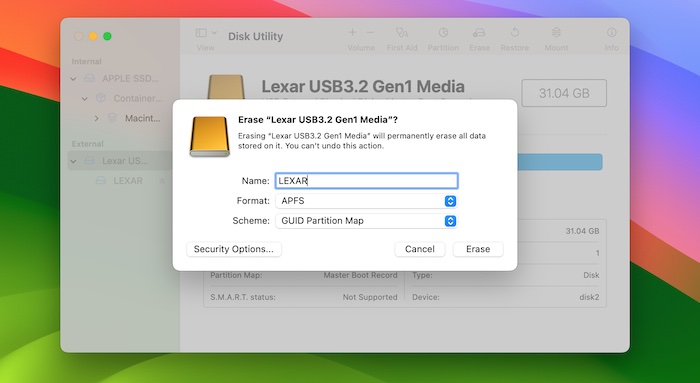
Open Disk Utility app on your Mac and select the drive you wish to format from the sidebar. Be sure to choose the correct drive as this process is irreversible. Click on the ‘Erase’ button at the top of the Disk Utility window. In the new dialog box, you’ll need to enter a name for the drive and select ‘APFS’ from the format options. If your Mac is equipped with an SSD, APFS is the recommended format; however, for older HDDs or external drives, you might consider other format options depending on your needs.
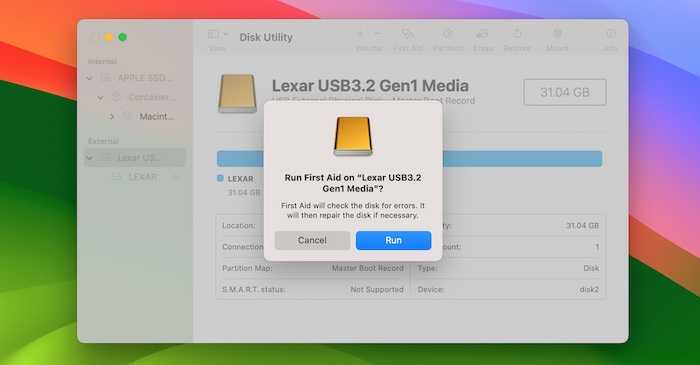
7. Run First Air from Disk Utility App
Running First Aid from the Disk Utility app on your Mac is an essential step in maintaining the health and efficiency of your hard drive. This built-in tool checks for and resolves various file system issues, ensuring that your disk operates smoothly. Whether you’re troubleshooting a specific problem or performing regular maintenance, First Aid is a user-friendly solution that can be executed with just a few clicks. Here’s a simple guide on how to run First Aid using the Disk Utility app.
Once Disk Utility is open, you’ll see a list of available drives and volumes on the left side of the window. Select the disk or volume you wish to check. It’s important to note that running First Aid on the startup disk requires you to start your Mac in Recovery Mode. This is because the startup disk cannot be repaired while it’s being used to run the operating system.
After selecting the appropriate disk or volume, click on the ‘First Aid’ button located at the top of the Disk Utility window. A dialog box will appear, asking you to confirm that you want to run First Aid on the disk. Click ‘Run’ to start the process. The utility will then check the disk for errors and attempt to repair any issues it finds. This process may take some time, depending on the size and condition of the disk.
Conclusion
Sonoma is great but it has some annoying issues as well. If Mac Sonoma is not mounting external drive, then the above solutions will definitely help you fix the issue. Let me know if you have other possible solutions or contact us if the problem was not solved!