Making a Linux Mint bootable USB is honestly not that hard, and it’s one of the easiest ways to try Linux Mint without touching your current system right away. I’ve done this a few times before—sometimes to install Linux Mint on an old laptop, sometimes just to test it first—and using a USB drive is by far the most convenient option. Whether you want to fully switch to Linux Mint, set up dual boot, or just run it in live mode, a bootable USB is the way to go.
In this guide, I’m going to show how to create a Linux Mint bootable USB on both Windows and Mac with UUByte ISOKit After trying a few different methods, I found this one a lot easier than messing around with complicated commands or tools that feel outdated.
How to Create an Linux Mint Bootable USB Using UUByte ISOKit
Follow these step-by-step instructions to create your Linux Mint bootable USB drive using UUByte ISOKit on either Windows or Mac.
Step 1: Click the below link to download the Windows version of UUByte ISOKit. Run the installer and follow the on-screen instructions to complete the installation.


Step 2: Go to the Linux Mint official website (https://linuxmint.com/download.php) and download the latest ISO file.
Step 3: Plug in a USB drive and open UUByte ISOKit from your Start menu or desktop shortcut.
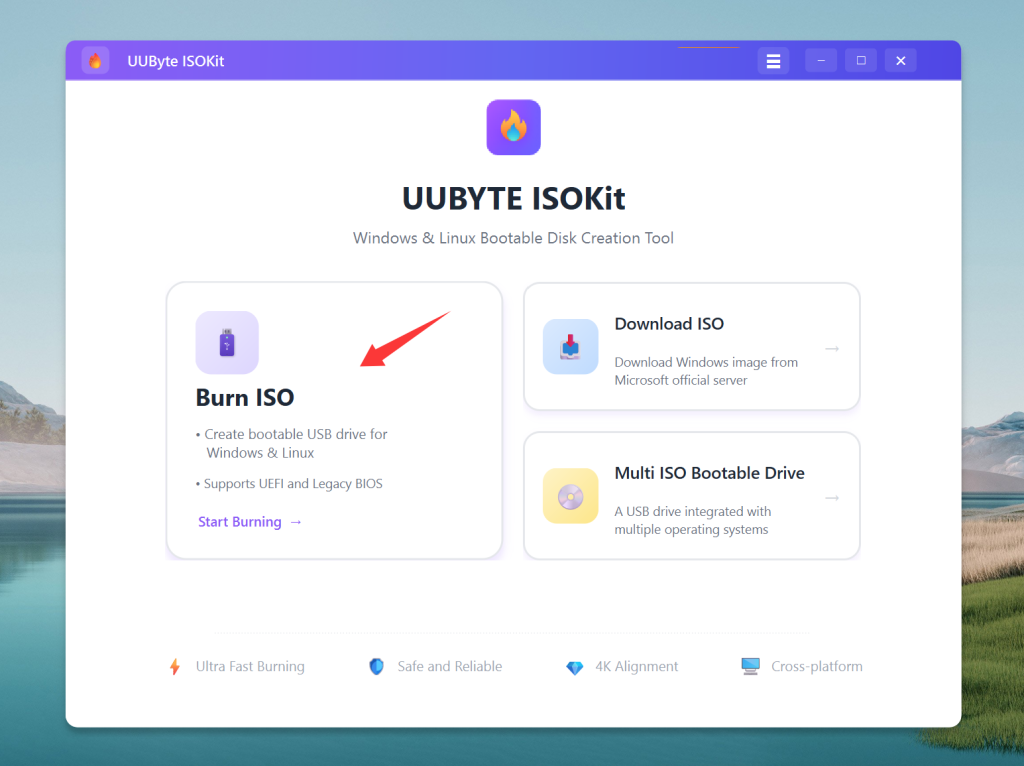
Step 4: In the UUByte ISOKit interface, click on the "Burn Linux Distro" option. Browse and select the downloaded Linux Mint ISO file. After that, choose the correct USB drive from the list.
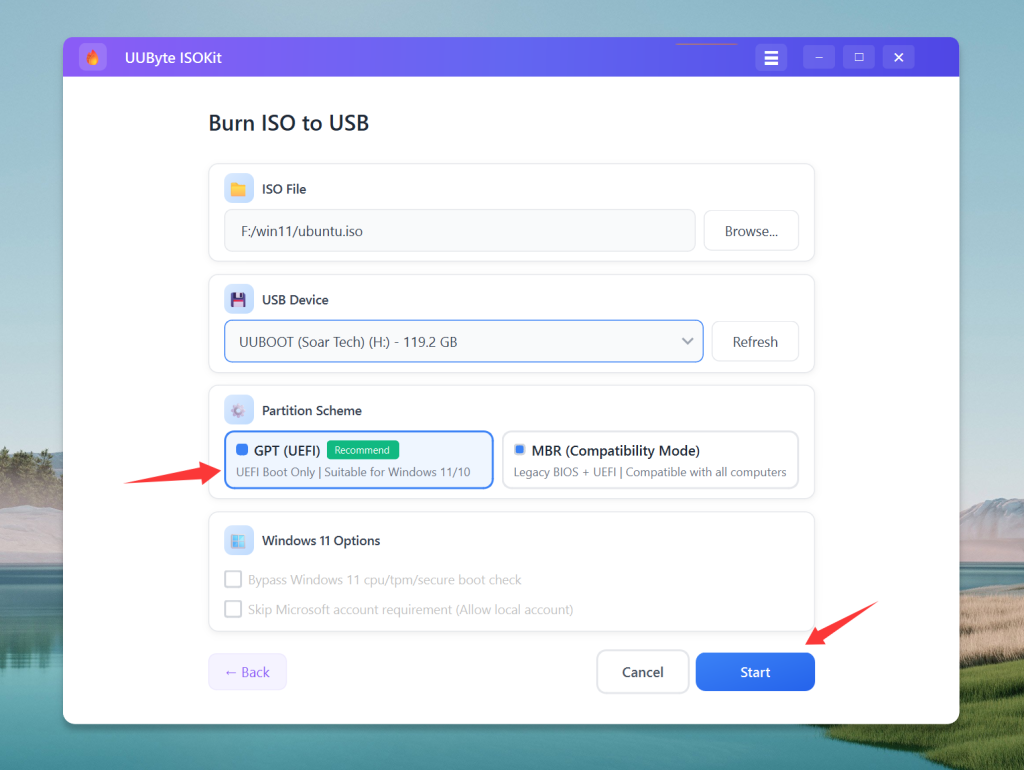
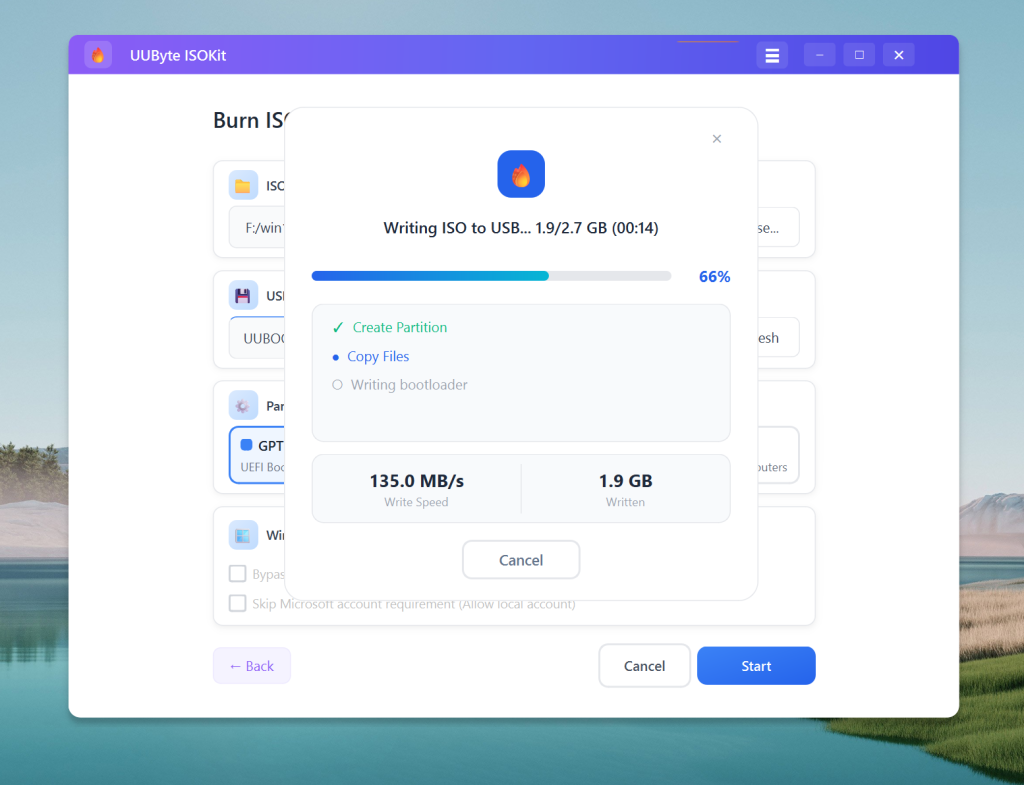
Step 5: Click the "Burn" button to begin the process. Wait for the software to complete writing the ISO to the USB drive. This may take several minutes.
Step 6: Once the process is finished, safely eject the USB drive from your computer. Your Linux Mint bootable USB is now ready to use.
Booting the Computer from the USB and Installing Linux Mint
With your bootable USB ready, the next step is to boot your computer from the USB drive and install Linux Mint. Plug the bootable USB drive into the computer where you want to install Linux Mint.
Restart the computer. As it starts up, you’ll need to access the boot menu. This usually involves pressing a specific key (such as F12, F10, Esc, or Del) immediately after powering on. Refer to your computer’s manual for the exact key.
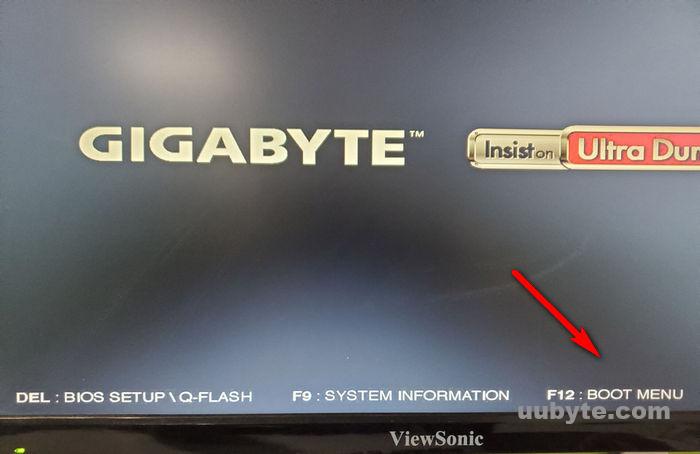
In the boot menu, select the USB drive as the primary boot device. This will allow your computer to boot from the USB instead of the internal hard drive.
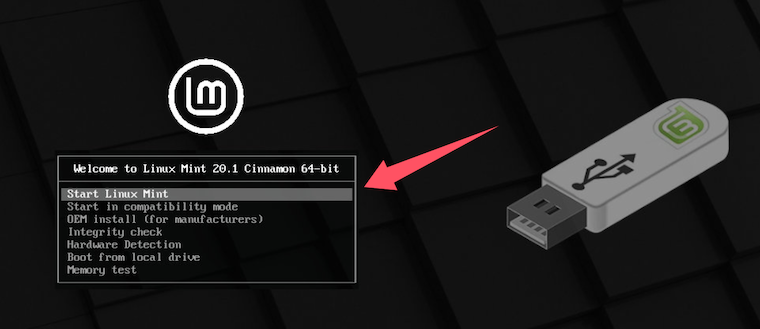
Once booted from the USB, you’ll see the the welcome screen. Select your language and follow the on-screen instructions.
Conclusion
Creating a Linux Mint bootable USB drive is an easy and efficient way to explore or install this user-friendly operating system. With just a few steps and the right tools, you can prepare a USB drive that works seamlessly on both PCs and Macs. Whether you’re a seasoned Linux user or a beginner, this method provides a quick and reliable way to get started with Linux Mint. Now that your bootable USB is ready, you can boot into Linux Mint, test its features, or proceed with installation on your preferred device. Enjoy the simplicity and power of Linux Mint!