Table of Contents
Windows 10 will end of support very soon and it is the right time to upgrade to Windows 11 for security reason. However, it is still a challenge task if you want to keep files, apps and settings during upgrade.
In this guide, we’ll walk you through the steps to safely upgrade to Windows 11 from Windows 10 without losing data.
Part 1: Download Windows 11 ISO

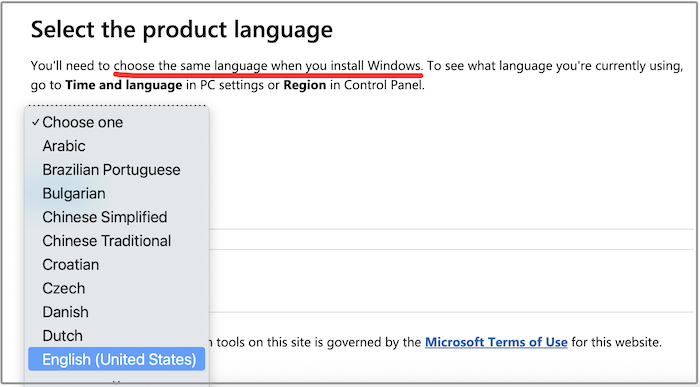
Before proceeding, the first step is to download the Windows 11 ISO image from Microsoft website. Please make sure the language of Windows 11 ISO is the same as the computer to get Windows 11 installed. This is very important to be able to keep apps, files and settings!
This command can be used in Powershell to check what the system language is:
dism /online /Get-Intl
Official Windows 11 ISO download page:
https://www.microsoft.com/en-us/software-download/windows11
Alternative Windows 11 ISO download page:
https://os.click/en/Windows:Windows_11
Part 2: Create Windows 11 Bootable USB from ISO
Next, back up important content on USB drive and download WinBootMate, one of the best programs for making Windows 11 bootable USB from ISO image. It can bypass Windows 11 system requirements so you can install Windows 11 on unsupported hardware. In addition, it is super easy to use and has less errors.
Step 1: First of all, download and install WinBootMate on a PC. WinBootMate is available in two versions, catering to both Windows and Mac users. You can download the appropriate version for your operating system.


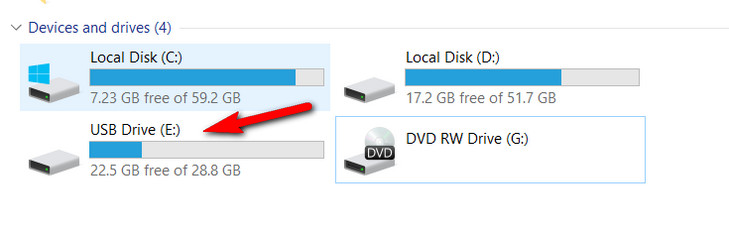
Step 2: Connect a USB flash drive (less than 64GB )to the computer and make sure you can see the USB name from the File Explorer.
Step 3: Open WinBootMate app and use the Browse button to import the downloaded Windows 11 ISO into the program. After that, choose "Create A Bootable USB" option.
And you will see the drive name under the drop-down menu. After that, enable the "Bypass Windows 11’s Secure Boot, TPM and CPU" option. You can also set a new name for the USB drive.
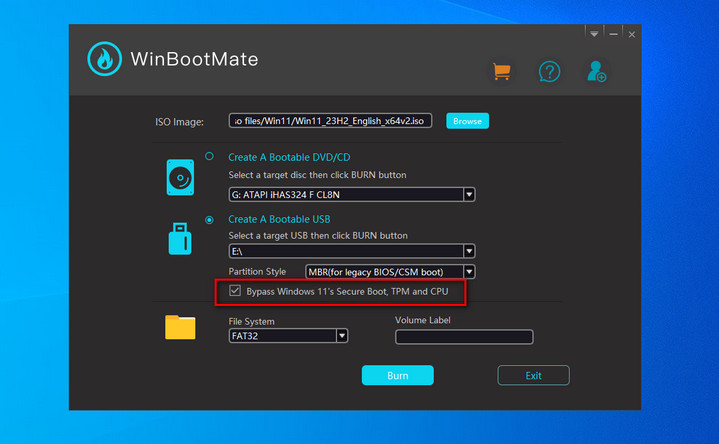
Step 4: When all the settings are fulfilled correctly, please click the Burn button to start patching Windows 11 ISO and burning the installation files to USB drive. This will make the USB bootable for Windows 11 installation.
Part 3: Free Upgrade Windows 10 to Windows 11
1. Go to the Sources folder of the USB you have created with WinBootMate app.
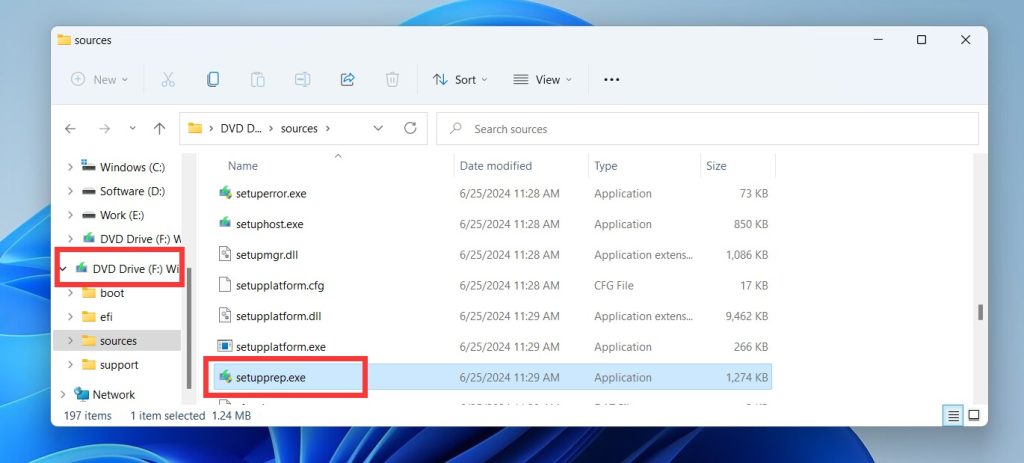
2. Hold the Shift key and right-click a blank space, then select "Open in Terminal".
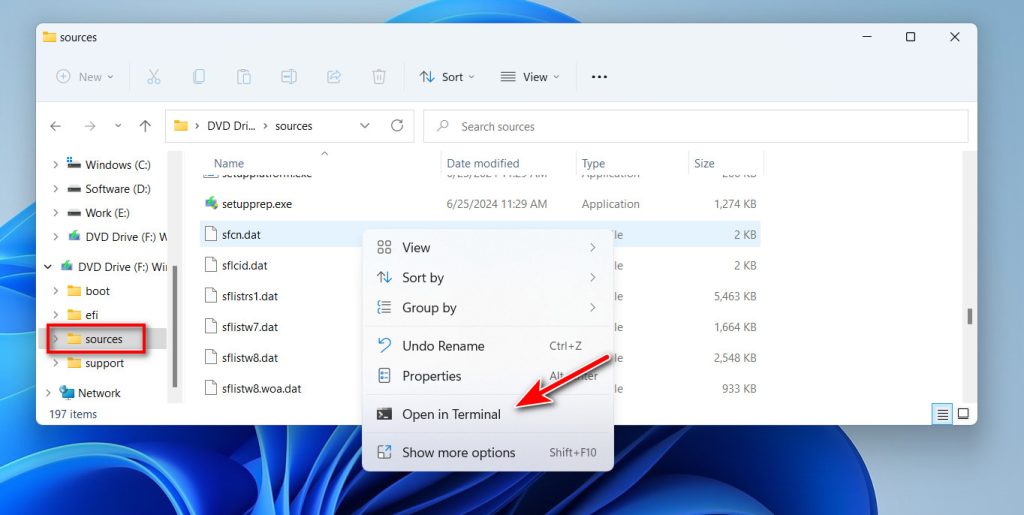
4. Type ".\setupprep.exe /product server" and press Enter.

Follow the on-screen instructions in a new window. Note that although the setup screen shows "Windows Server," you are still installing a regular edition that matches your current SKU. That is it.
Conclusion
This is a very simple and safe way to upgrade Windows 11 without losing data. Please follow the steps in above to get it done. If you have more question, please contact the support team.