Table of Contents
Despite Microsoft’s official end of support for Windows 7 in 2020, many users still prefer this classic OS for its simplicity, compatibility with legacy software, or nostalgic value. However, installing Windows 7 on modern hardware—especially systems with newer CPUs, SSDs, and USB 3.0 ports—can be challenging due to missing drivers and compatibility issues.
In this guide, we’ll walk you through the steps and workarounds needed to successfully install Windows 7 on a modern PC, ensuring it runs smoothly with updated drivers and key system tweaks. Before installation, we need to download Windows 7 ISO and create a Windows 7 bootable USB.
Part 1: Download Windows 7 ISO
Microsoft no longer holds Windows 7 ISO download. You need to download it from other sources. OS.CLICK is a trustworthy option now.
https://os.click/en/Windows:Windows_7:7601.17514
On the homepage, you’ll see options for various operating systems. Click on Windows to proceed. From the list of available Windows versions, select Windows 7. You’ll be prompted to choose the specific edition (e.g., Home Premium, Professional, Ultimate), language, and architecture (32-bit or 64-bit) of Windows 7 you wish to download.

Part 2: Create Windows 7 Bootable USB
Next, back up important content on USB drive and download UUByte ISO Editor, one of the best programs for making bootable USB from ISO image.It is super easy to use and has less errors.


Step 1: Download UUByte ISO Editor application from above location. Please note that this is a direct download link, which means the .exe file will be automatically downloaded when you click this link. Double-click the .exe file to install the software on your PC, and launch the application.
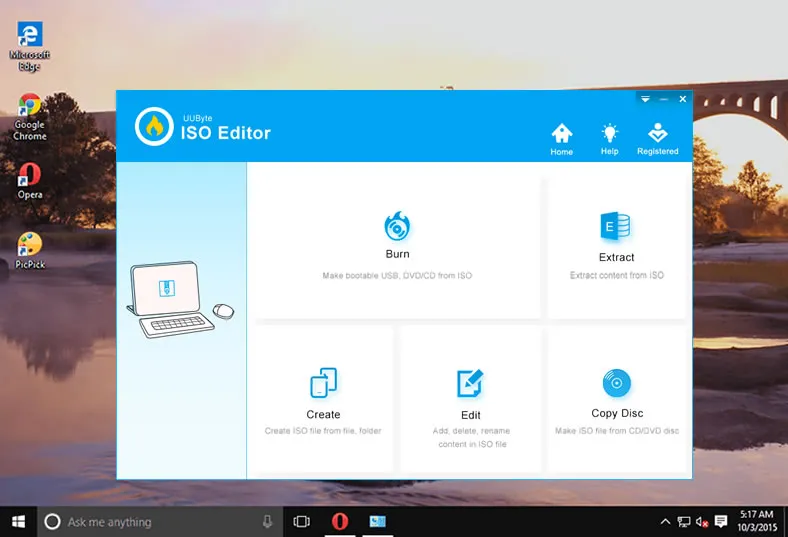
Step 2: Click "Burn" button on the main interface to initial the setup process. All you need to do is follow the onscreen instructions. After this, you will be taken to a page where you can select the ISO file from which you will be creating the bootable USB drive. Select the file and then insert the USB drive before moving to the next step.
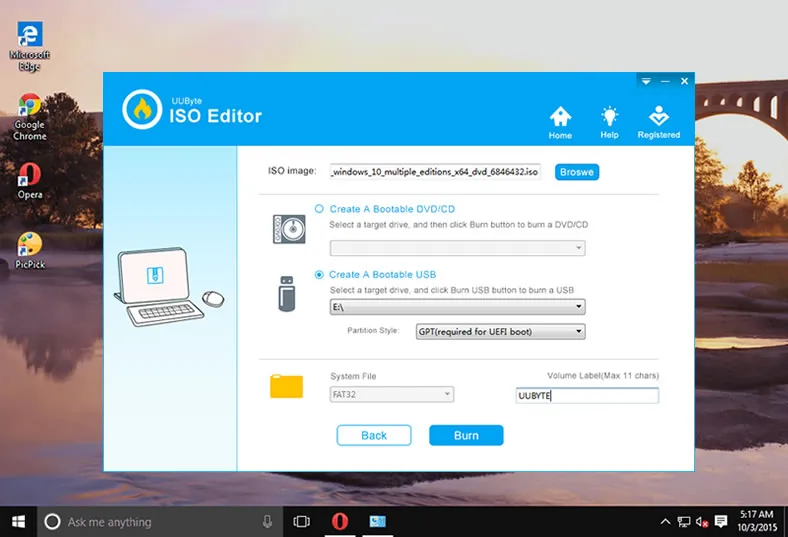
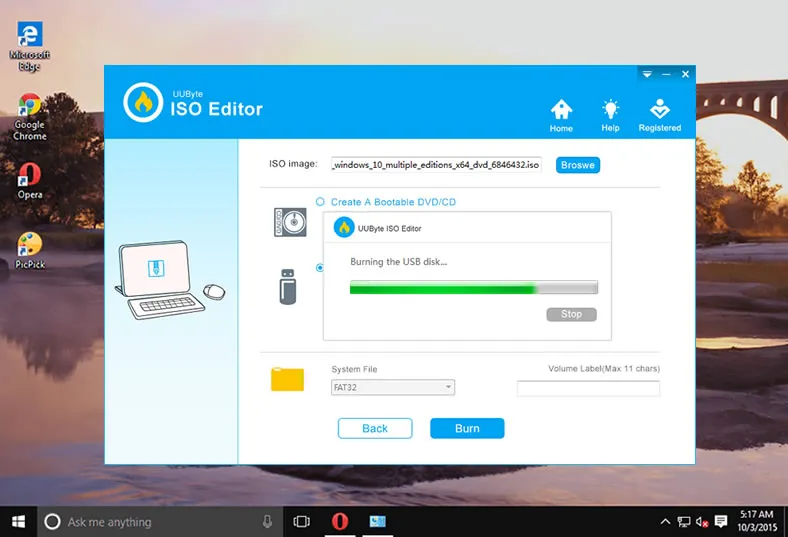
Step 3: You can now select USB as the burn option, and click on the button that says ‘Burn’. In a few moments, your bootable USB drive will be ready and you can remove it and use it for your purpose.
As you can see, there are no complicated steps to follow and no additional software required to create bootable media. The application is completely error free, so you can confidently use even a DVD or CD to create the required bootable media from your ISO file.
Part 3: Install Windows 7 from USB on Model Hardware
To boot from USB and install Windows 7, follow the steps below. This works for most PCs, including modern hardware (with a few tweaks).
1. Plug the bootable USB into the computer where you want to install Windows 7.
2. Turn on or restart the computer.
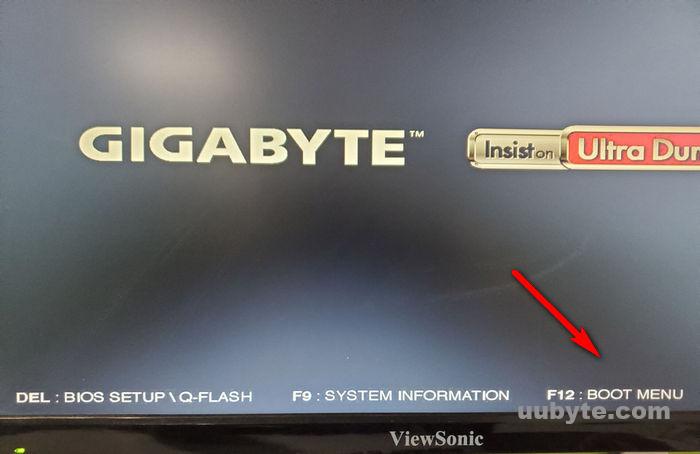
3. As soon as the PC starts, press the key to open Boot Menu. Usually, the key is F10, F12, Del or ESC. It depends on the motherboard brand.
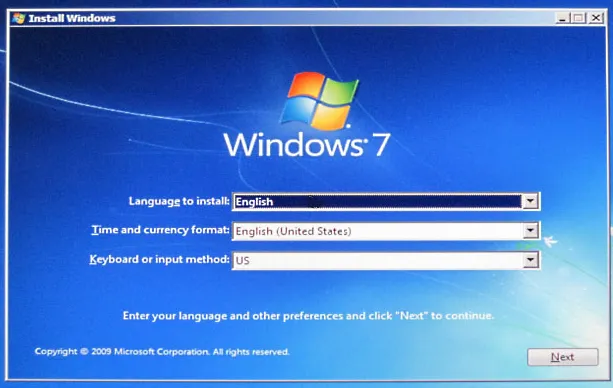
4. Use arrow keys to select your USB drive and hit Enter. Your PC will boot from the USB and load the Windows 7 setup screen. Follow the on-screen instructions to start the installation.
Conclusion
Getting Windows 7 up and running on modern hardware requires a bit of extra effort, but it’s entirely doable with the right tools and preparation. From slipstreaming USB 3.0 and NVMe drivers to disabling Secure Boot and configuring BIOS settings, each step plays a vital role in making the installation successful. Whether you’re setting up a retro gaming rig or testing legacy software, this guide should help you bridge the gap between classic Windows and today’s technology.