Table of Contents
Honestly, I never thought it could be so hard to important photos from iPhone to Mac, though I am an ex-iPhone users and a tech guy who knows smartphone and computer quite well. It is now 2022 and Apple still makes it so complicated to transfer data from iPhone to Mac, not mentioned the Windows PC.
The story starts from here. My wife has an 128 GB iPhone 13 and the storage is almost full. She was annoyed by the warning message that says iPhone storage is full from time to time. In addition, the device is not responding regularly because of short free space.

So she asked to import iPhone photos to Mac. By doing this, most of unused photos on iPhone can be deleted and more free storage will be released. You will learn the step-by-step guide on how to transfer photos from iPhone to Mac in this tutorial.
Why You Need to Import Photos to Mac?
The most important reason is for data security. The iPhone could be lost, stolen or broken without any notice. The photos would be gone forever if there was no backup. Hence, it is very necessary to backup iPhone photos to Mac. You can restore deleted or lost photos from backup at any time.
The second reason is to free more space on iPhone. From my observation, photos are the data that eats up storage sharply on most of iPhones. If the storage was full, your iPhone would become functioning abnormally. After importing photos on your Mac, you can delete old photos so a lot of space will be released.
In short, it is a very good practice to import iPhone photos to Mac as backup.
What Kind of Things You Should Prepare before Import
There are a couple of things you should know before the import get started. Otherwise, the process would fail at the half and waste a lot of your precious time.
How much storage the photos is take on iPhone: You need to know how much space the photos occupy on the iPhone. If the storage was larger than the free space on Mac, the import process will fail for sure.
To do this, open Settings app on your iPhone and tap the General menu. Now, navigate to Manage Storage option. Tap on it and you will how much space the Photo app takes on iPhone.

How much storage Your Mac currently has: The import task would be only working if the free space on Mac was larger than the storage your iPhone take on iPhone.
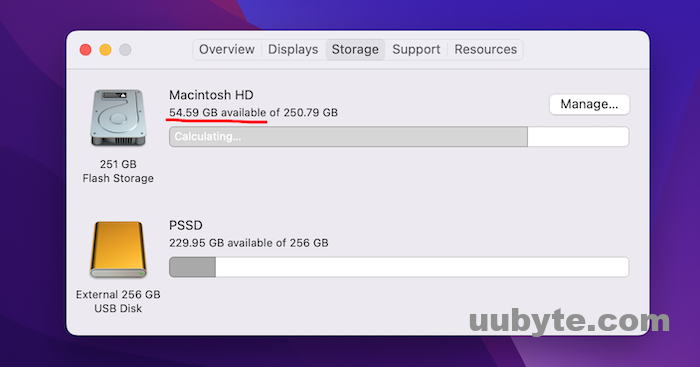
To do this, click on the Apple icon at the upper left corner on your Mac. From the pop-up, choose About This Mac. Next, click the Storage tab to see how much free space is left on this Mac. If the free space is not enough, then click the Manage... button to make more free storage for this transfer.
Get a Fast Speed USB (Optional): After you import photos to Mac, you might want to backup them to an external drive if there was not enough space on Mac. If this was your case, please do go and find a fast speed drive. This will reduce the transfer time dramatically.
How Much Time It Takes to Backup iPhone Photos to Mac
If you never did this before, you might think it is a simple task and take no time. Well, the transfer time really depends on how many photos you want to import to Mac.
In my example, it takes an hour to import iPhone to Mac via Photos app. It is nearly 9000 images being transferred from iPhone to Mac. As reference, it takes another two hours to backup iPhone photos from Mac to a USB 3.0 SSD. Actually, it will be a time consuming task.
Method 1: Import Photos from iPhone to Mac from Photos App
There are a few different ways that you can transfer photos from your iPhone to your Mac. One of the easiest ways is to use the Photos app that comes pre-installed on Mac. Here’s how:
1. Connect your iPhone to Mac using a Lightning cable.
2. Open the Photos app on your Mac.
3. Click on the device icon in the left sidebar. This will open up a window showing all of the photos and videos on your iPhone.
4. Select the photos and videos that you want to backup.
5. Click the Import button in the top right corner of the window.
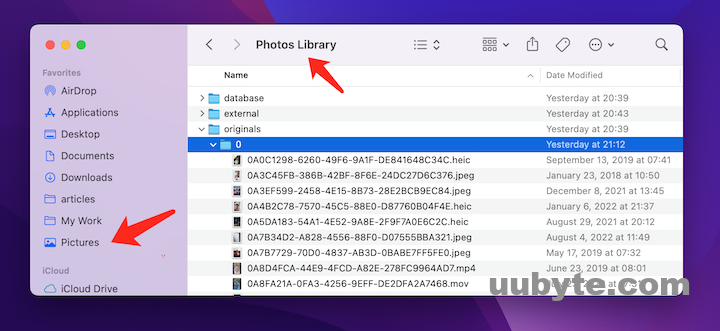
Your photos and videos will now be imported to your Mac. The only drawback is that the original image files are hidden from see. You need to locate the Photos Library in Picture folder and right click on it. Select Show Package Contents. From there, you will see all imported photos in originals folder.
Method 2: Import Photos from iPhone to Mac via AirDrop
AirDrop is a feature that allows you to share files between Apple devices. It uses Bluetooth to create a connection between the devices and then uses Wi-Fi to share the files. AirDrop is available on all Apple devices running iOS 7 or later and Macs running OS X Lion or later.
To use AirDrop, you need to have Bluetooth and Wi-Fi turned on. Then, you can simply select the file you want to share and choose the device you want to share it with. The recipient will then get a notification asking if they want to accept the file. Once the file is accepted, it will be downloaded to their device.
It is the ideal solution if there are only a small number of photos to be imported from iPhone to Mac. Here’s how to do it:
1. Make sure both your iPhone and your Mac are connected to the same Wi-Fi network.
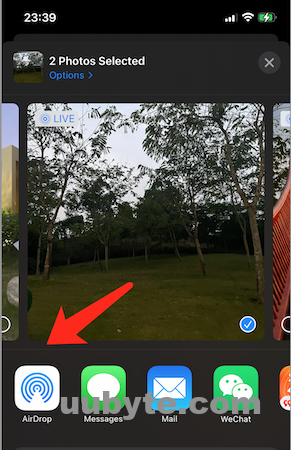
2. On your iPhone, open the Photos app and select the photos you want to transfer.
3. Tap the share icon in the bottom left corner of the screen.
4. Tap the AirDrop icon.
5. Select your Mac from the list of devices.
6. Your Mac asks if you want to receive the photos or not.

AirDrop is a great way to share files between Apple devices because it is quick and easy to use. It is also more secure than other methods of sharing files, such as email or social media, because the connection is only between the two devices and no one else can access the files.
There are a few things to keep in mind when using AirDrop. First, make sure that you trust the person you are sharing the files with. Second, keep in mind that AirDrop uses Wi-Fi, so it will use up your data if you are not connected to a Wi-Fi network. Finally, remember that AirDrop is only available on Apple devices, so you cannot use it to share files with Android or Windows devices.
Method 3: Import iPhone Photos to Mac via iCloud Drive
iCloud Drive is one of the most convenient ways to download photos from iPhone to Mac. It is a cloud-based storage service that allows you to store files of all types, including photos, in the cloud. Once you’ve uploaded your iPhone photos to iCloud Drive, you can access them from any device with an internet connection, including your Mac.
Here’s how to important photos from your iPhone to your Mac using iCloud Drive:
1. On your iPhone, open the Settings app.
2. Tap your name at the top of the screen.
3. Tap iCloud.
4. Tap iCloud Drive.
5. Make sure the switch next to iCloud Drive is turned on.
6. Tap Photos.
7. Make sure the switch next to iCloud Photos is turned on.
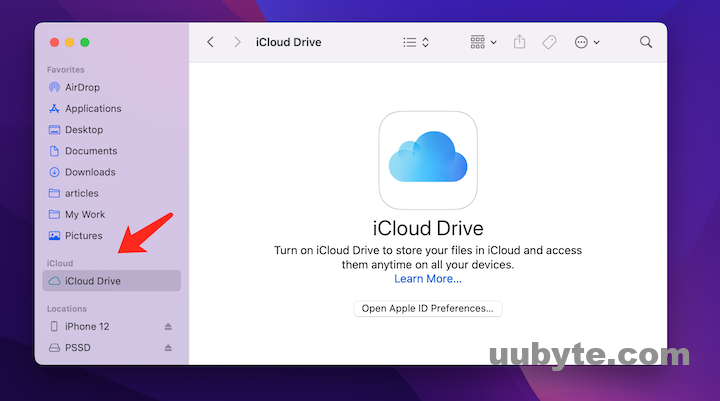
8. On your Mac, open the Finder.
9. Click the iCloud Drive icon in the sidebar.
10. Double-click the Photos folder.
11. Your photos will now be synced to your Mac.
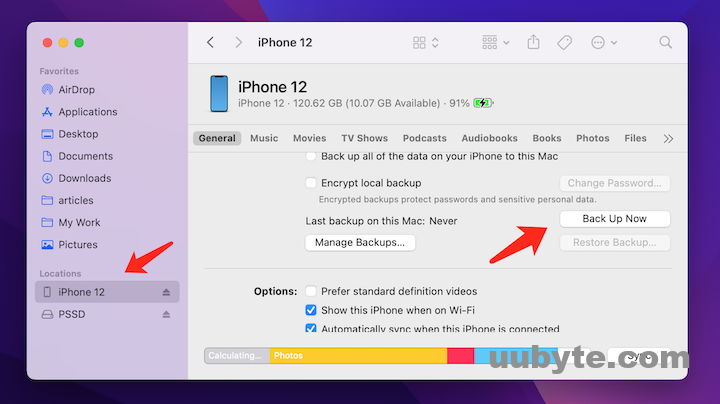
Method 4: Import iPhone Photos to Mac from Finder (as Backup)
Backing up iPhone to Mac is a great way to keep a local copy of your data in case you need it, including the photos. You can do this with the built-in Finder app, which replaces the iTunes as the stock backup app for iOS device on Mac. On old Macs, you need to use iTunes app to achieve this important task.
Here goes the complete instructions:
1. Connect your iPhone to your Mac using a Lightning cable.
2. Open the Finder and click on the "Devices" section in the sidebar.
3. Click on your iPhone in the list of devices and then click on the "Back up" button.
4. Choose any location on your Mac to save the backup.
However, you won’t be able to view or copy photos from this backup file. You can only restore the device to get the photos you backed up previously.
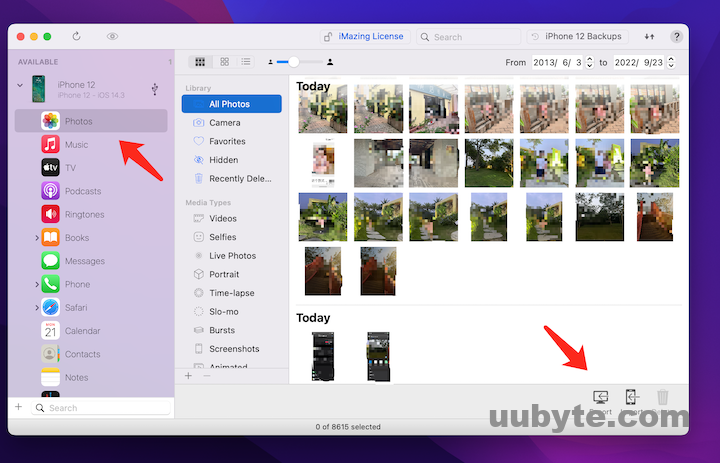
Method 5: Import Photos from iPhone to Mac Using iMazing App
iMazing is a third-party app that allows you to transfer photos (and other data) from your iPhone to Mac in a more flexible manner. It’s easy to use and has a free trial, so you can try it out before deciding whether to purchase it.
Here’s how to use iMazing to transfer photos from iPhone to Mac:
1. Download and install iMazing on your Mac.
2. Connect your iPhone to your Mac using a Lightning cable.
3. Launch iMazing and select your device.
4. Click the "Photos" tab.
5. Select the photos you want to transfer.
6. Click the "Export" button.
7. Choose where you want to save the photos on your Mac.
8. Click the "Export" button.
That’s all there is to it! iMazing makes it a lot of easier to import photos from iPhone to Mac. However, you need to buy a license to activate the app.
Video Tutorial: How to Important Photos from iPhone to Mac 2022
The Bottom Line
Importing photos from iPhone to Mac is not a rocket science. However, the whole process is not that easy as imaged. We share five different ways to help you transfer iPhone Photos to Mac. Please read each methods carefully and know the pros and cons. Finally, pick up the best one based on your own case.