Table of Contents
Windows 10 ISO is a must-have requirement for creating a Windows 10 install media. Whether you’re setting up a new PC, performing a clean install, or troubleshooting a system, having a bootable Windows 10 install media is essential. Unfortunately, Microsoft does not offer an straightforward way to download the Windows 10 ISO file, which you can use to create installation media on a USB drive or DVD.
In this guide, we’ll walk you through the steps to safely download the 64-bit Windows 10 ISO and show you how to create a bootable install media from it — no technical expertise required.
Part 1: Download Windows 10 ISO 64-bit
Microsoft only holds one version of Windows 10 ISO. This is not enough for all users. Don’t worry. We will offer a flex and safe way to download Windows 10 ISO 64 bit.
First, open the following link from a browser, which is the home page of Windows 10 ISO download.
https://os.click/en/Windows:Windows_10
On the homepage, you’ll see options for various operating systems. From the list of available Windows versions, select Windows 10.
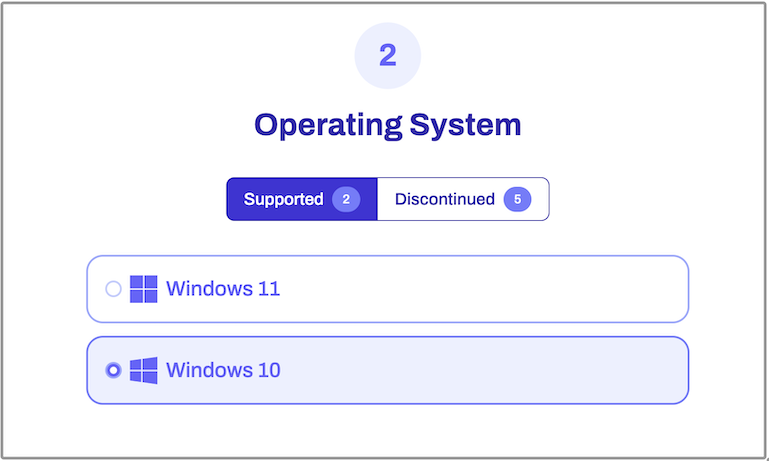
You’ll be prompted to choose the specific edition.
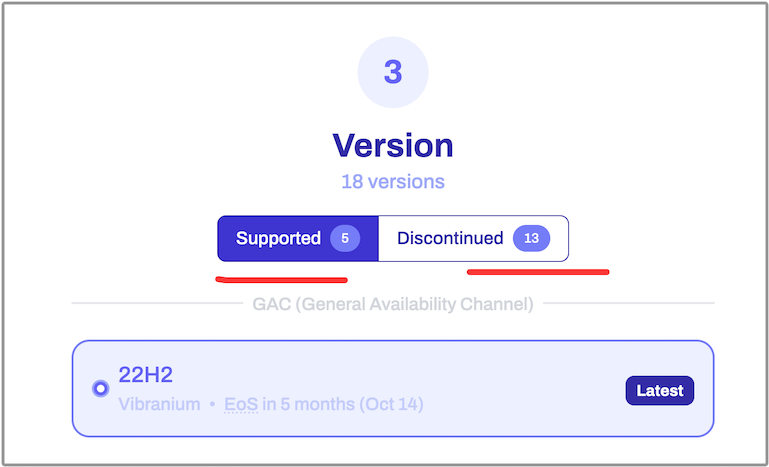
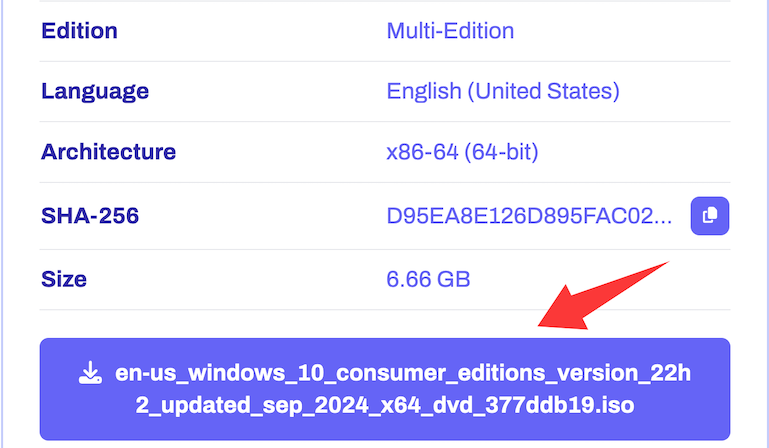
After that, choose the language, and architecture (32-bit or 64-bit) of Windows 10 you wish to download. Once it is done, you will be presented a download link for Windows 10 64-bit.
Part 2: Create Windows 10 Installation Media
Next, back up important content on USB drive and download UUByte ISO Editor, one of the best programs for making bootable USB from ISO image.It is super easy to use and has less errors.


Step 1: Download UUByte ISO Editor application from above location. Please note that this is a direct download link, which means the .exe file will be automatically downloaded when you click this link. Double-click the .exe file to install the software on your PC, and launch the application.
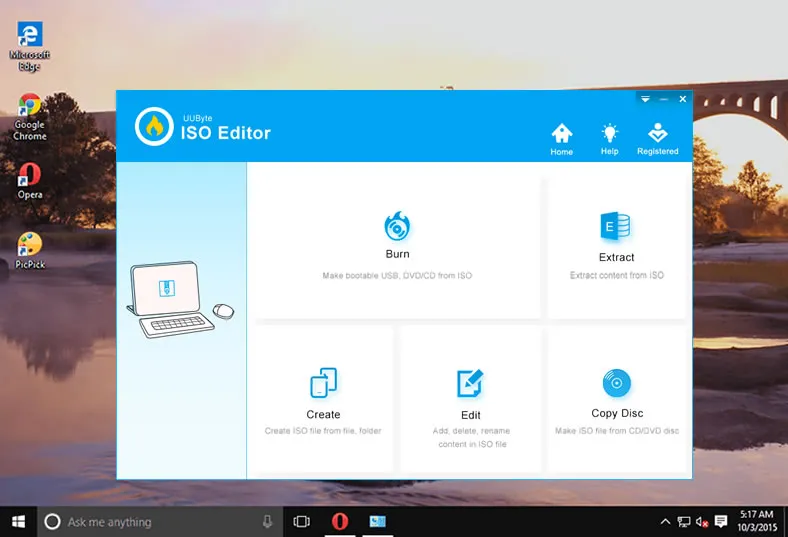
Step 2: Click "Burn" button on the main interface to initial the setup process. All you need to do is follow the onscreen instructions. After this, you will be taken to a page where you can select the ISO file from which you will be creating the bootable USB drive. Select the file and then insert the USB drive before moving to the next step.
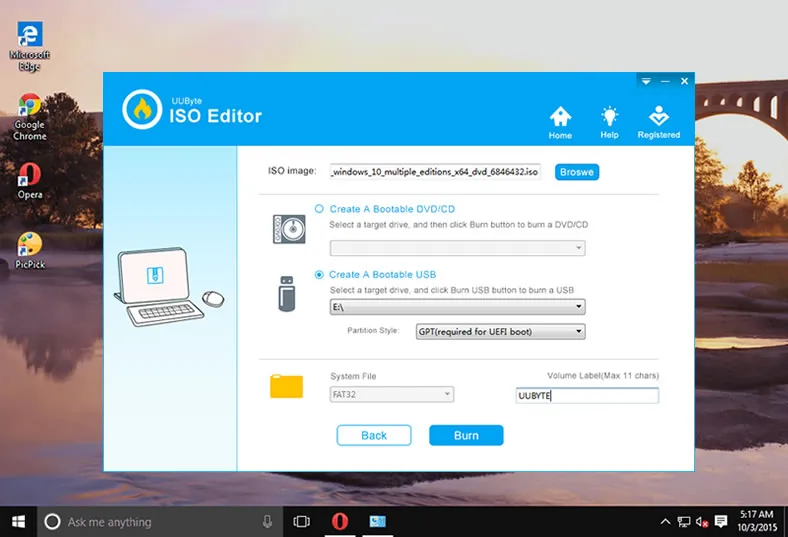
Step 3: You can now select USB as the burn option, and click on the button that says ‘Burn’. In a few moments, your bootable USB drive will be ready and you can remove it and use it for your purpose.
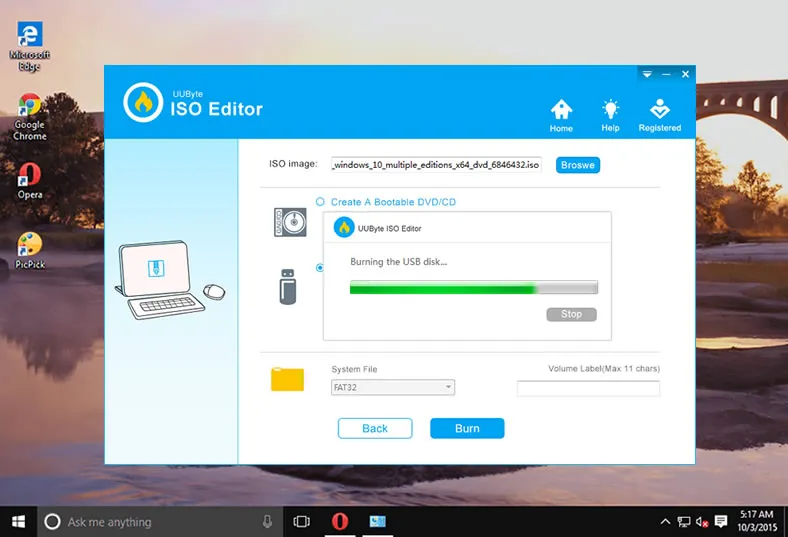
As you can see, there are no complicated steps to follow and no additional software required to create bootable media. The application is completely error free, so you can confidently use even a DVD or CD to create the required bootable media from your ISO file.
Part 3: Install Windows 10 from USB
To boot from USB and install Windows 10, follow the steps below. This works for most PCs, including modern hardware (with a few tweaks).
1. Plug the bootable USB into the computer where you want to install Windows 10.
2. Turn on or restart the computer.
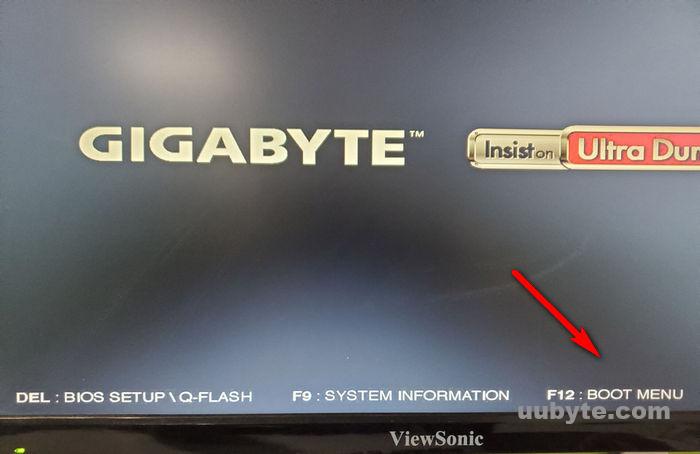
3. As soon as the PC starts, press the key to open Boot Menu. Usually, the key is F10, F12, Del or ESC. It depends on the motherboard brand.
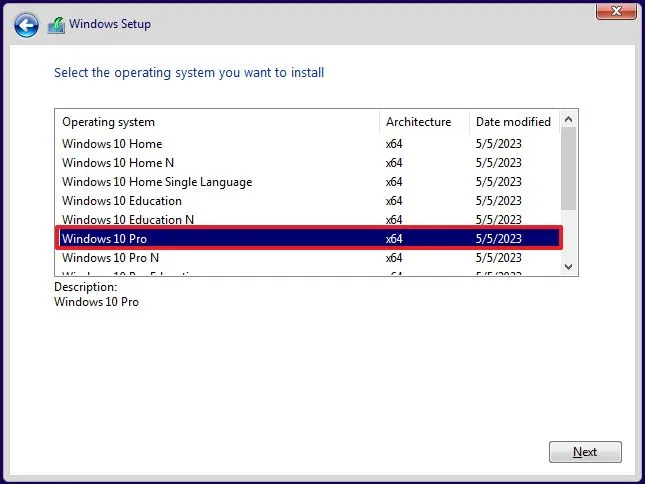
4. Use arrow keys to select your USB drive and hit Enter. Your PC will boot from the USB and load the Windows 10 setup screen. Follow the on-screen instructions to start the installation.
Conclusion
Creating a Windows 10 installation media from the ISO file is a smart move for any PC user. It gives you the flexibility to perform clean installs, repair systems, or upgrade PCs without relying on an internet connection. By following the steps outlined above, you can easily download the official 64-bit ISO and prepare a USB or DVD install drive that’s ready whenever you need it. Make sure to keep your product key handy, and you’re all set for a smooth installation experience.