User Guide for UUByte CaptureGo Screen Recorder
Learn how to record your screen with audio, capture a live stream or game, record computer audio, and record your screen together with a webcam.
UUByte CaptureGo is a Windows screen recorder designed for everyday recording tasks such as tutorials, presentations, live streams, gameplay, computer audio, and webcam videos. Its home screen provides separate recording modes so you can quickly choose what you want to capture without working through complicated settings.
This online guide covers the four most common recording features. Screen recording with audio is explained step by step, while the other recording modes use a shorter workflow because they can be started directly from the CaptureGo home screen.

Part 1: How to Record Screen with Audio
The Screen Recorder mode lets you capture the full desktop, a selected area, or a specific application window while recording system sound and, if needed, microphone narration. You can also adjust video quality, frame rate, mouse effects, recording shortcuts, and other options before starting.
Step 1: Open CaptureGo and Choose a Recording Mode
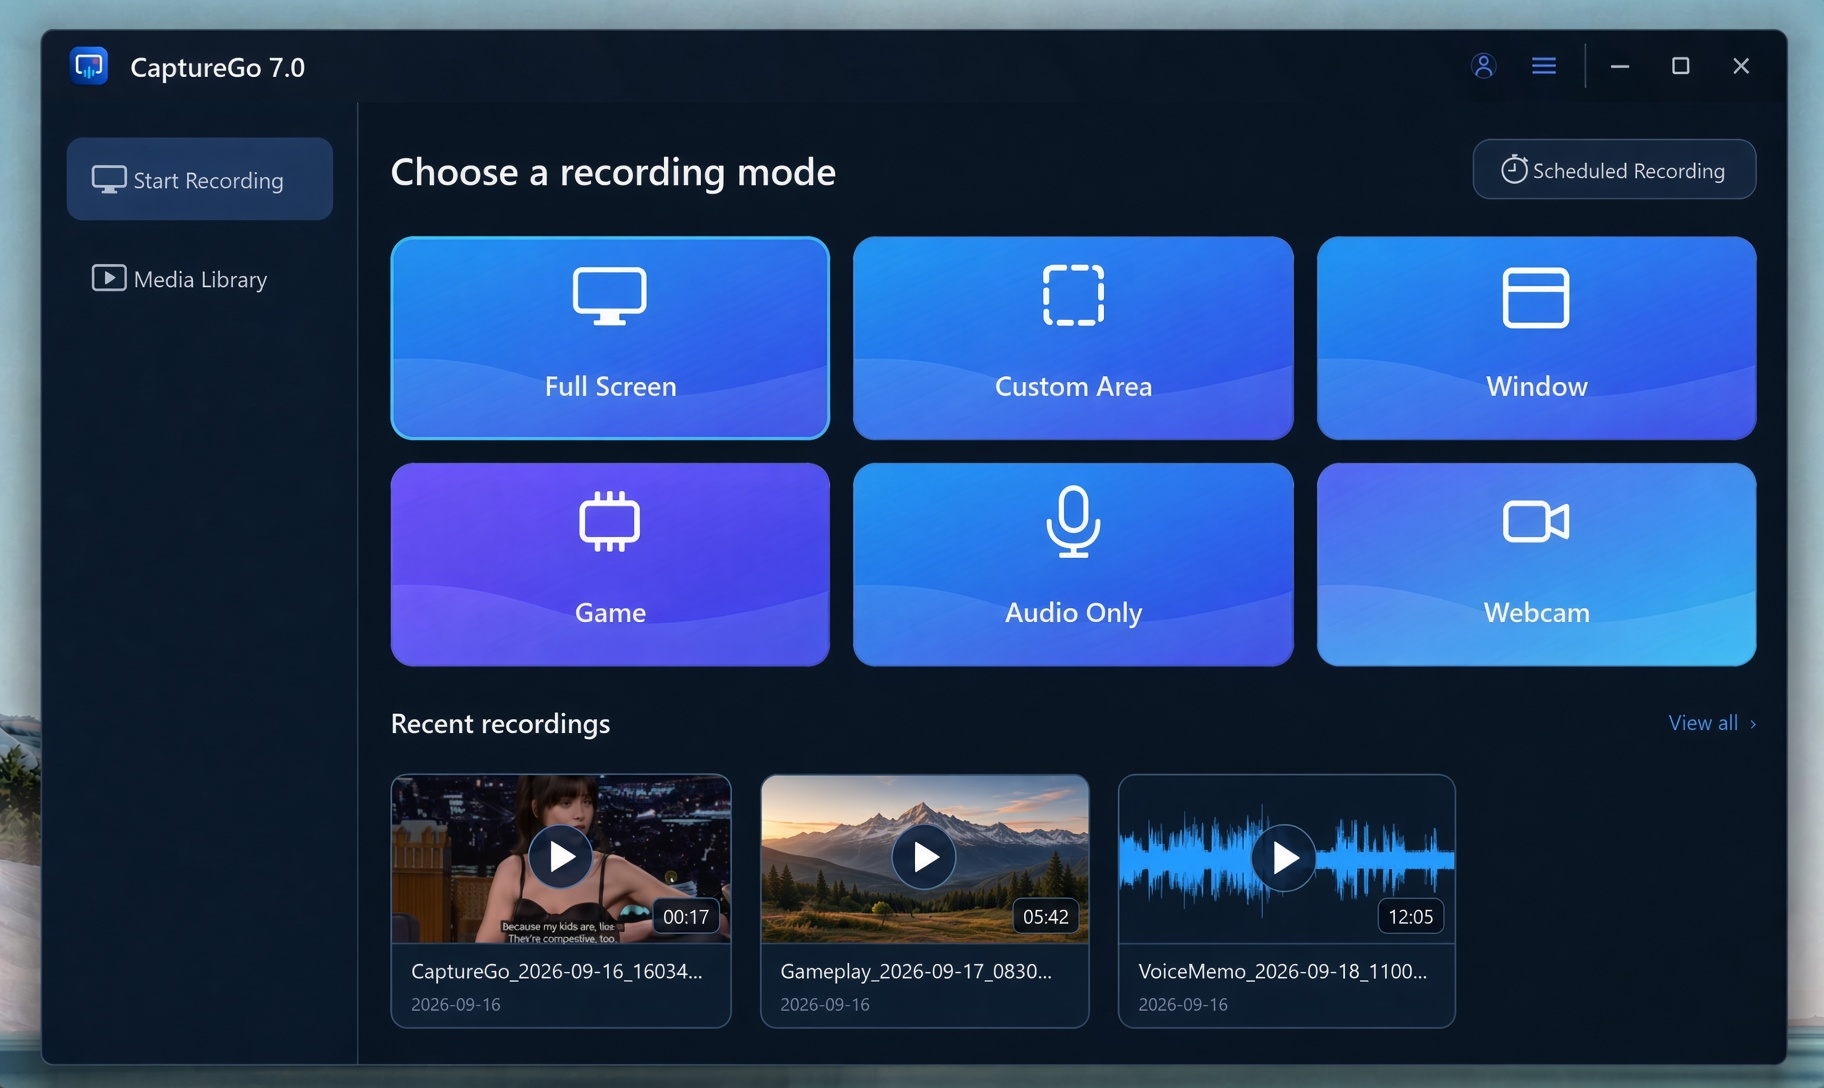
Launch UUByte CaptureGo on your PC. From the home screen, choose Full Screen to record the entire display, Custom Area to record only part of the screen, or Window to capture a specific application.
Step 2: Turn on System Audio and Microphone
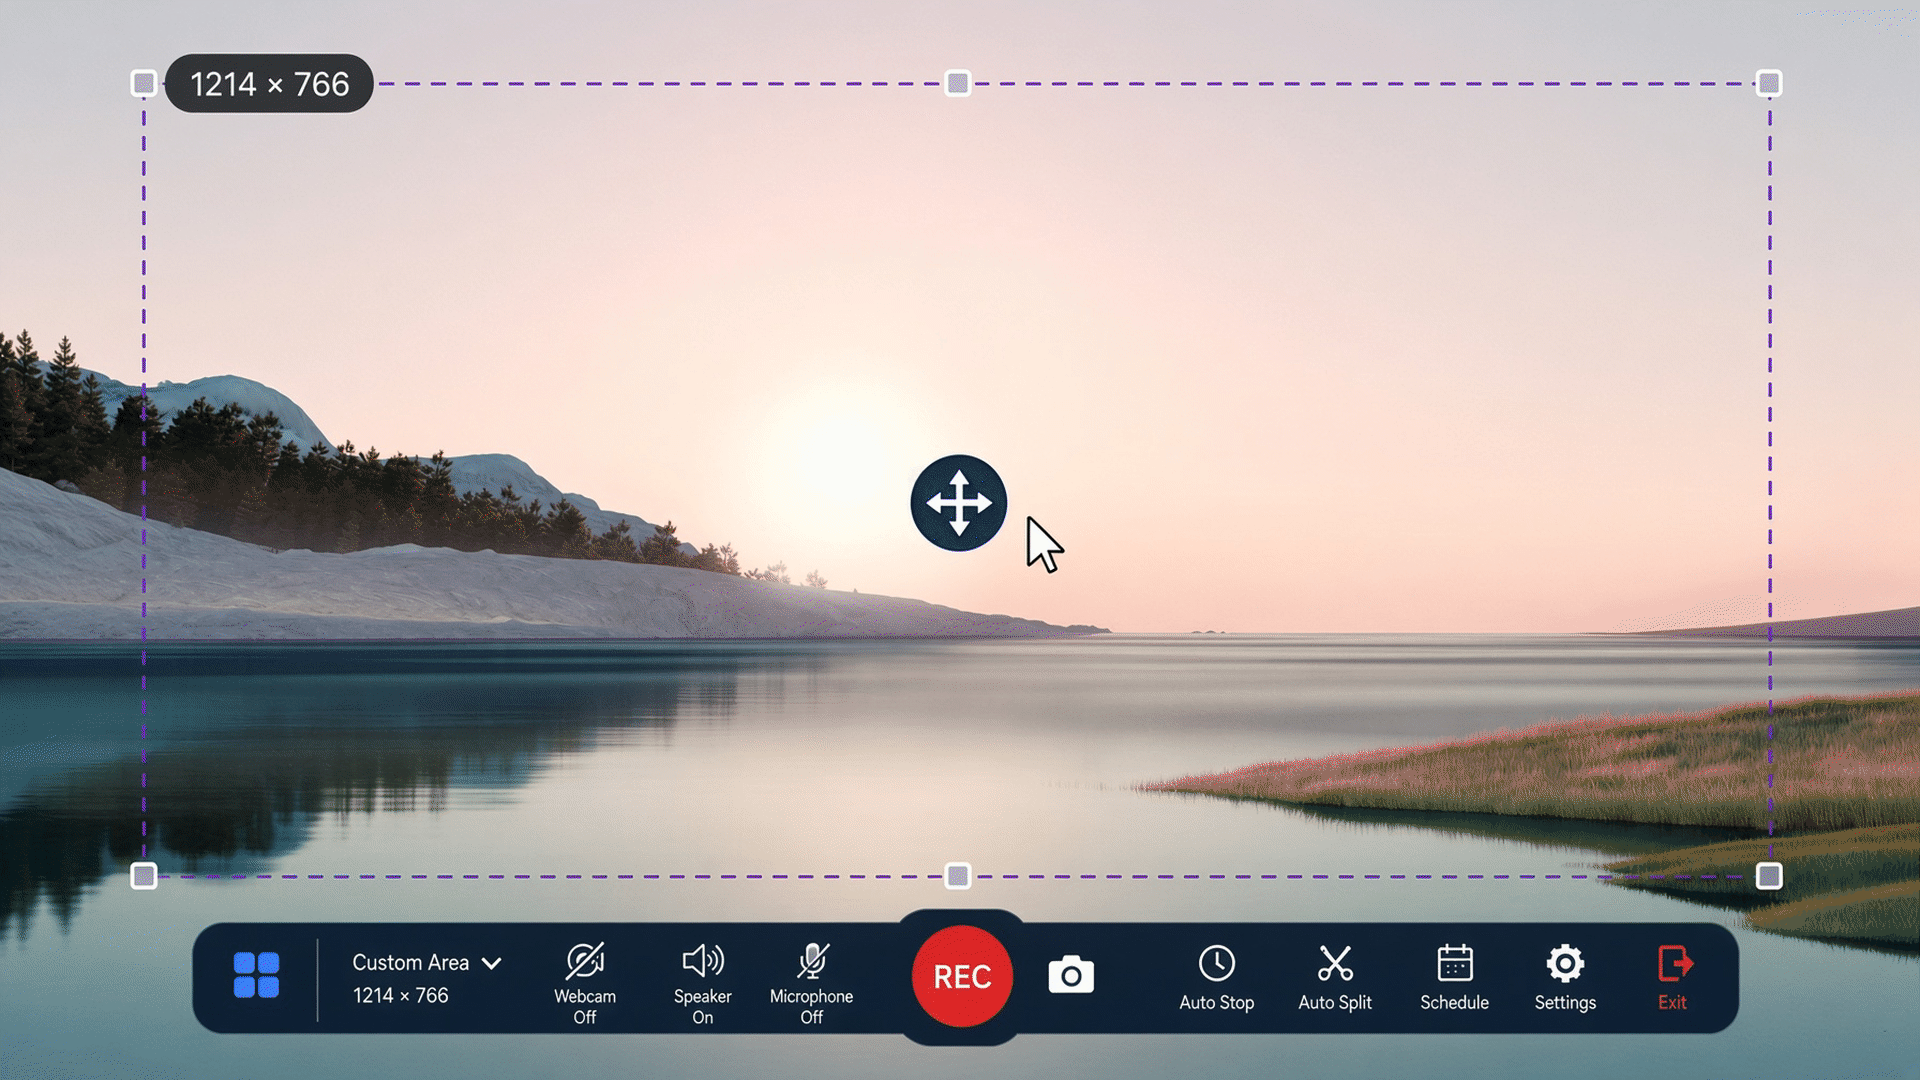
Before recording, make sure Speaker is turned on if you want to capture sound from Windows, a browser, a video player, or another application. Turn on Microphone when you also want your voice in the recording. If a webcam is not needed, leave the Webcam option off.
Step 3: Select the Screen Area You Want to Record
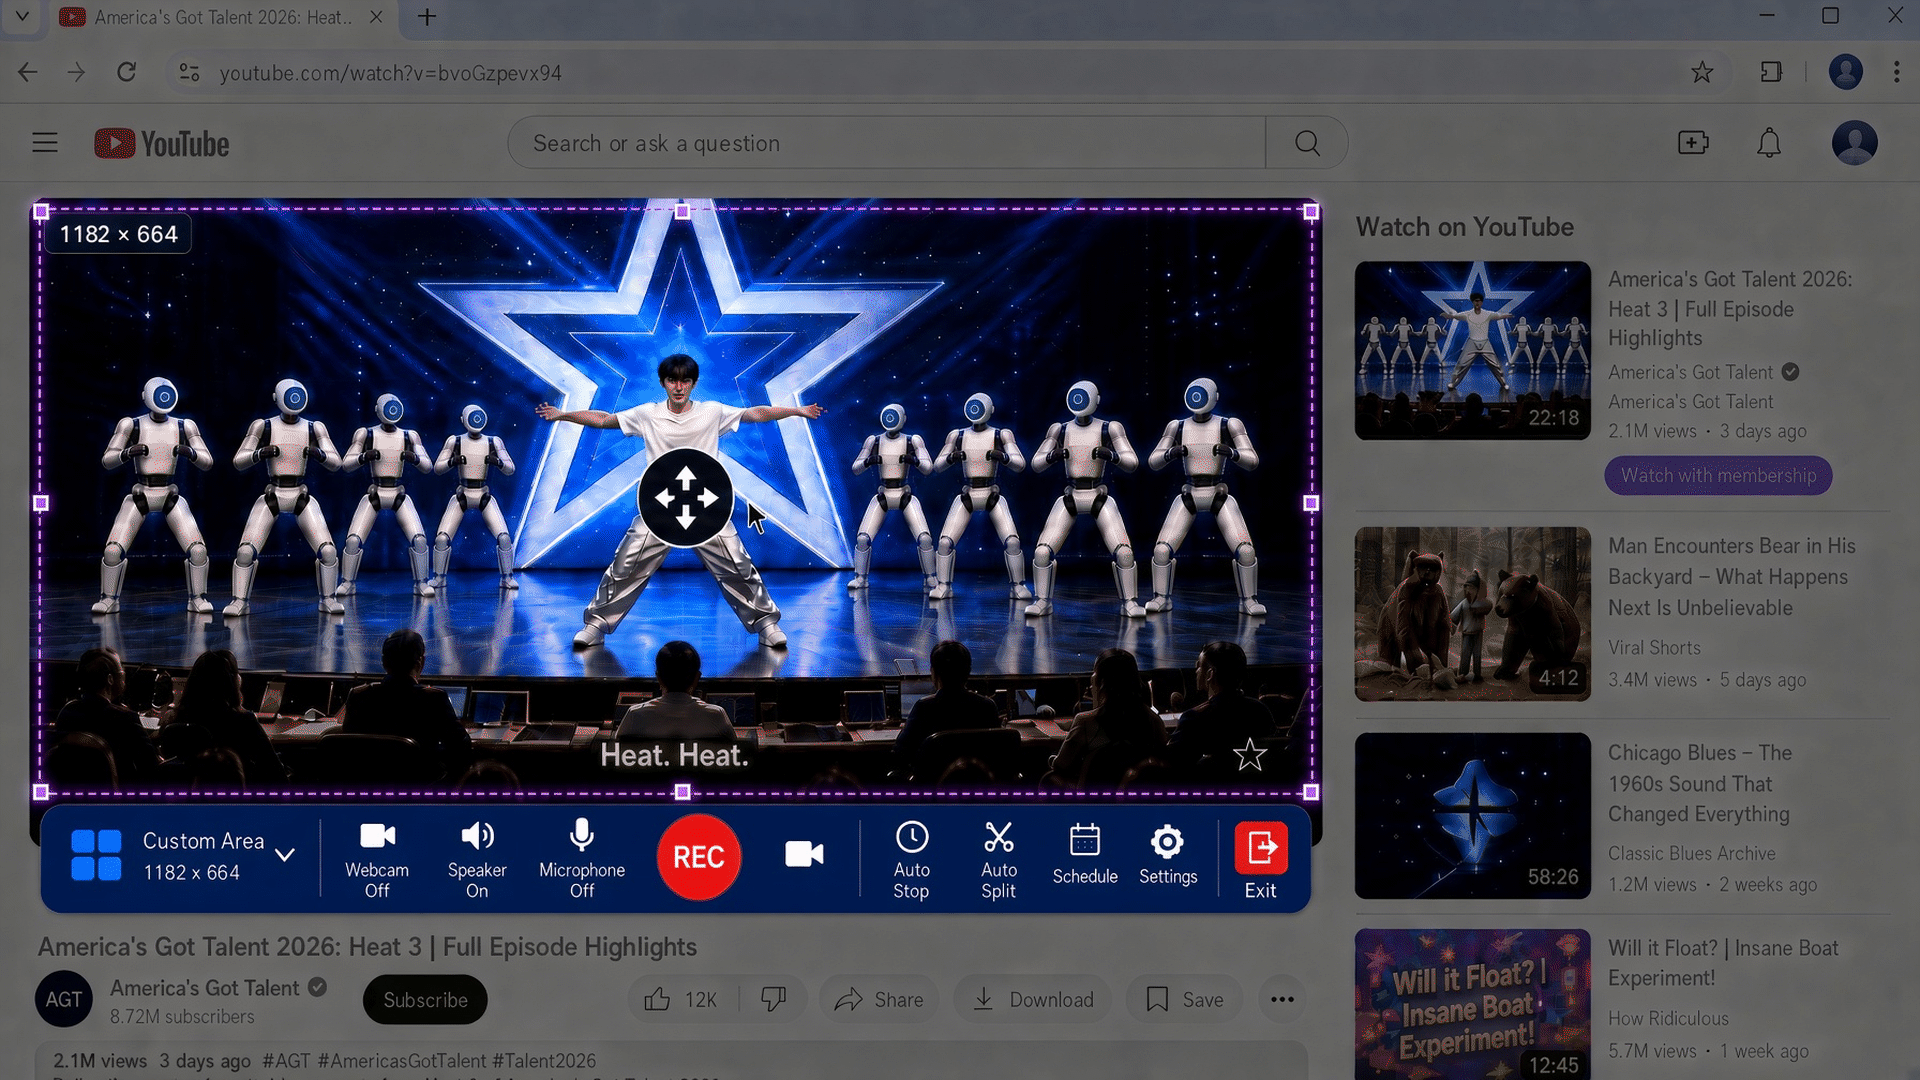
If you selected Custom Area, drag the recording frame around the content you want to capture. Resize the border until the browser window, video, application, or desktop area is fully inside the selected region.
Step 4: Start the Screen Recording
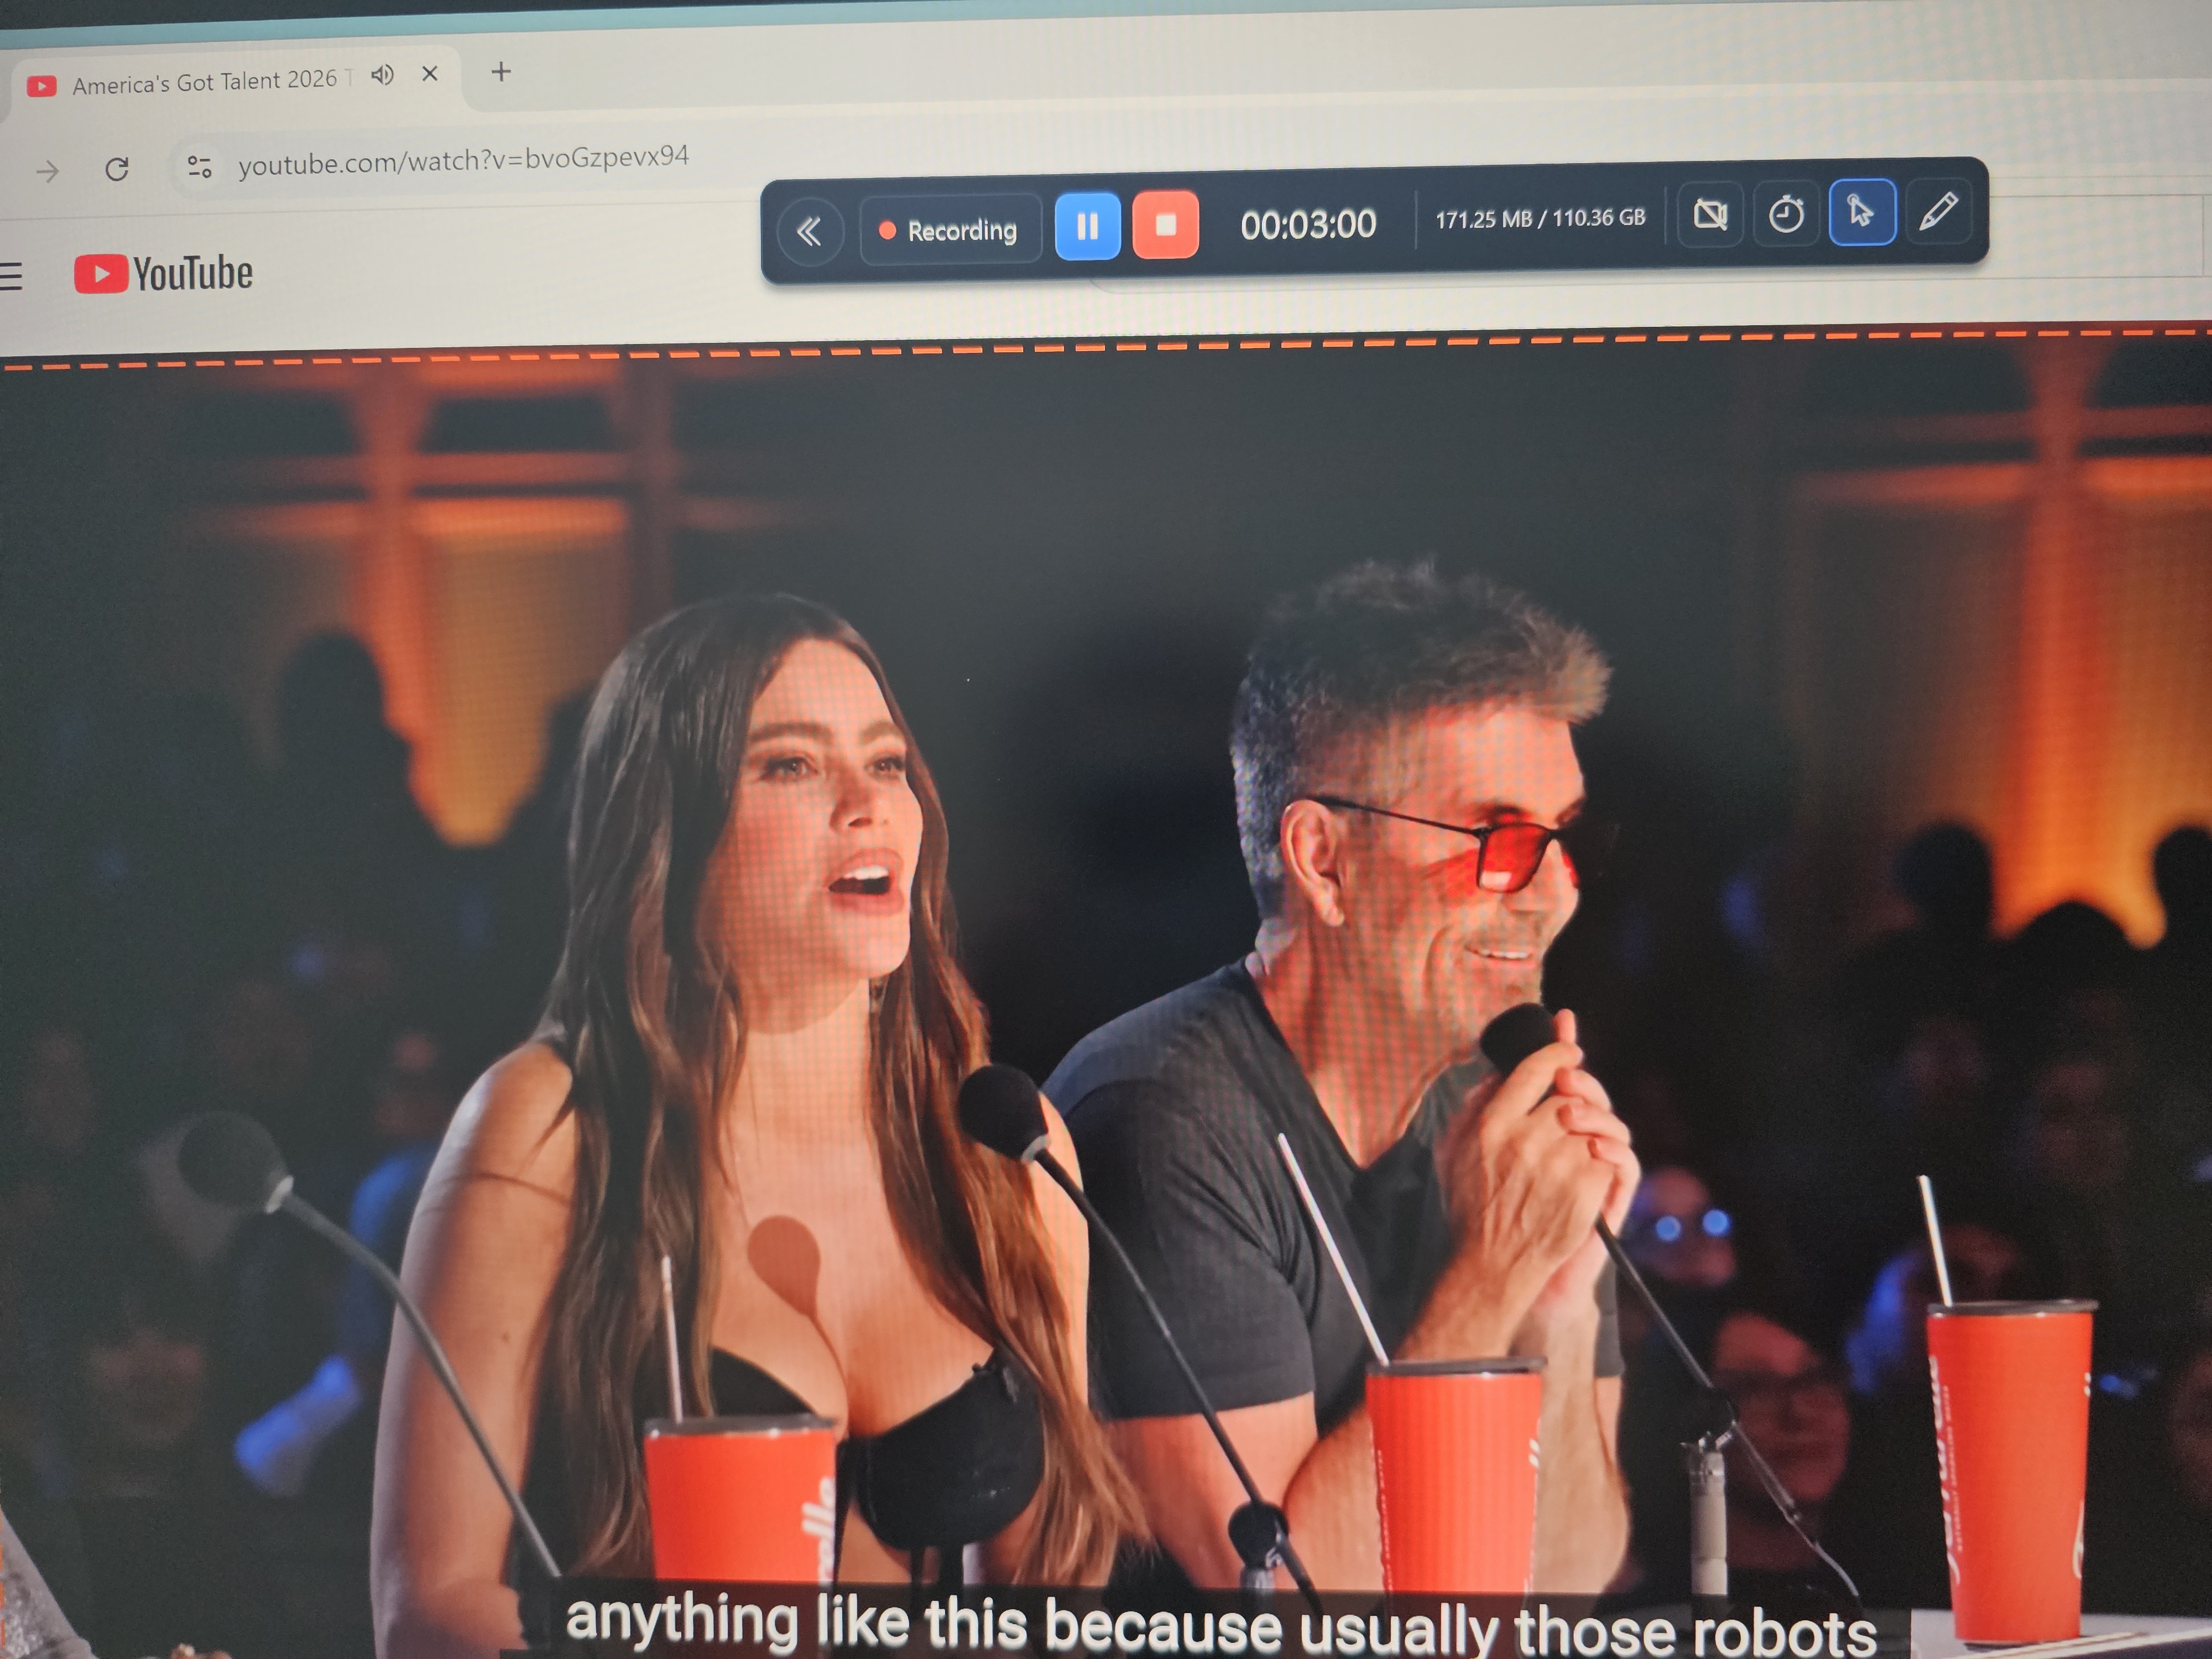
When the recording area and audio settings are ready, click the red REC button. CaptureGo will begin recording and display a compact control bar with the elapsed recording time. You can pause or resume the recording from this toolbar whenever needed.
Step 5: Stop and Save the Recording
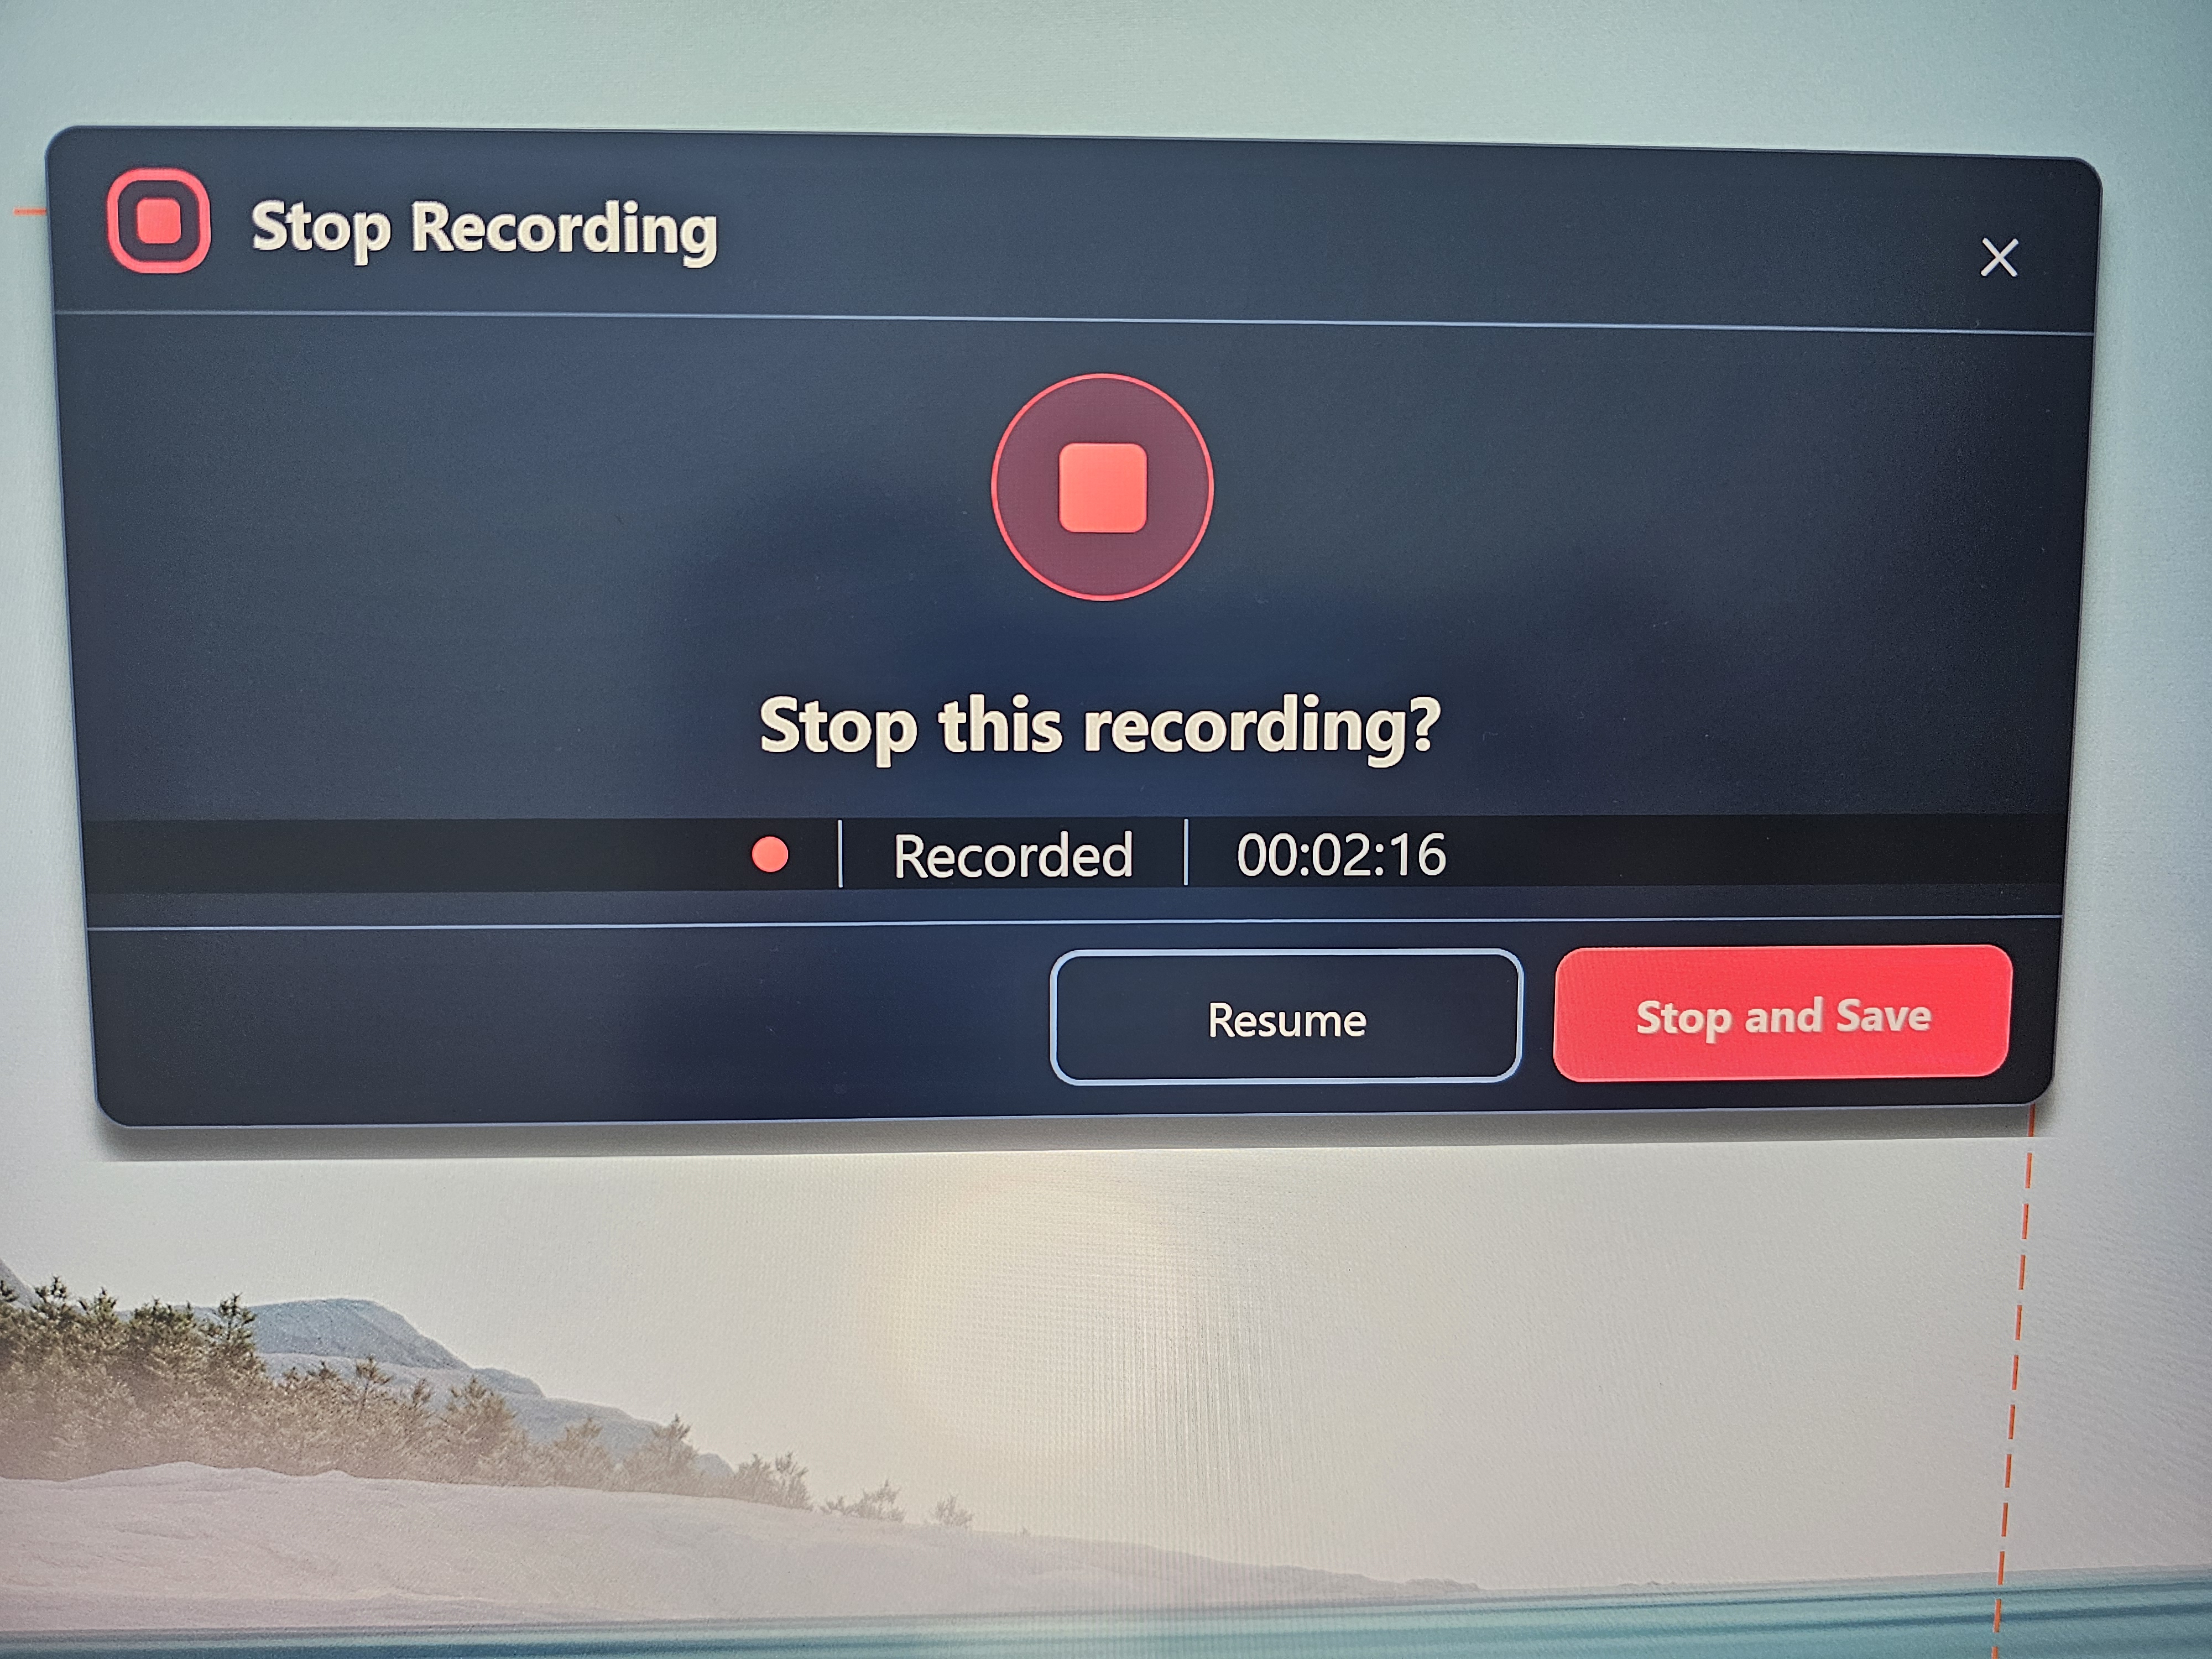
When the recording is finished, click the red Stop button. CaptureGo will show a confirmation window with the recorded duration. Click Stop and Save to finish the recording and save the video to your computer.
Step 6: Preview and Edit the Recorded Video
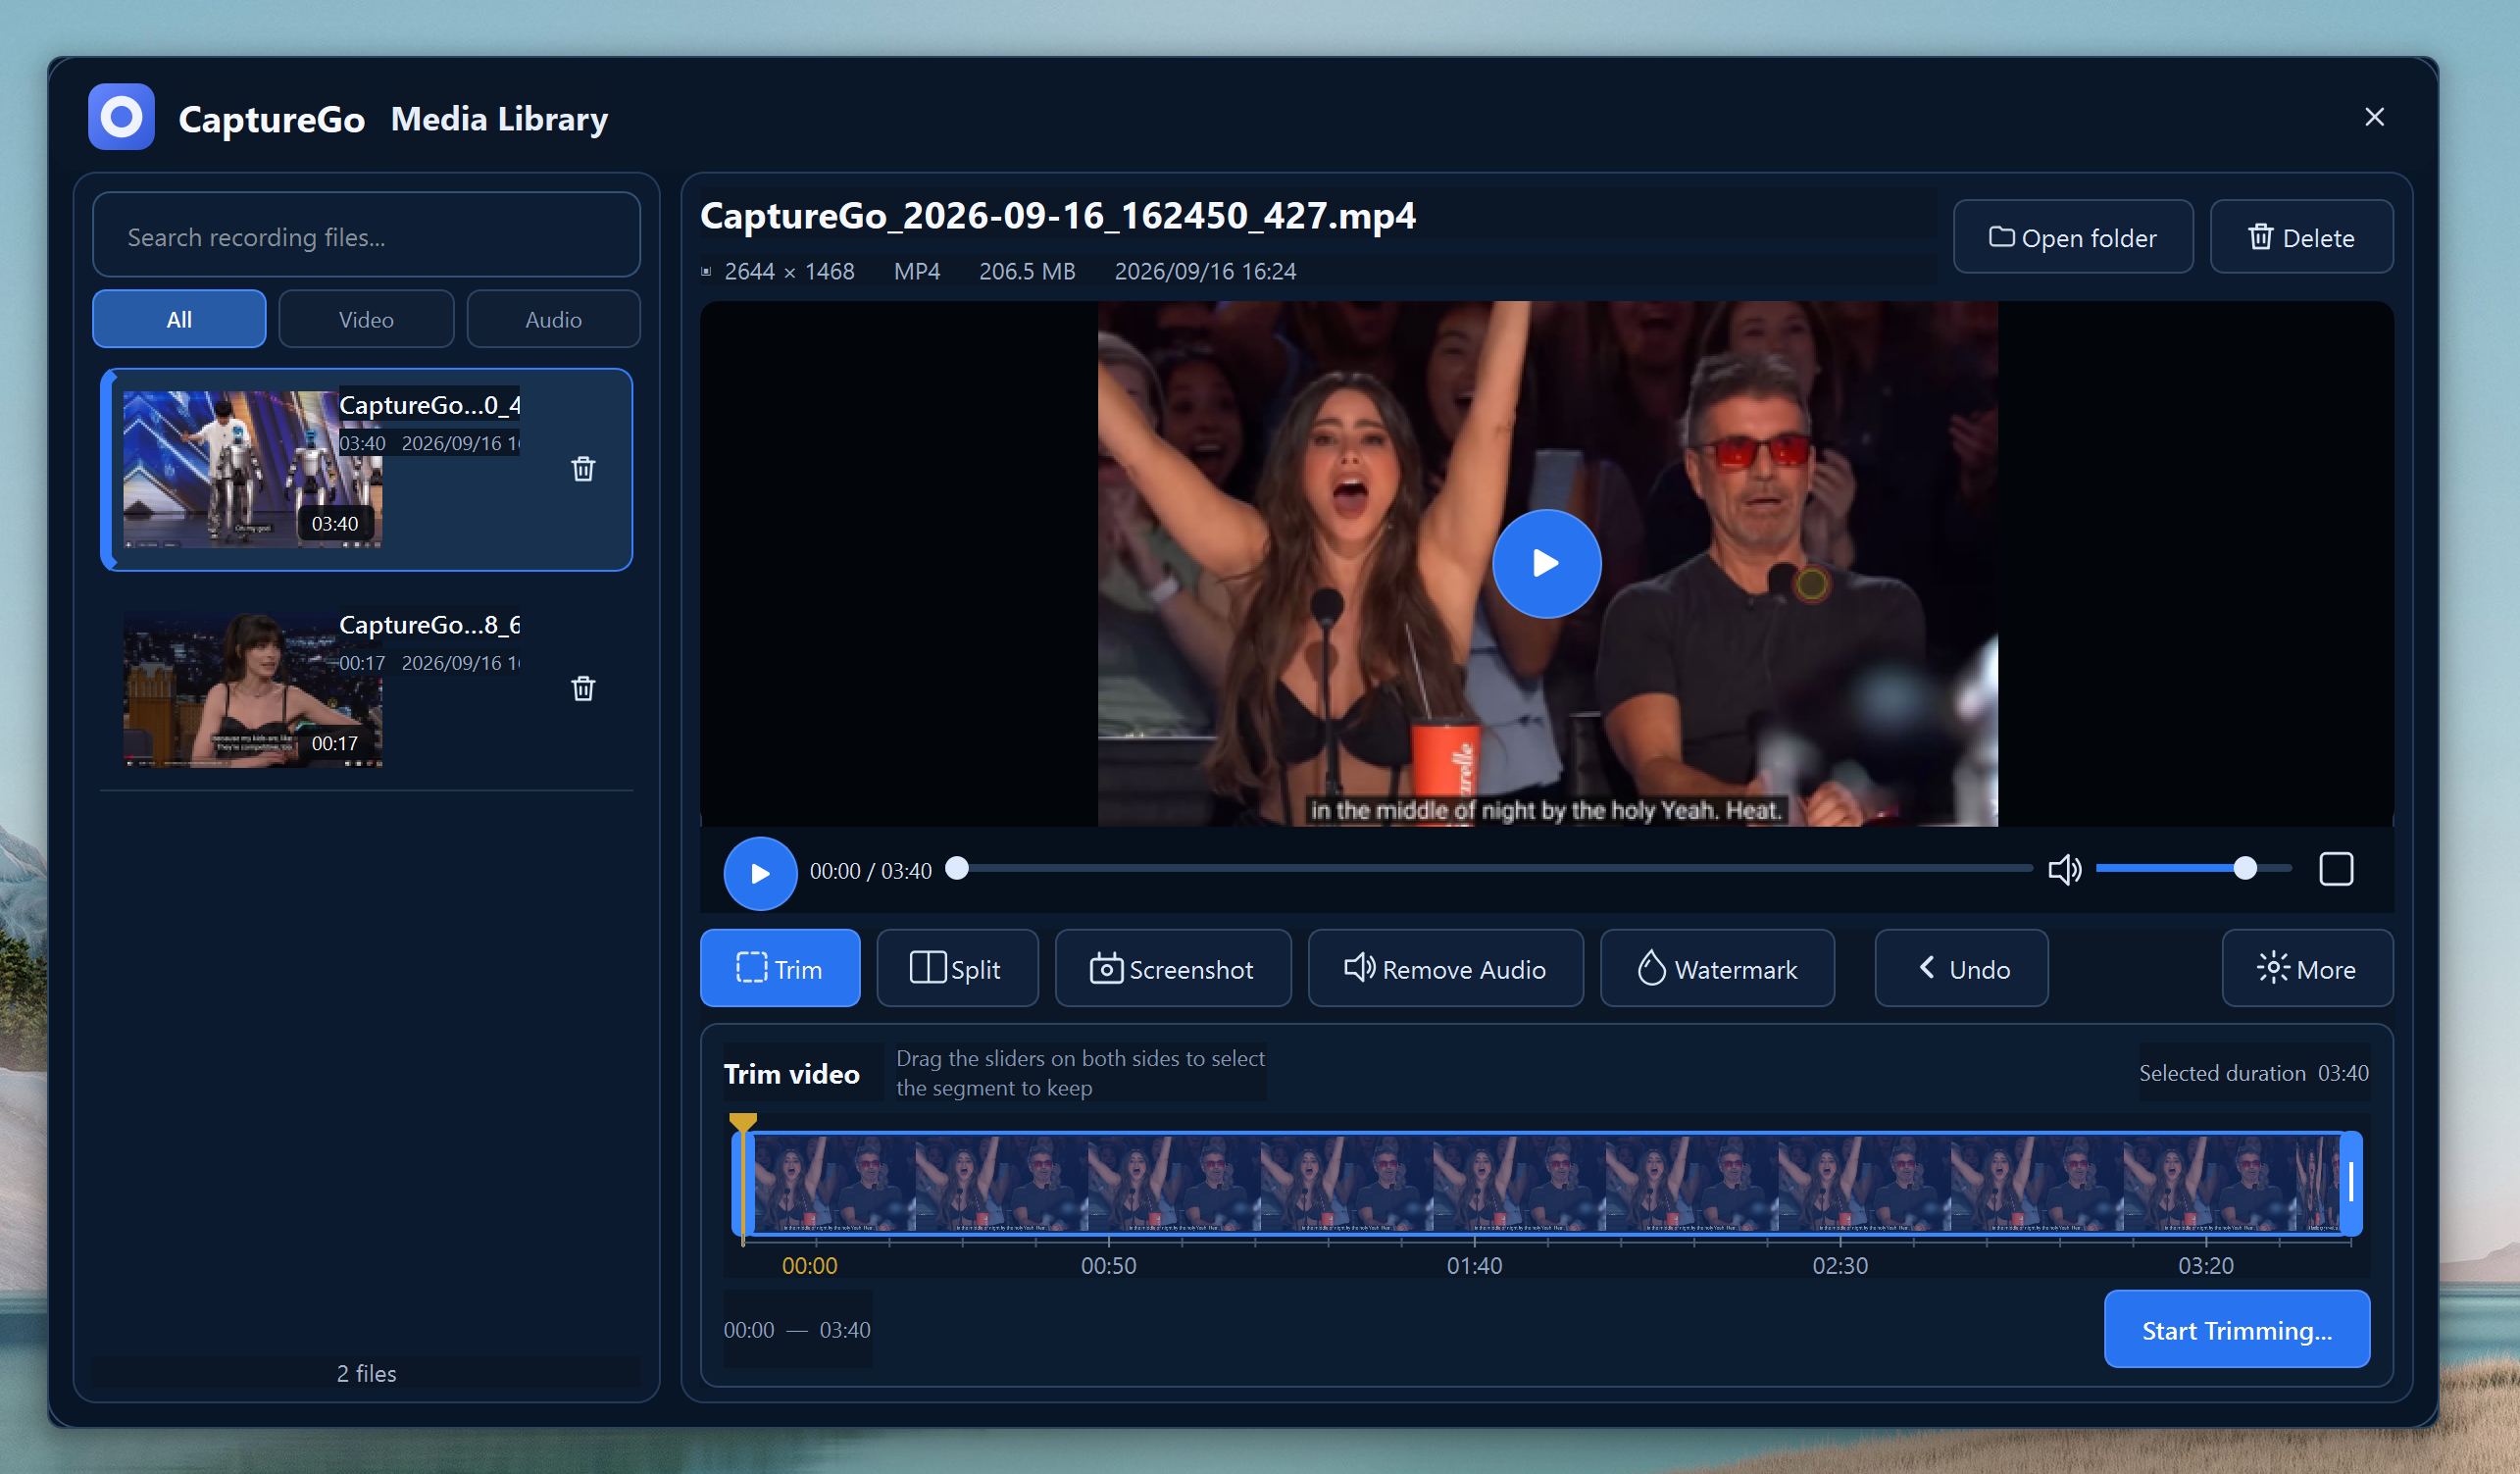
Open Media Library to preview your new recording. From here you can quickly trim unwanted sections, split the video, take a screenshot, remove audio, add a watermark, or undo recent changes. Click Open folder when you want to access the saved video in File Explorer.
Part 2: How to Record a Live Stream or Game
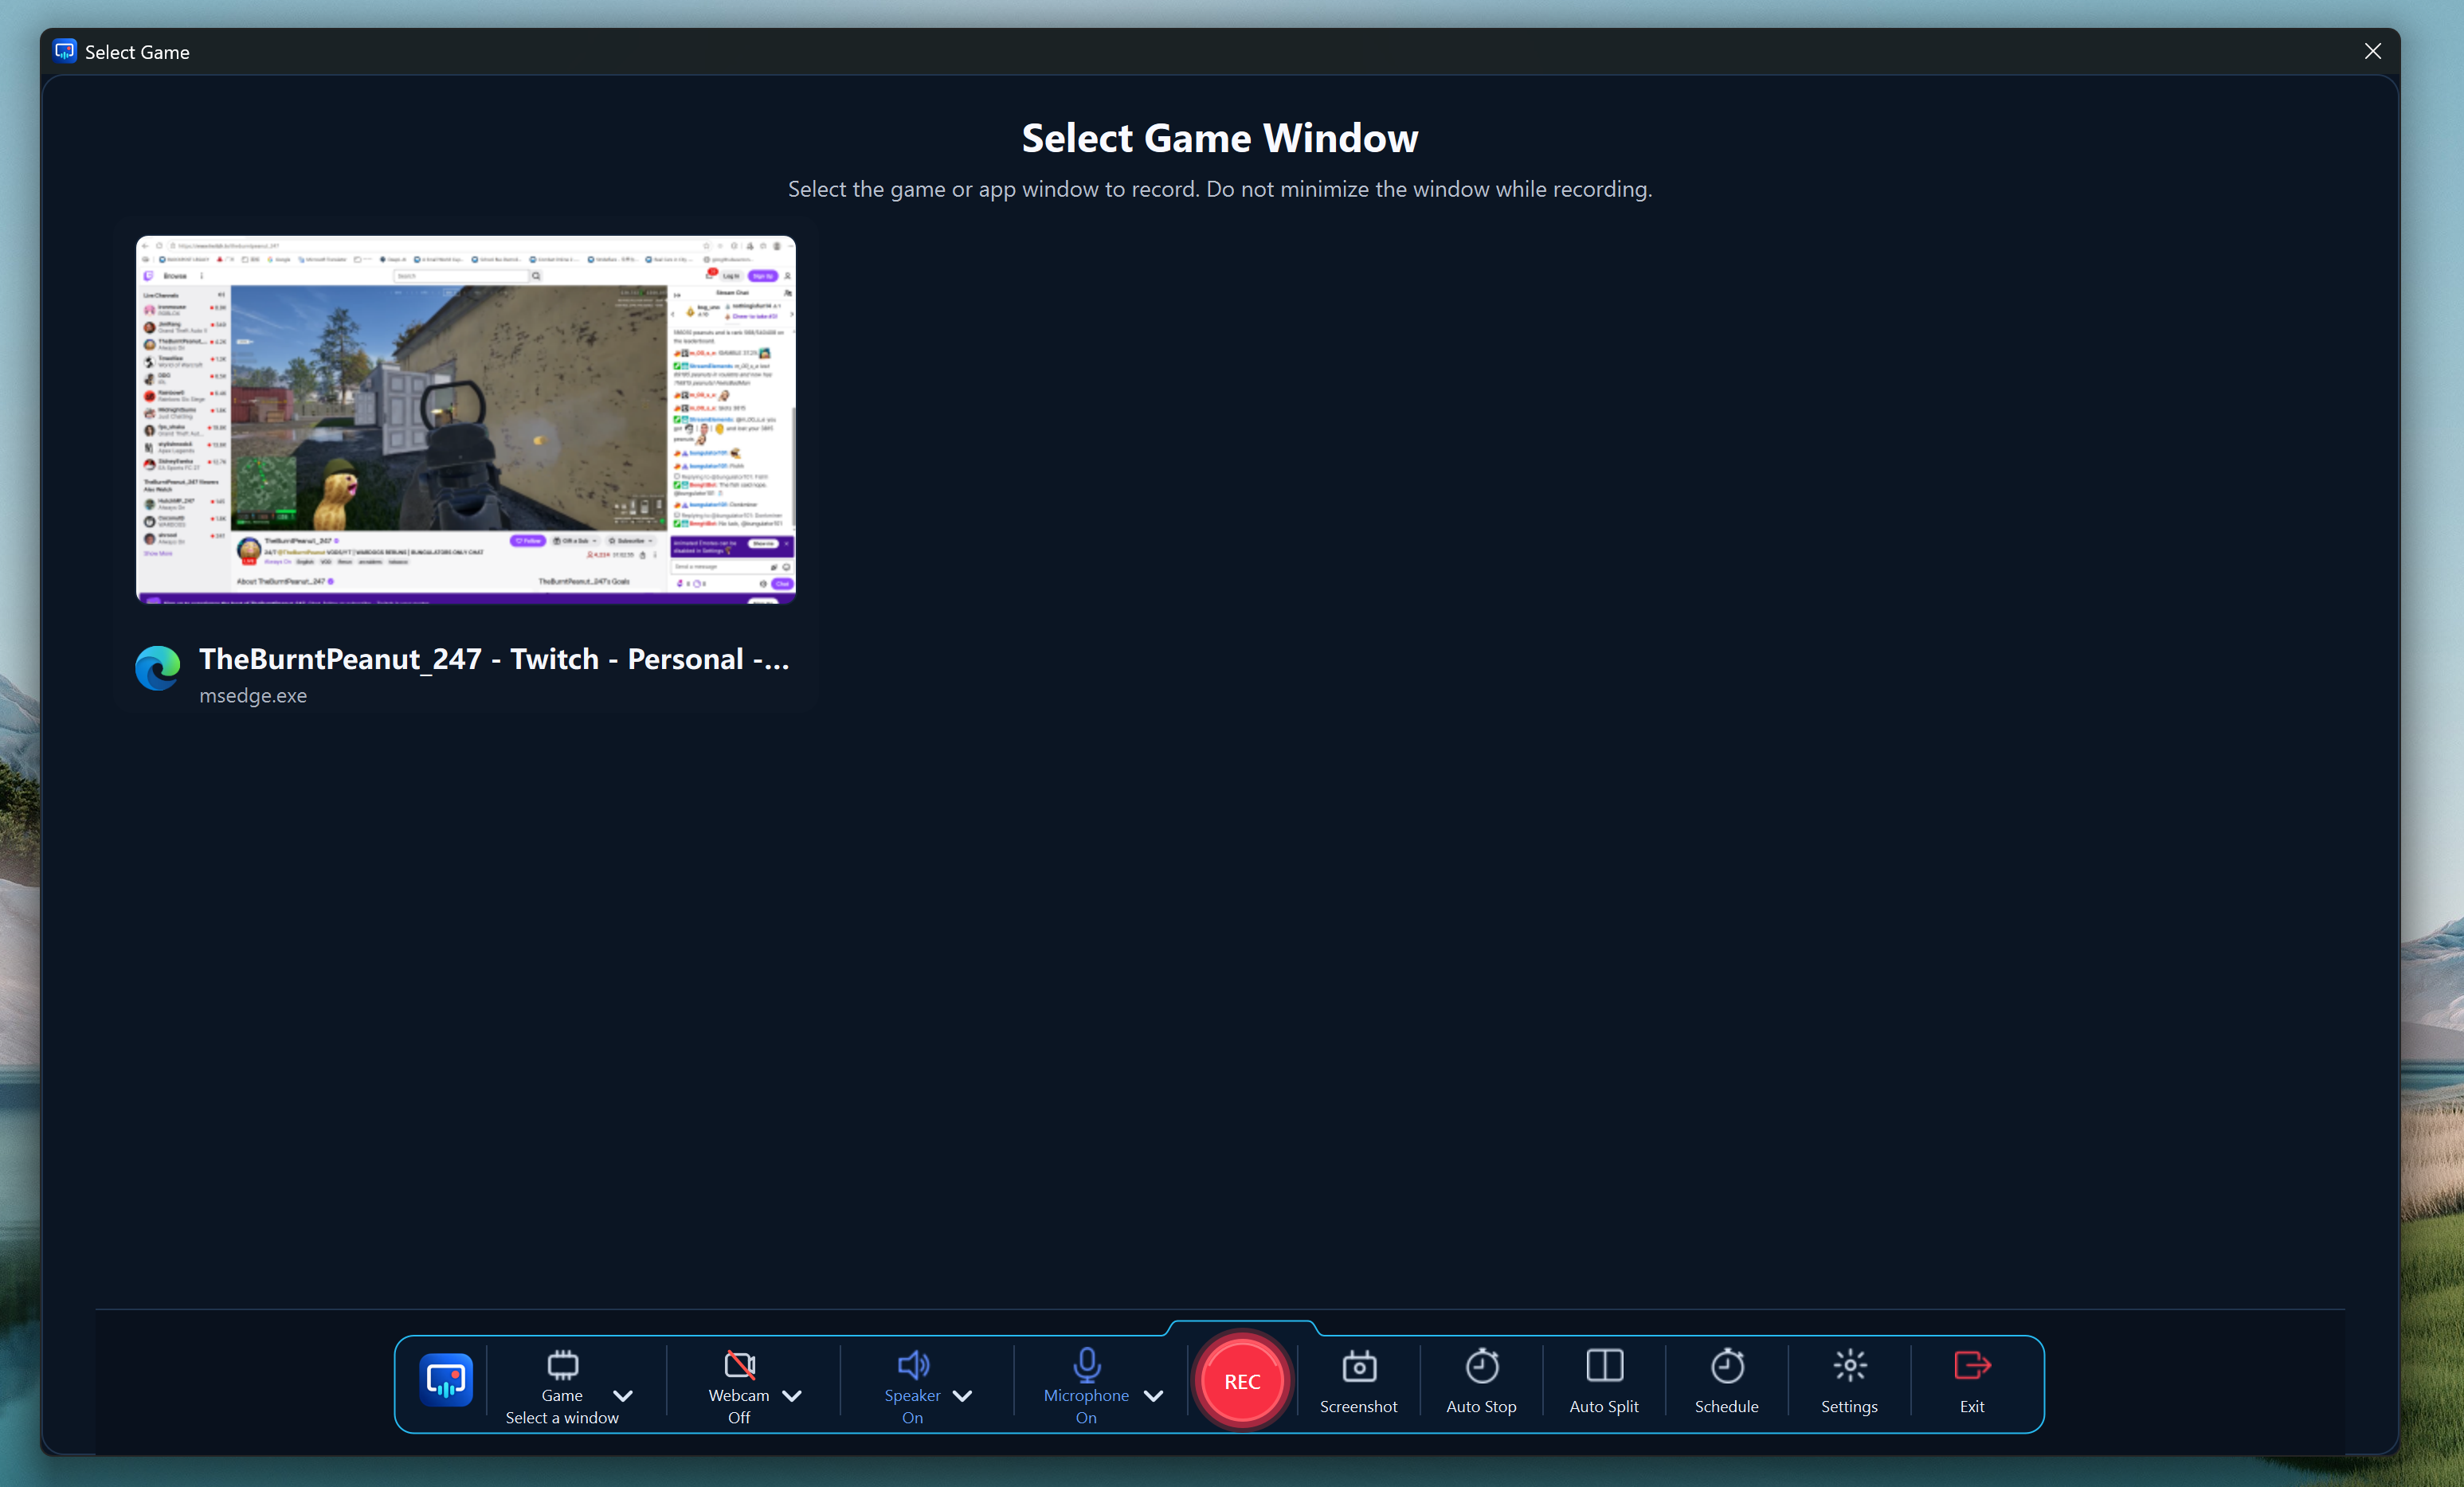
Open CaptureGo and choose Game when you want to capture gameplay, or use Full Screen, Custom Area, or Window when the live stream is playing in a browser or desktop app. Turn on Speaker to capture the stream or game audio, enable Microphone if you want commentary, select the game or stream area, and then click REC. When the session is finished, stop the recording and save it to Media Library for preview or editing.
Part 3: How to Record Audio on My Computer
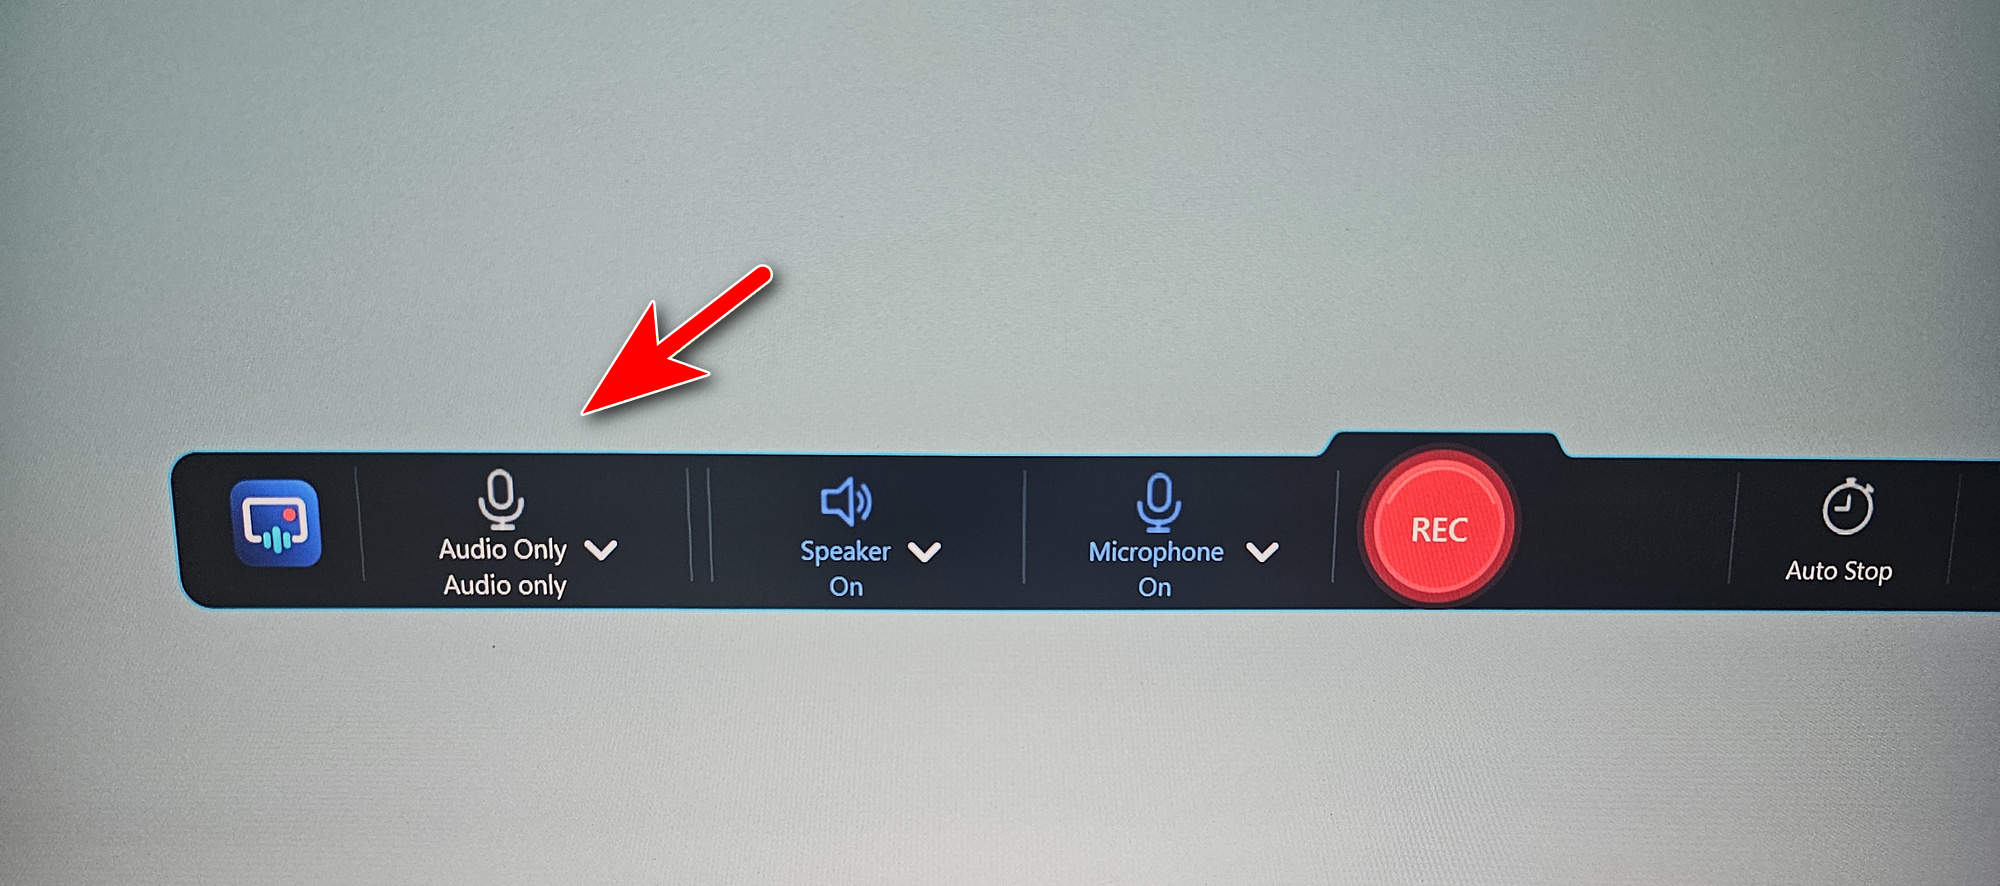
From the CaptureGo home screen, click Audio Only when you do not need any video. Enable Speaker to record the sound coming from your PC, enable Microphone if you also want to record your voice, and use the Test controls to make sure the correct devices are selected. Click the record button to begin, then stop the recording when finished. The audio file will be available from Media Library so you can review or manage it without recording unnecessary screen video.
Part 4: How to Record Screen with Camera
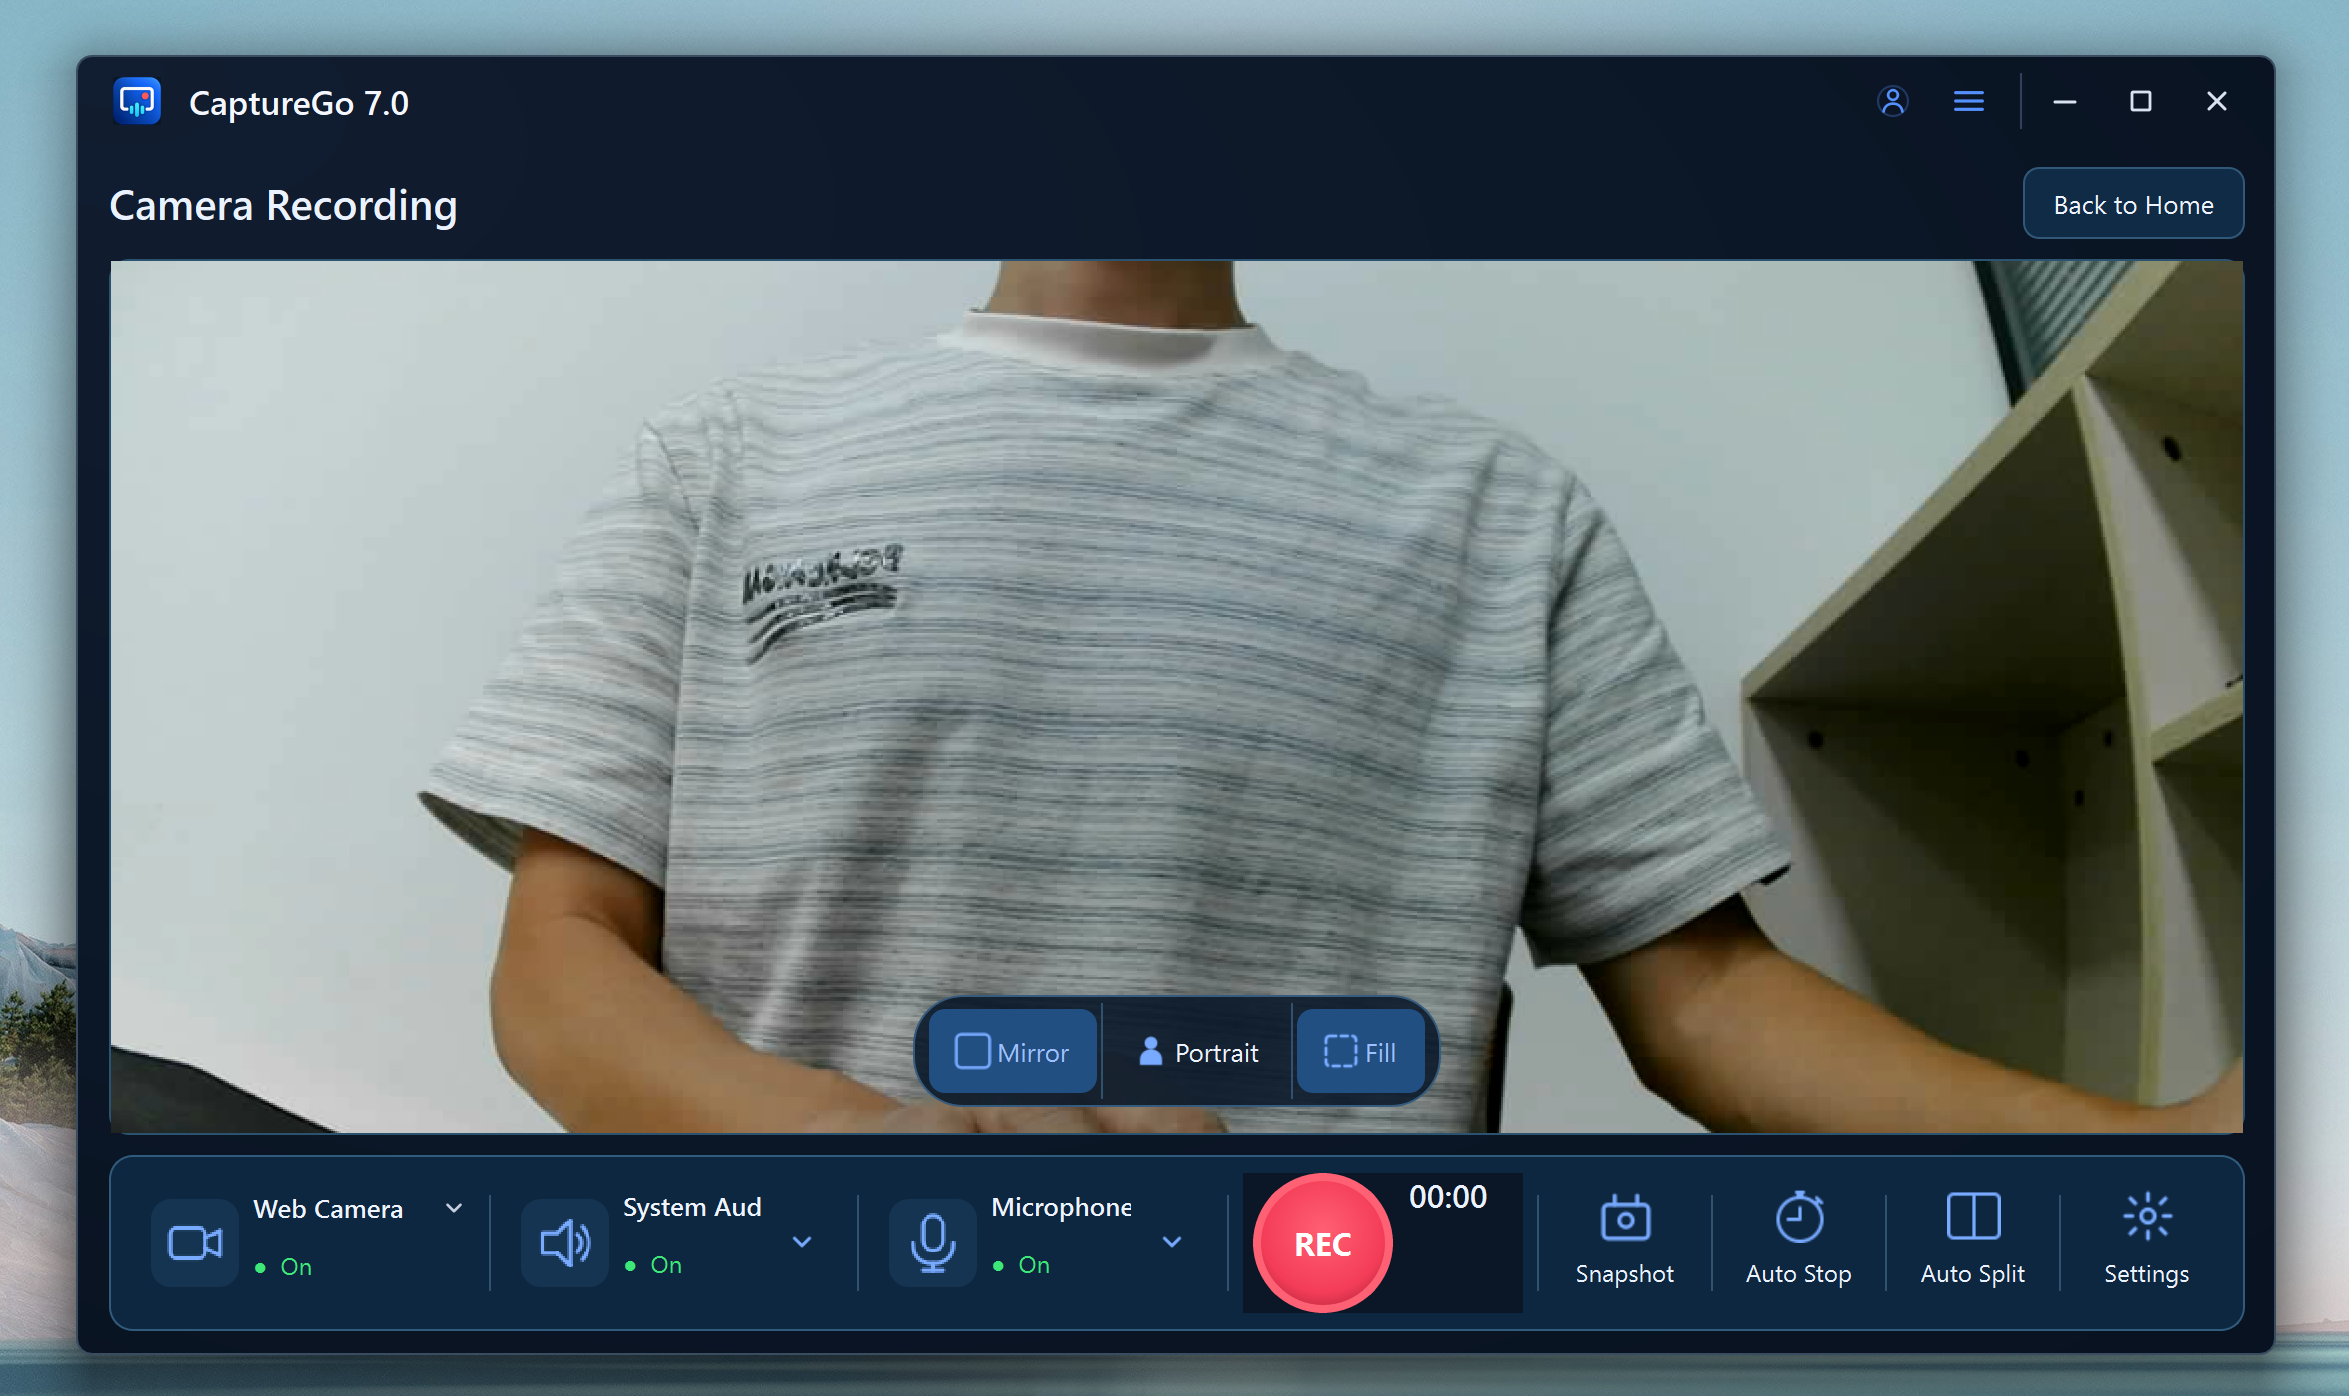
To record your screen and webcam together, first choose Full Screen, Custom Area, or Window, and then turn Webcam on from the recording controls. Select the camera you want to use and keep Speaker or Microphone enabled according to the audio you need. Position the webcam overlay so it does not cover important screen content, then click REC. This mode is useful for tutorials, presentations, online lessons, reaction videos, and other recordings where viewers need to see both the computer screen and the presenter.
Summary
UUByte CaptureGo combines screen, game, audio, and webcam recording in one Windows application. For most screen recording tasks, select the required capture area first, choose the audio and camera sources you need, and then click REC. The finished recordings are stored in Media Library, where you can preview the files and make quick edits before sharing or saving the final result.